Introduction
In the previous article, We went through the process of building a machine-learning model for sentiment analysis that was encapsulated in a Flask application. This Flask application uses sentiment analysis to categorize tweets as positive or negative. Ready for implementation, the complete project is version-controlled on GitHub. Moving further, we will now walk over how to use Gunicorn and Nginx to deploy this Flask application on a cloud server, ensuring the machine learning model is scalable and accessible in a production environment.
You can follow the previous article on How to Deploy a Machine Learning Model using Flask?
Picking up where we left off, we will use Gunicorn and NGINX to deploy this Flask application onto a cloud server. This post will explain moving a Flask application originally hosted locally for machine learning deployment to the cloud.
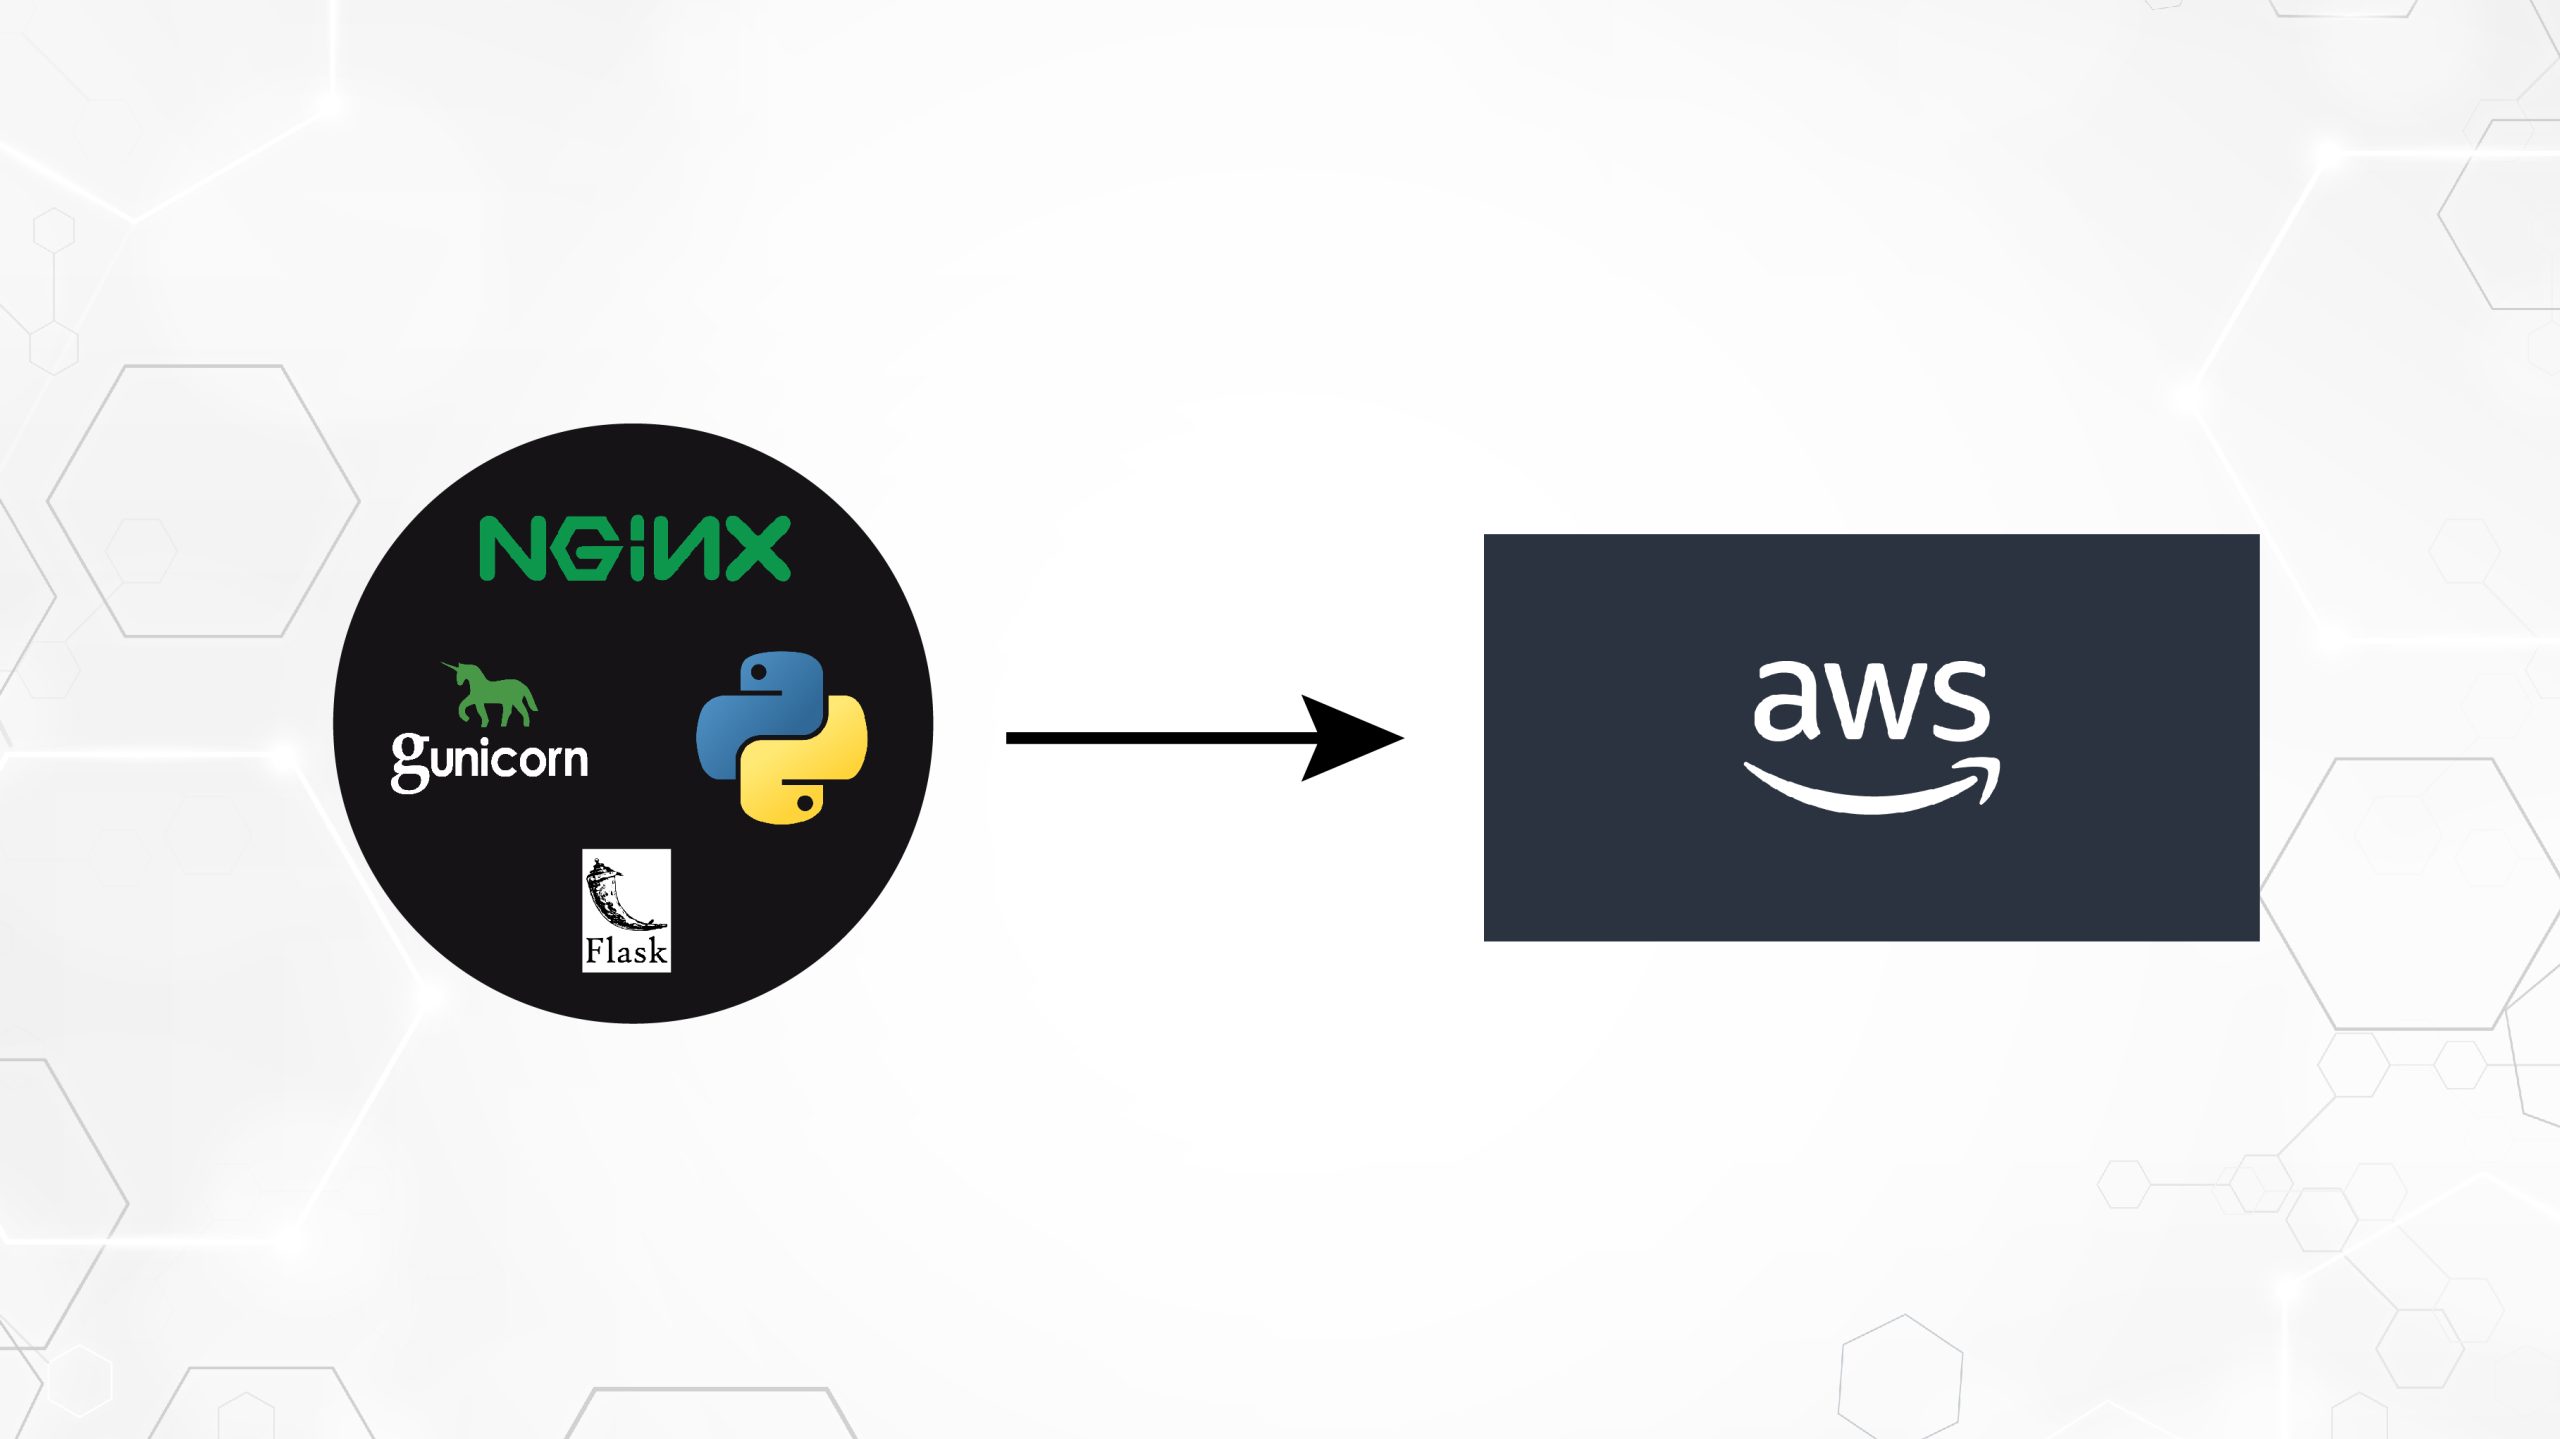
Table of contents
Steps Include
- Set up an AWS EC2 Instance: Launch an AWS EC2 instance with Ubuntu as the operating system. Configure security groups to allow inbound traffic.
- SSH into the EC2 Instance: Use SSH to connect to your EC2 instance from your local macWeis. We require an SSH key pair (public and private )to connect with your local system.
- Deploy Flask Application: Transfer the Flask application files to the EC2 instance. If the model is already on Git Hub, clone it into the EC2 Ubuntu instance. Then, Set up a virtual environment and install the required Python packages or the requirements file in the directory using pip. Test whether the Flask application runs correctly in the EC2 environment.
- Install Dependencies: Update the package lists for upgrades and install necessary dependencies, such as Python, pip, and any other libraries required by your Flask application.
- Install and Configure Gunicorn: Install Gunicorn, a WSGI HTTP server for Python applications. Create a Gunicorn service file to manage the application process. Start and enable the Gunicorn service to run in the background.
- Install and Configure NGINX: Install NGINX, a high-performance web server, and reverse proxy. Configure NGINX to forward incoming HTTP requests to the Gunicorn server. Set up server blocks (virtual hosts) for your Flask application.
- Configure Domain Name (Optional): If you have a domain name, configure DNS settings to point to your EC2 instance’s public IP address. If not, you can access your Flask application directly from the public IP address.
- Secure the Application: Enable HTTPS for secure communication between clients and the server. Obtain an SSL/TLS certificate (e.g., Let’s Encrypt) and configure NGINX to use it.
- Test the Deployment: Once everything is set up, test your deployed Flask application by accessing it through a web browser or sending requests using cURL or Postman.
Following these steps, we’ll successfully deploy your Flask application for machine learning on an AWS EC2 instance, utilizing Gunicorn as the WSGI server and NGINX as a reverse proxy server to handle incoming requests efficiently and securely.
Before Getting into the hands-on, Let’s understand how it is done.
Understanding the Communication: Flask, Gunicorn, and Nginx
             +-----------------------------+
             |           Client            |
             +-----------------------------+
                          |
                          |
             +------------v-------------+
             |        NGINX (Port 80)   |
             +------------+-------------+
                          |
                          |
             +------------v-------------+
             |       Gunicorn           |
             |     (WSGI Server)        |
             +------------+-------------+
                          |
                          |
             +------------v-------------+
             |   Flask Application      |
             |       (Python)           |
             +--------------------------+
Flask: The Centre of the Application
Flask is a lightweight and flexible Python web framework that provides the tools to build web applications/services. It is the foundation of your sentiment analysis service, handling incoming web requests, processing them using your machine learning model, and returning the analysis results. Flask operates as the application layer in our stack.
We already created the Flask application in the previous article. And clone it using the command.
https://github.com/Geek-shikha/Flask_model_sentiment_analysis.gitFlask alone can not handle multiple requests at a time; that is when Gunicorn comes into play.
Gunicorn: The Python WSGI HTTP Server
Gunicorn acts as an intermediary layer that interfaces with Flask. It’s a Python WSGI HTTP server designed for UNIX systems, offering a simple yet efficient way to deploy Python web applications. When you run your Flask app with Gunicorn, it creates a WSGI server that communicates with the Flask application. Gunicorn manages multiple worker processes to handle incoming requests, distribute the load, and increase the ability to handle concurrent users. No. The number of workers and threads depends on the number of cores of the system, 2*Cores +1.
Until you have multithreading, there is no separate memory space. A single worker can handle Multiple Requests from the clients in parallel.
Why is Gunicorn Required?
For various reasons, Gunicorn, or Green Unicorn, is a crucial component in hosting Flask applications. Firstly, Flask’s built-in development server cannot handle multiple requests simultaneously, making it unsuitable for production environments. Its pre-fork worker model enables scalability by running numerous worker processes or threads, accommodating increased traffic effectively. G unicorn’s load balancing distributes requests evenly, enhancing performance under heavy loads. Compliant with the WSGI specification, Gunicorn seamlessly integrates with Flask and other WSGI-compliant frameworks, simplifying deployment. Gunicorn provides essential features such as concurrency, scalability, performance, and compatibility, making it indispensable for deploying Flask applications in production.
Nginx: The Frontline Reverse Proxy
Nginx is a powerful, high-performance web server known for its stability, simple configuration, and low resource consumption. In our deployment, Nginx is configured as a reverse proxy, sitting in front of Gunicorn. It receives client requests and forwards them to Gunicorn, which, in turn, communicates with the Flask application. Nginx is also responsible for serving static files, handling SSL/TLS encryption, and potentially load balancing if your application scales to multiple servers.
Why Nginx?
Apart from providing Moreover, NGINX excels in handling multiple models or applications concurrently, thanks to its robust load balancing capabilities and buffering mechanisms. While Gunicorn may struggle with the speed of processing multiple requests, NGINX can efficiently handle this workload by buffering requests, ensuring smoother operation. Additionally, NGINX provides essential features like SSL termination, token authentication, and load balancing, making it indispensable for securing and optimizing Flask applications. For further scalability and flexibility, Docker or Kubernetes can be integrated alongside NGINX, enabling dynamic scaling and simplified management of services. Whether deployed on AWS or Kubernetes, NGINX remains a versatile and powerful tool for hosting Flask applications at scale.
Pre Requisites
Before Using the steps to deploy your model, you should understand and have the following.
AWS Account: You need an AWS account to access EC2 and other AWS services. If you don’t have an account, you can sign up for one on the AWS website.
If you want your app to appear with a name, you must have a domain name configured to point to your server. You can get one for free on Freenom. We do not need this here since we will use the public IP address directly.
Understanding of WSGI file specification and servers, proxy, and ports. A Little understanding will also help.
Deploying Machine Learning Model Using Flask on AWS with Gunicorn and Nginx
STEP 1: Set up an AWS EC2 Instance
Launch an AWS EC2 instance with Ubuntu as the operating system. A micro Service would work just fine. We are keeping the instance’s name as sentiment_analysis_server. You are free to choose what you like. But remember, the instance’s service selection depends on the scale of the application you are trying to host.

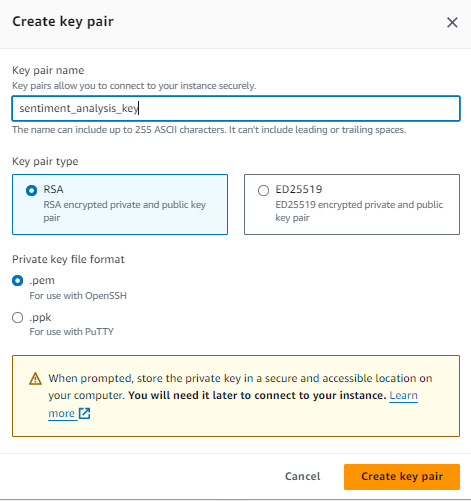
Create a key pair to connect securely with your EC2 through SSH. When you create an EC2 instance, you specify a key pair, and the corresponding private key file (.pem) is used to authenticate your SSH connection to the instance. Use an RSA-type key pair and follow the below steps.
- Create Key Pair: Click the “Create key pair” button to generate the key pair.
- Download Private Key: Once the key pair is created, a private key file (.pem) will be automatically downloaded to your local machine. This private key file authenticates SSH connections to your EC2 instances.
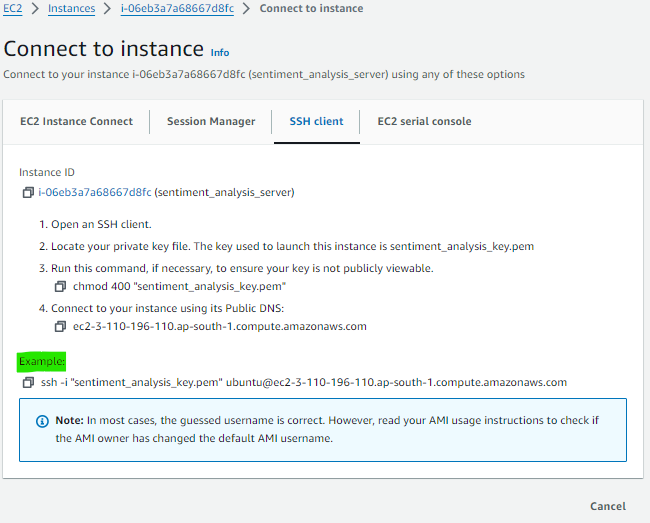
Launch your instance with security configurations that allow port and http traffic. After launching and connecting to your instance, copy the SSH command from it so you can post it on your local terminal to access the instance remotely. In the following image, the green highlighted portion is what you need to copy and paste into your local/terminal.
STEP 2: SSH into the EC2 Instance
Open your computer’s terminal. If your private key file (.pem) is located in a directory, you’ll need to specify the full path to the key file when using the SSH command to connect to your EC2 instance. Here’s how you can do it:
Let’s say your key(.pem file) is in Downloads. Then, you need to place your SSH command there. So, all you need to do is open your terminal, navigate to the Downloads directory, and paste your command there.
cd ~/DownloadsNow Paste your SSH command, which might look like the example: ssh -i “sentiment_analysiskey.pem” [email protected]

STEP 3: Installing the necessary Components from the Ubuntu Repositories
The first step is to install all necessary components from the Ubuntu repositories. This includes the Python components, which Pip will manage, and the Python package manager. The Python development files required to assemble Gunicorn components will also be provided. When installing the packages that enable you to create your Python environment, you must first update the local package index.
sudo apt update
sudp apt upgrade
Then, install the Python-pip command to install pip and the virtual environment.
sudo apt install python3-pip
sudo apt install python3-venv
Then, install the net stat package. The net-tools package displays network-related information, such as active network connections, routing tables, interface statistics, etc.
sudo apt install net-tools
sudo apt install net-tools
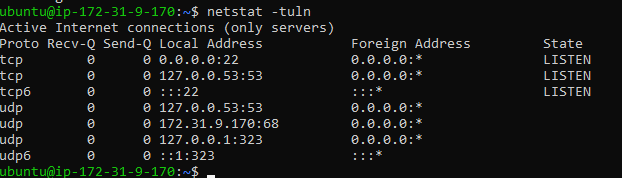
netstat tuln #after installing run this command
It displays a list of active network connections and listening ports on the system:
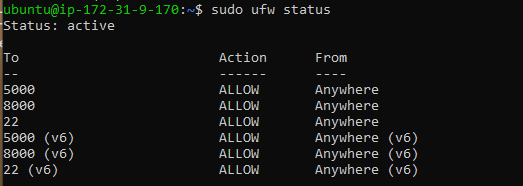
Then install the firewall package: the ufw (Uncomplicated Firewall) package is a front-end for managing iptables firewall rules on Ubuntu and other Debian-based Linux distributions. It provides a simplified interface for configuring firewall rules, making it easier to set up essential firewall protection for your system
- sudo ufw enable: Enables the firewall.
- Sudo ufw allow /: This command allows incoming connections on a specific port and protocol (e.g., sudo ufw allows 22/TCP to enable SSH connections).
- Sudo ufw status: Displays the current status and rules of the firewall.
sudo apt install ufw #
sudo ufw allow 22 #ssh access
sudo ufw allow 5000  #5000 port for flask app test

sudo ufw status - Sudo ufw allow 5000: This allows incoming connections on port 5000. By default, it allows both TCP and UDP traffic on this port. We will be running our Flask app on 5000, so the Flask app service running on port 5000 needs to be accessible from the network.
- Sudo ufw allow 22: This command enables incoming SSH connections on port 22. SSH is used for remote access to your system, and allowing connections on port 22 enables you to connect to your server via SSH securely. This is important; you should not turn this off, as you won’t be able to access your SSH remotely.
Step 4: Deploy the Flask Application and Set Up the Application
Deploy Flask Application: Transfer the Flask application files to the EC2 instance. If the model is already on Git Hub, clone it into the EC2 Ubuntu instance. Then, Set up a new virtual environment and install the required Python packages or the requirements file in the directory using pip. Then, the Test Flask application runs correctly in the EC2 environment.
In our case, we are cloning a git repository, which we used in the last article to analyze the sentiment of a tweet.
But first, make sure the git is installed. If it’s installed, run the command: git clone -b master –single-branch https://github.com/Geek-shikha/Flask_model_sentiment_analysis.git
git --version # if this exists you need not to sudo apt install git
git clone -b master --single-branch
https://github.com/Geek-shikha/Flask_model_sentiment_analysis.git #same line

#after cloning the repository go tot the directory and list all the files
cd Flask_model_sentiment_analysis
ls
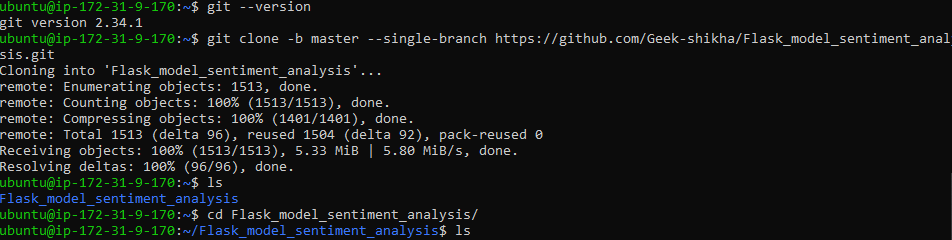

Note: When you clone the repository, you will not see any app.py file; instead, myproject.py is present, which we require.
There is an existing virtual environment that we created previously while creating a Flask app locally. We need to create a new virtual environment to avoid errors or discrepancies. The new virtual environment is named “myprojectenv” and must be activated.
python -m venv myprojectenv #virtual env named as myprojectenv
source myprojectenv/bin/activate #activate the virtual environment
Install the Python libraries stored in requirements.txt
pip install -r requirements.txt #install the dependencies like flask, nltk etc.Now test and run your Python Flask application
python3 myproject.pyBy running this, you can see an output in the terminal like this :

To see if it is working. Visit your server’s IP address followed by:5000 in your web browser. On your web browser, your server IP is 5000, like http://server_pub_ip:5000. Let’s say the server IP is 23.124.09.133. Then put http://23.124.09.133:5000
Step 5: WSGI file
Next, create a file that will serve as the entry point for your application. This file will instruct the Gunicorn server to interact with the application.
create a wsgi.py file in the Flask_model_sentiment_analysis folder
nano ~/Flask_model_sentiment_analysis/wsgi.py In this file, import the Flask instance from our application, which we named myproject.py, and then run it:
from myproject import app

if __name__ == "__main__":
    app.run()
You can also install sudo apt and unicorn if there is any error.
Step 6: Gunicorn Configuration
Let’s begin by configuring Gunicorn and binding the wsgi app to port 5000
unicorn configure command starts a Gunicorn server that listens for incoming connections on port 5000 from any IP address and serves the WSGI application named app defined in the wsgi.py file.
gunicorn --bind 0.0.0.0:5000 wsgi:appOutput:

Check if it is working. Visit your server’s IP address followed by:5000in your web browser: On your web browser, your server IP is 5000, like http://server_pub_ip:5000; let’s say the server IP is 23.124.09.133. Then put http://23.124.09.133:5000
It should give you an output like this :
If you get the correct response, stop the service; you can press ctrl+c and then deactivate your virtual environment by giving the command. Subsequently, Create the system and service unit file. This action will enable Ubuntu’s init system to automatically initiate Gunicorn and host the Flask application upon server boot.
sudo nano /etc/systemd/system/myproject.serviceAdd the following content :
[Unit]
Description=Gunicorn instance to serve myproject
After=network.target

[Service]
User=ubuntu
Group=www-data
WorkingDirectory=/home/ubuntu/Flask_model_sentiment_analysis
Environment="PATH=/ubuntu/Flask_model_sentiment_analysis/myprojectenv/bin"
ExecStart=/home/ubuntu/Flask_model_sentiment_analysis/myprojectenv/bin/gunicorn
--workers 3 --bind unix:myproject.sock -m 007 w>
[Install]
WantedBy=multi-user.target- [Unit]: This section specifies metadata and dependencies for the unit.
- Description: Describes the service.
- After=network.target: It indicates that this unit starts after the network is up, ensuring network connectivity before the service starts.
- [Service]: This section defines the parameters for the service.
- User=ubuunit: It specifies the user account under which the service should run.
- Group=www-data: Sets the group for the service.
- WorkingDirectory: Specifies the working directory for the service.
- Environment=”PATH=/ubuntu/Flask_model_sentiment_analysis/myprojectenv/bin”: This variable defines the service’s environment variables, explicitly setting the PATH variable to include the virtual environment’s binary directory.
- ExecStart: Specifies the command to start the service. In this case, it starts Gunicorn with specific options:
- –workers 3: Configures Gunicorn to use three worker processes.
- –bind unix: my project.sock: Specifies the socket file through which Gunicorn will communicate with the web server (e.g., Nginx or Apache).
- -m 007: Sets the mask to 007, controlling the permissions of files created by Gunicorn.
- wsgi:app: Indicates the location of the WSGI application to serve.
- [Install]: This section defines installation information for the unit.
- WantedBy=multi-user.target: Specifies the target into which this unit should be installed. In this case, it’s set to multi-user. Target, a standard target for user systems, indicates that the service should start automatically during system boot.
In summary, this system unit file sets up Gunicorn to serve a Flask application with specific configurations and ensures that the service starts automatically upon system boot.
Time to start the Gunicorn service that you created and enable it so that it starts at boot:
sudo systemctl start myproject
sudo systemctl enable myproject
sudo systemctl status myproject#check the status of your service file for errors, ifany
If the command resists, then use this to reload “sudo systemctl daemon-reload,”
If you have followed each step, there should be no errors; however, if the error persists, resolve the error. There can be an error in the path or environment in the service file. Check Carefully
Step 7: Install and Configure NGINX
The Gunicorn application server is operational and awaiting requests via the socket file in the project directory. Now, we shall configure Nginx to direct web requests to this socket by implementing minor modifications to its configuration file. For this, we need to install nginx first
sudo apt install nginxStart by generating a fresh server block configuration file within Nginx’s sites-available directory. Name this file “project” so as not to get confused. We have been using the name myproject.py previously
sudo nano /etc/nginx/sites-available/myprojectto add the content to the file, which has Nginx server block configuration ensuring that incoming HTTP requests to the specified server IP address are forwarded to the Gunicorn application server via the Unix socket file, allowing the Flask application to handle the requests. Save the file and come out of the editor.
server {
    listen 80;
    server_name 3.110.196.110; #your server public ip

    location / {
        include proxy_params;
        proxy_pass http://unix:/home/ubuntu/Flask_model_sentiment_analysis/myproject.sock;
    }
}- Server { … }: This block defines a server configuration within Nginx. It encapsulates the configuration settings for handling requests for a specific server.
- Listen 80: This directive specifies that Nginx should listen for incoming HTTP requests on port 80, the default port for HTTP traffic.
- server_name 3.110.196.110: This directive sets the server’s hostname or IP address. In this case, it’s set to 3.110.196.110, which should be replaced with your server’s public IP address.
- Location / { … }: This block defines how Nginx should handle requests for the root directory / of the server.
- Include proxy_params: This directive provides configuration settings from the proxy_params file. These settings typically contain proxy-related configurations, such as proxy headers.
- proxy_pass http://unix:/home/ubuntu/Flask_model_sentiment_analysis/myproject.sock: This directive specifies that Nginx should forward incoming requests to the specified Unix socket file located at /home/ubuntu/Flask_model_sentiment_analysis/myproject.sock. This is where Gunicorn listens to requests. Nginx will act as a reverse proxy, passing requests to Gunicorn and returning the responses to the client.
Now enable and test for errors
sudo ln -s /etc/nginx/sites-available/myproject /etc/nginx/sites-enabled
sudo nginx -t- sudo ln -s /etc/nginx/sites-available/myproject /etc/nginx/sites-enabled: This command creates a symbolic link named myproject in the sites-enabled directory, pointing to the configuration file located in the sites-available directory. By doing this, you enable the server block configuration for your project.
- Sudo nginx -t: This command tests the Nginx configuration for syntax errors. It checks whether the Nginx configuration files, including the newly enabled myproject server block, are correctly written and valid. If there are any errors, they will be reported during this test.
Restart the nginx as we have updated the configurations
sudo systemctl restart nginxupdating the firewall for nginx
sudo ufw allow 'Nginx Full'Since we don’t need the 5000 port, we can disable it using the command “sudo ufw delete allow 5000,” but we don’t need to disable port 22.
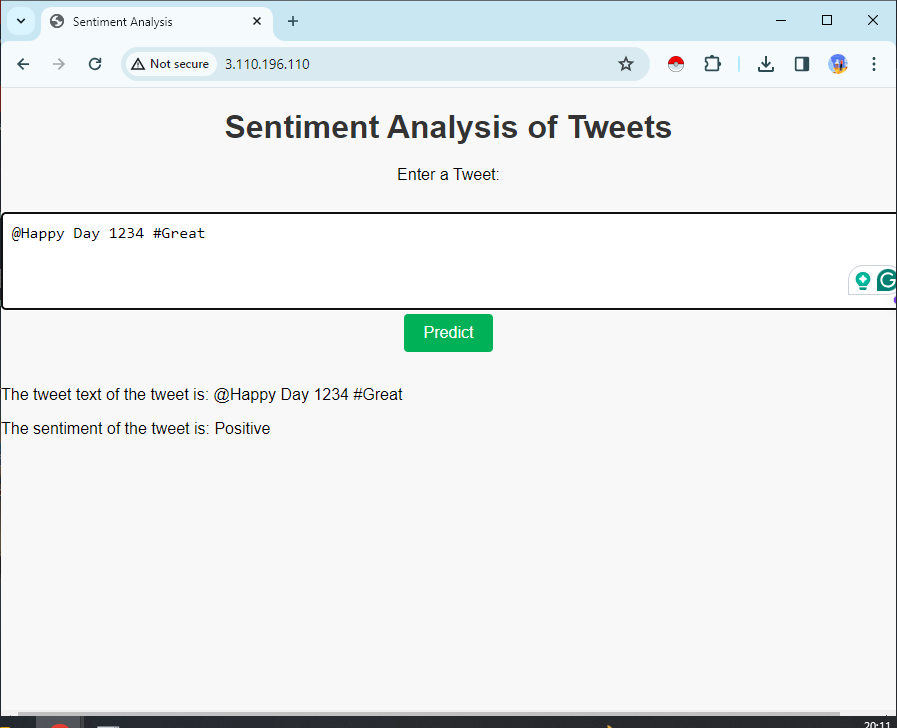
Now navigate to your server’s domain name(or IP address) in your web browser, and you will see the output :

If you see any error like 502 gateway,, you need to change some permissions. Use the command
sudo chmod 755 /home/ubuntuAlso, when you test your server for the application, you should use http://….. and not https, as the application is not secured.
If there are errors, you can check them through commands like:

If you want to stop the service, you can use the command
sudo systemctl stop nginx #stop the service
sudo systemctl start nginx# to start the service
Further Steps to Secure the Application
There are further steps to secure the application.
Enable HTTPS for secure communication between clients and the server. Obtain an SSL/TLS certificate (e.g., Let’s Encrypt) and configure NGINX to use it. We can use Certbot to secure the application.
To secure your web server with SSL/TLS using Certbot, you typically need a registered domain name. Certbot requires a domain name to issue SSL certificates because it verifies domain ownership before issuing the certificate. While it’s technically possible to use a public IP address instead of a domain name, it’s not recommended for several reasons. One is Certificate Authority (CA) Requirements: Certificate Authorities (CAs) like Let’s Encrypt (which Certbot utilizes) have policies in place that require domain validation. They will not issue SSL certificates for IP addresses.
If you want to secure it, you can use sudo apt install python3-certbot-nginx and learn more about it in its documentation.
Conclusion
In this article, we created a basic Flask application within a Python virtual environment. We generated a WSGI entry point, enabling compatibility with any WSGI-capable application server, and then configured Gunicorn to fulfill this role. Subsequently, We crafted a system service file to initiate the application server automatically upon system boot. Additionally, you constructed an Nginx server block responsible for directing web client traffic to the application server, effectively forwarding external requests, and safeguarding server traffic with Let’s Encrypt encryption.
- SEO Powered Content & PR Distribution. Get Amplified Today.
- PlatoData.Network Vertical Generative Ai. Empower Yourself. Access Here.
- PlatoAiStream. Web3 Intelligence. Knowledge Amplified. Access Here.
- PlatoESG. Carbon, CleanTech, Energy, Environment, Solar, Waste Management. Access Here.
- PlatoHealth. Biotech and Clinical Trials Intelligence. Access Here.
- Source: https://www.analyticsvidhya.com/blog/2024/04/ml-using-flask-on-aws-gunicorn-nginx/

