 Courtney Goudswaard • Today at 00:00
 What good is traffic to your Amazon product listing if it doesn’t convert? The quality of the listing itself is what convinces customers to make a purchase after they land on your product page.
But quality is subjective. Some products perform better than others. So, how can you make sure your product listing is converting best? Amazon Listing Optimization.
In this practical step-by-step guide, you’ll learn:
Table of Contents
What is Listing Optimization on Amazon & Why Is it Important?
Amazon listing optimization is the process of giving your Amazon product detail page a glow-up with the goal of increasing your conversion rate.
A well-optimized listing communicates the product’s benefits clearly, overcomes objections, and persuades the customer that the product is exactly what they’re looking for.
As a rule of thumb, a baseline conversion rate to aim for is around 10-15%.
But it’s worth noting conversion rates can vary and depend on factors such as your niche’s competition, your product category, and its price point, among other factors.
By consistently optimizing your Amazon listings, your products stay competitive and appealing to customers, leading to increased sales.
Related reading: Learn more about Amazon SEO ranking factors and the nuances of Amazon Search Engine Optimization (SEO). Plus, learn how to dominate organic search results and conduct keyword research.
What Do I Need to Think About When Creating An Optimized Listing on Amazon?
To rank higher in Amazon search results, you need to consider optimizing for relevant keywords, using high-quality photos, and creating an optimized title and description, to name a few. We’ll go into more step-by-step detail soon.
Also, remember that Amazon’s A9 algorithm considers not only the optimization of your listing but also the overall quality of your product.
Customer perception and feedback play a significant role in driving sales. You must listen and adjust your product and service to satisfy your customers’ needs. We’ll touch on this later in step 6.
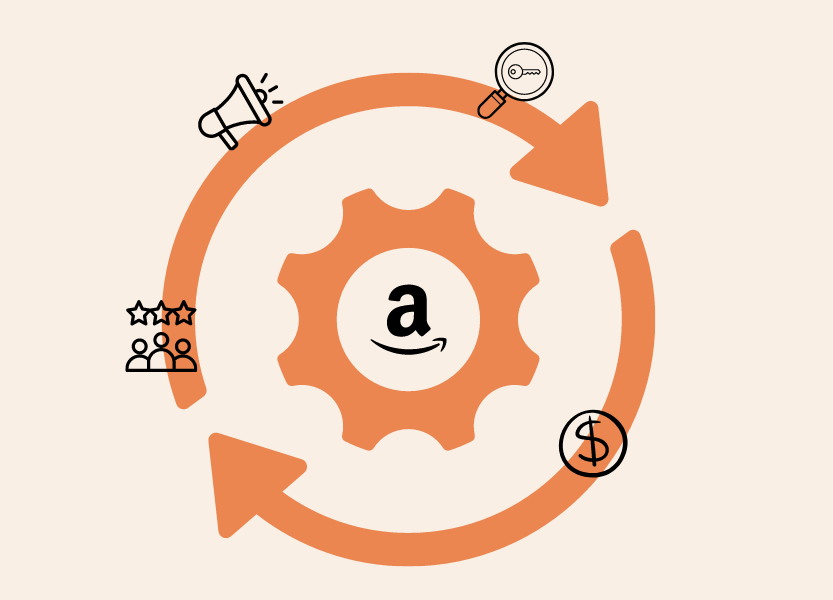
The FlyWheel of Amazon Listing Optimization
Each component of the Optimization Flywheel mutually supports continuous improvement and growth for your Amazon listing, ensuring visibility and effective conversion from browsing to buying.
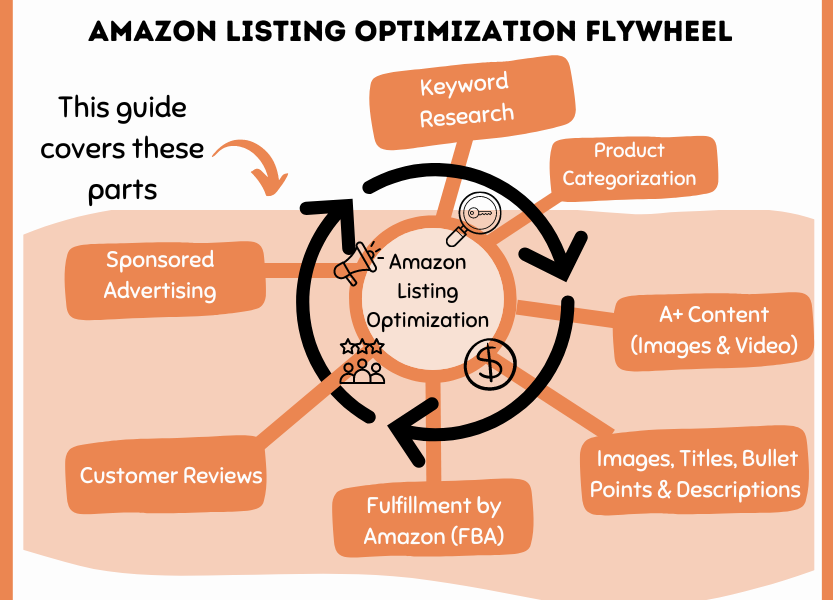
While not elaborately discussed in this guide, keyword research is vital. Without traffic, the optimization flywheel stalls. Thorough keyword research optimizes your Amazon listing’s positioning for high rankings and traffic generation in Amazon search results.
Haven’t got your keywords sorted?
We go into more detail about how to conduct keyword research to determine the most valuable and relevant keywords for your product to rank for in our Amazon SEO guide. Before we break down the practical steps of Amazon listing optimization, here is the canvas you get to work with.
The Anatomy of an Amazon Listing
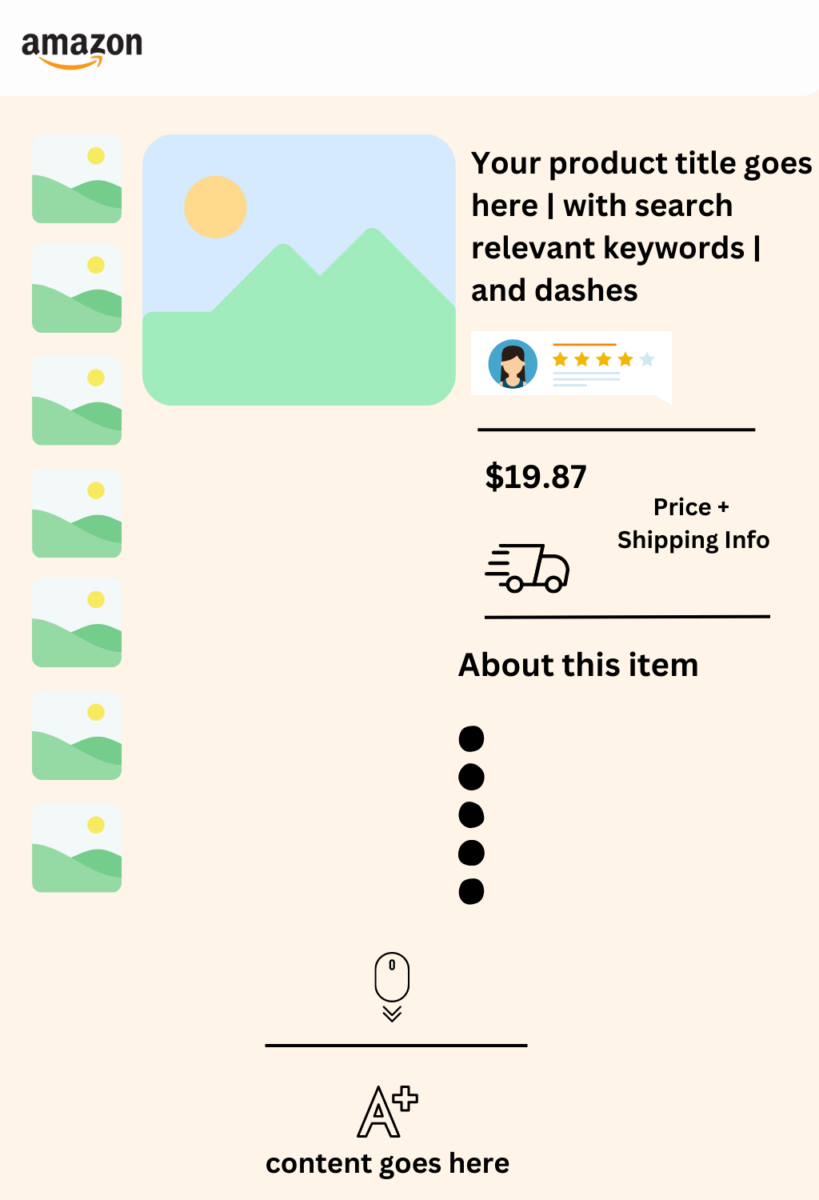
Important listing elements include optimized:
- Title
- Product Rating
- Price + Shipping Information
- Product Information
- Image selection
- A+ Content/Enhanced Brand Content (EBC)
- Reviews
- Product Features
Now you know what you’re working with, let’s get to work.
Step 1: Optimizing Your Amazon Product Listing Titles
Arguably, one of the first factors Amazon’s search algorithm cares about is how relevant your title is to the customer’s search query. Having an optimal title increases your visibility and its Click Through Rate (CTR) on the results page. While titles are technically for the algorithm, writing for humans works better.
Here are two examples of nicely optimized titles for “greens powder.”
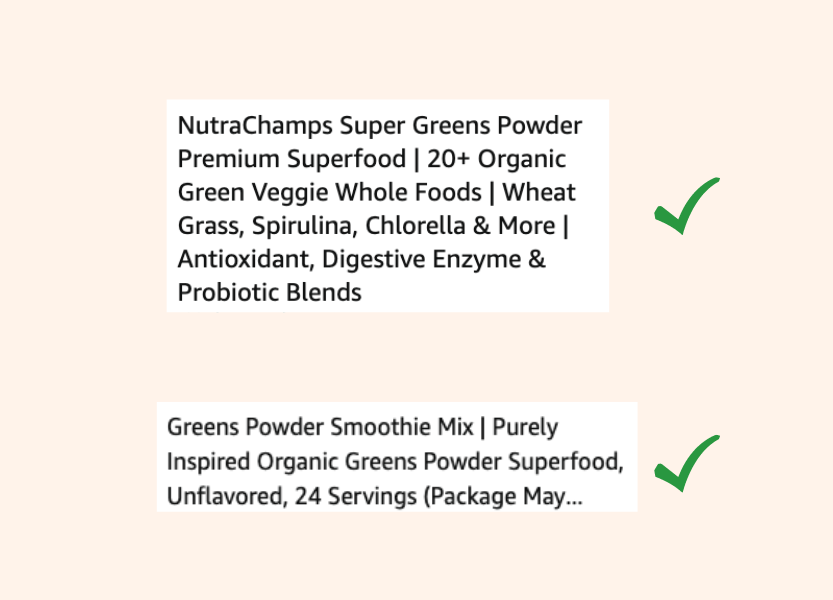
Title Optimization Best Practices 👍
- Character Count: Ideally, keep your title between 100-150 characters, prioritizing the first 80 for optimal mobile viewing. Despite Amazon’s 200-character limit, titles shorter than 150 characters generally perform better.
An ECF Member who recently A/B tested multiple titles found “shorter titles performed better IN GENERAL. It is case specific, of course.”
- Keyword Optimization: Make sure the title’s first five keywords are the most search-relevant. Utilize tools like MerchantWords Reverse ASIN Lookup to identify and experiment with competitors’ profitable keywords in your titles. But don’t forget to write for humans…
“While keywords in the title are important, the #1 reason for a title is for a human to read it and find relevance.”
- Use of Delimiters: After the first five primary keywords (excluding fillers like “the” and “a”), use a dash (-) or pipes (|). This creates a keyword-rich canonical URL for Google to crawl, improving search result visibility. Include other relevant Amazon keywords after the delimiter.
- Include Necessary Information: Don’t forget to add in the must-have details: things like the color, model number, the series, and quantity if it’s relevant. If you sell multi-packs or bundles, call that out in your title (i.e. 5-pack).
- Capitalization & Numerals: Capitalize the first letter of each word in your product title. Use numbers instead of words (20 instead of twenty), but spell out measurements such as pound, ounce, etc.
- Brand Name in Title: Include your brand name in the product title, preferably not at the start unless it notably boosts Click-Through Rate (CTR). As your brand gains popularity and generates branded searches, the importance of its inclusion in the title increases.
“Titles truncate as short as 74 characters on Amazon’s app. For a brand where it’s not going to increase CTR on the listing, I typically try to put it towards the end of the title rather than lead with it.”
Best to Avoid 👎
- Excessive Capitalization: Avoid capitalizing all words in the title.
- Ampersand Usage: Instead of using (&) to keep titles shorter, Amazon recommends spelling out the word “and.”
- Promotion Phrases or Misleading Promises: Avoid using false promises like “100% satisfaction guaranteed” or “Free shipping worldwide.”
- Keyword Stuffing: Avoid overstuffing your title with too many keywords, which can confuse and put off potential buyers.
- ASCII Characters: Avoid using ASCII (American Standard Code for Information Interchange) characters like © in product titles. They can mess with readability, especially in CSV format. Selling private label? Put copyright info in the description instead.
Step 2: Optimizing Your Product Descriptions For Conversions
You got the click. The buyer is on your product listing page; how do you keep them there now?
“When writing product descriptions, go for clarity over cleverness. Simple words and simple sentences.”
Best Practices for Product Listing Descriptions
- Craft your bullet points as compelling selling points: They should convince a buyer that the product’s features are beneficial, outlining why and how they need this product.
- Design your listing to be highly skimmable: Place the most important information upfront. This approach allows customers to quickly understand your product’s unique selling points.
- Capitalize the first word of each bullet point: This draws attention to the unique selling propositions (USPs) of the product.
- Keep each bullet point concise yet informative: This helps customers quickly skim through while gaining a good understanding of the product.
Best to Avoid 👎
- Code in Product Details: Avoid using HTML, JavaScript, or other types of code in your product detail pages. The only exception is line breaks </br> in the description.
Example of Product Listing Description Done Well (& What Could Be Improved)
Let’s look at an example of the NutraChamps Green Powder example we looked at earlier:
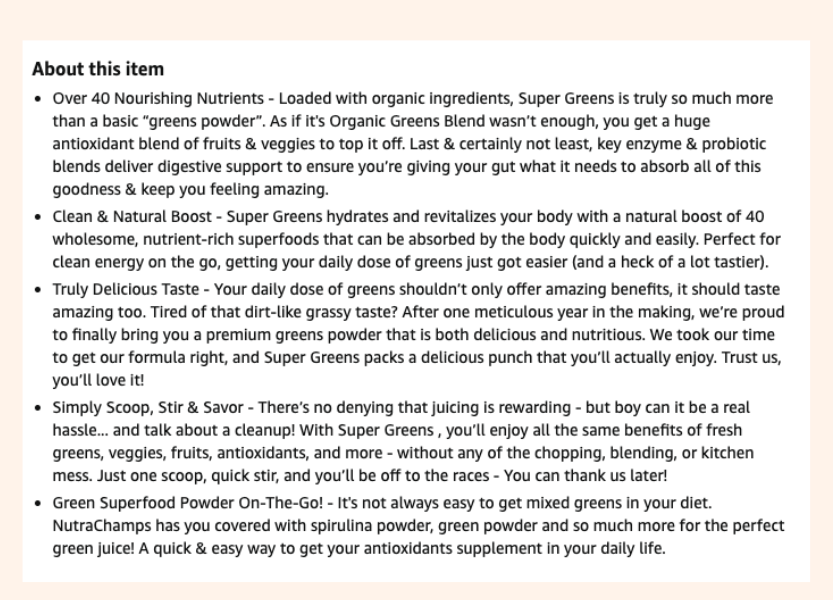
What they’ve done well:
- It’s descriptive and provides factual information about the product
- They’ve highlighted the benefits of the product and described how to use the product in a scannable manner
- They’ve highlighted pain points (i.e. not always easy getting mixed greens into your diet) and how this product solves it
- They haven’t stuffed it with keywords
What could be improved:
- The bullet points could be more concise
- Some parts of the copy sound a bit too much like marketing material (i.e. Trust us, you’ll love it!)
- Word count is over 300 words which is quite lengthy. Try to keep it under 200 words
- They might want to consider capitalizing the words before the first dash to make the bullet points more scannable (i.e. CLEAN & NATURAL BOOST)
Bonus tip: Struggling to write or edit your listing? Get AI assistance from Helium 10’s Listing Builder. Create sections of your entire listing using your prioritized keywords with a single click. If you’re a Helium 10 user, this feature is readily available.
Step 3: Selecting the Right Product Images & Visuals for Your Amazon Listing
Choosing the appropriate images and visuals when setting up your Amazon product listing can be a game-changer in attracting customers and driving sales.
Selecting & Optimizing The Right Product Images
- Use the Full Quota of Images: Amazon allows up to seven visuals, including the main photo and video demonstrations. Use this to your advantage.
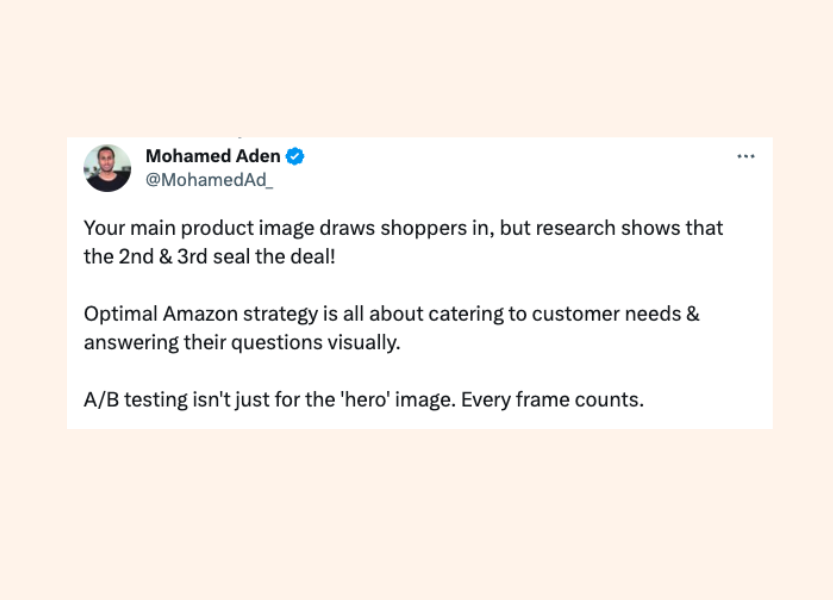
- Show Different Perspectives: Include images with different angles and uses of your product, along with close-ups. The goal is to answer customer queries, promoting better product understanding visually.
- Integrate Video Content: Videos showcasing your product’s functions can enhance buyer understanding. According to Amazon, adding videos could potentially increase sales by up to 9.7%.
- Leverage Image Optimization Tools: Utilize services like PickFu to optimize your product listings. By running a poll, you use this feedback to make more data-informed decisions about your image selection.
“Our top-line revenue increased by 10% when switching from the images we thought were the best ones to the ones that Amazon customers select through PickFu.”
Going back to our greens powder example:
Leverage Amazon’s A+ Content For Maximum Conversions
A+ Content is a feature on Amazon to enhance your product listings with rich story-telling media like high-quality images, charts, and videos.
Adding A+ content to product detail pages can help increase sales by an average of 5.6%. (Amazon Internal Data)
The main goal of A+ Content is to boost sales by improving conversion rates, increasing brand value, and providing a more immersive buying experience. This can help differentiate your product from competitors.
Here’s How to Optimize A+ Content Strategically To Boost Conversions
- Emphasize Unique Selling Features: Use high-quality images as well as some details about your product, particularly if not previously included in your regular product listing images. For e.g. zooming into details of your product and talking more in-depth about the benefits to your customers.
- Maximize Value With Unique Modules Available: Deliver key messages in the most concise and visually-appealing way. Put yourself in your customers’ shoes and think about their main questions.
- Prioritize Mobile Optimization: With half of Amazon’s searches performed on mobile devices, a mobile-friendly product listing is essential. And on mobile, your A+ Content appears before your standard bullet points list.
Note: A+ content can occupy a lot of space on mobile screens. Review your listing across devices to ensure an optimal viewing experience.
In the desktop view video below, the A+ Content follows the standard product listing. It features a carousel detailing brand points, a founder’s note, and CTAs directing buyers to specific product categories. Image banners below create a visually enriched product description, highlighting benefits.
- Watch this Amazon A+ Content Tutorial from (14:53) to watch a video walkthrough on adding A+ Content to your Amazon Seller Central Account.
- Use Amazon’s Manage Your Experiments tool to run A/B tests on your A+ Content to optimize for conversion
Step 4: What do I need to consider for Product Pricing Optimization?
Product pricing optimization should be an ongoing process, particularly with fluctuating factors like seasonality and competition. Therefore, this month’s successful price may not be optimal for the next.
“Everything I know and learned about Amazon listing optimization leads to the following conclusion: changing your pricing is the most powerful test of all.”— Andrew Browne, co-founder of Amazon split testing tool Splitly.
General Price Testing Tips
Andrew Browne suggests using Weber’s Law for price testing. This suggests most of your potential customers won’t notice the incremental pricing adjustments.
He recommends:
- Starting with 10%, adjust by another 10%, and keep testing until you find the optimal price.
- When you increase the price, make sure the possible drop in sales is offset by the increased profit per unit.
- When lowering the price, the decrease in profit per unit should be compensated by a significant boost in sales.
- Experiment with unique price points. Instead of traditional pricing like $19.99 or $19.95, try something distinct like $19.87.
“I have found it difficult to test pricing because competitor pricing jumps around so much and will often react immediately to any of your changes.”
Split Testing Shipping Charges: Real-life Scenarios
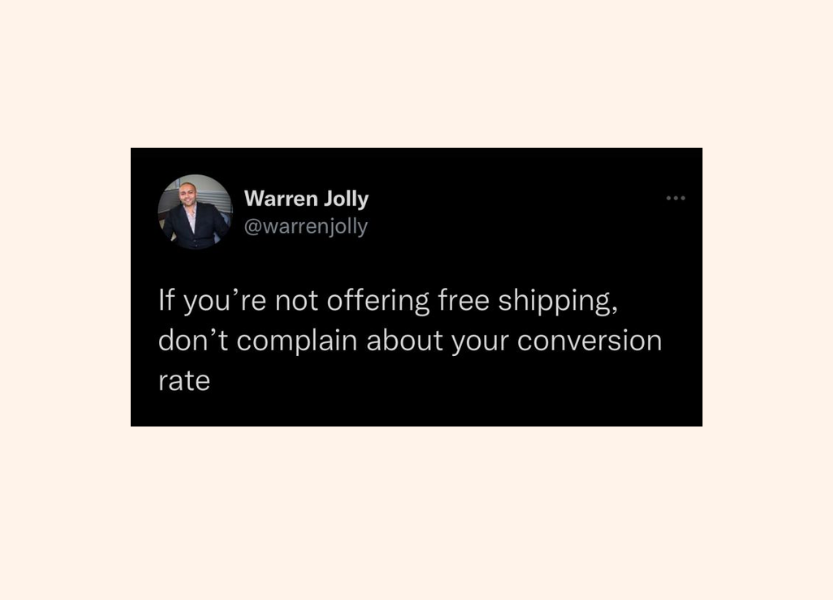
Something else you can include in your pricing A/B tests are shipping charges. The consensus is that Amazon customers are trained to expect free shipping.
“In general, sales DOUBLE when you offer FBA (free shipping and the Prime badge) vs. FBM with a +$X shipping.”
So what can you do?
Bake shipping into your price and offer “free” shipping.
How some ECF members handled shipping costs in their businesses:
One ECF member suggests two methods for handling shipping costs:
- Incorporating shipping costs into the product price and providing free shipping for all orders (past practice of theirs).
- Offering free shipping once a customer’s order exceeds a certain amount (their current approach).
He believes that the impact of charging for shipping on the conversion rate (CVR) is less substantial for unique or scarce products than common, widely-available products. And he recommends using a free shipping threshold to both reward customers with a high lifetime value (LTV) and boost the average order value (AOV).
This approach didn’t negatively impact their CVR, which stayed between 2.75% and 3.5%.
Another ECF member shares a strategy for handling shipping costs and times in his former gift-focused business, where shipping times were critical. They had even developed a custom date picker for customers to know when their order would arrive and be charged the necessary shipping fees.
The strategy:
- Provide three new shipping options: Overnight, 2-day, and Express.
- Offer free standard shipping for orders over $325-$350 and include product upsells to encourage customers to reach this threshold.
- Improve the clarity of shipping time information on the product page, cart, and checkout.
- Pass on the exact cost (or slightly more) to customers for express shipping.
This strategy helped to convert shipping from a cost to a profit center by integrating a portion of the ground shipping cost into their products and charging slightly more for express delivery than it cost them. They found that customers in urgent need are often willing to pay more, which can also help improve the conversion rate.
“ I agree that the single biggest CRO improvement you can make is to find a way to make shipping “free.” (i.e. make shipping APPEAR free). Sometimes this isn’t possible because of MAP (minimum advertised price) agreements etc. But if doable, yes, I think it‘s basically a slam dunk.”
Step 5: Constructing The Best Copy For Your Product’s Key Features
This section is often referred to as ‘the bullet points.’ And when you consider the purpose of bullet points is to help inform a buyer (in a highly-scannable manner), the elevator pitch for your product.
Insight from a small-scale test on the ECF forum revealed that bullet points can be overwhelming in some Amazon product descriptions.
“Shoppers wanted to have a quick way of identifying what a bullet point is about instead of having to read the whole thing or having a giant wall of text thrown at them.”
Given that shoppers are looking at several listings— being concise and clear makes them more likely to read it.
Bullet Point Tips:
- Make bullets short, simple, and concise, and stick to the product’s most important benefits.
- Focus on the points where your product stands out and put more detailed information in the rest of the product listing (i.e. A+ Content).
- Consider using CAPS or [brackets] to make headings and separate bullets better visually.
For example:
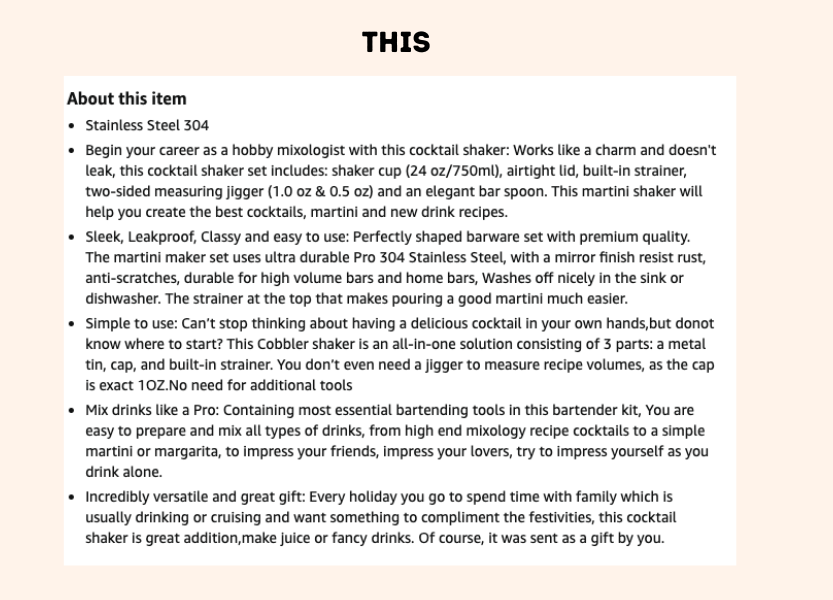
Let’s compare two product descriptions for a cocktail shaking set. Does one make you feel overwhelmed?
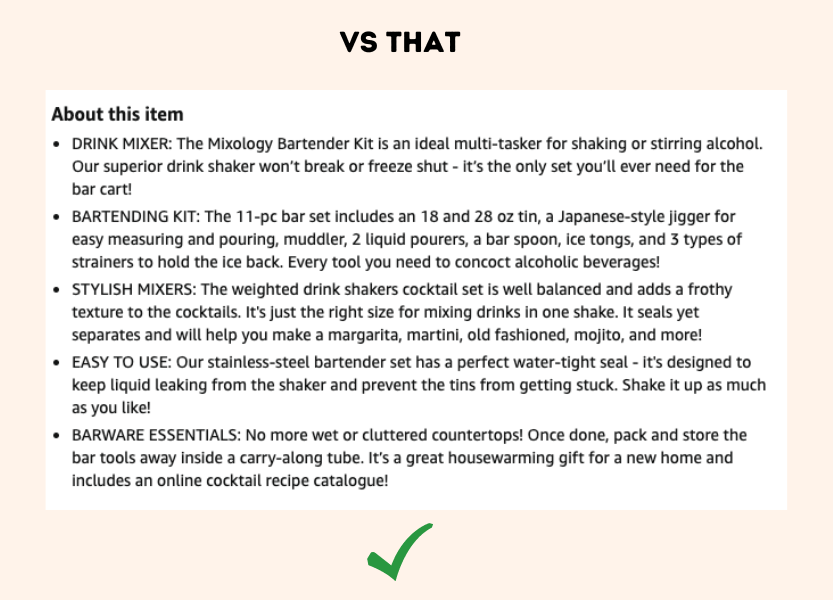
Step 6: Generating Positive Amazon Product Reviews (And Reversing Negative Feedback)
Positive reviews increase conversion rates and influence search rankings.
“It was a lot more difficult to get it to rank well and to stick because we couldn’t get any reviews to show up until yesterday.”
But once you have them…
“When we jumped from 4 stars to 4.5 stars on one of our products, our conversion went up 50% and has held there. That’s right…50%. That means 50% more sales overnight without doing anything else.”
Strategies for Generating Positive Reviews
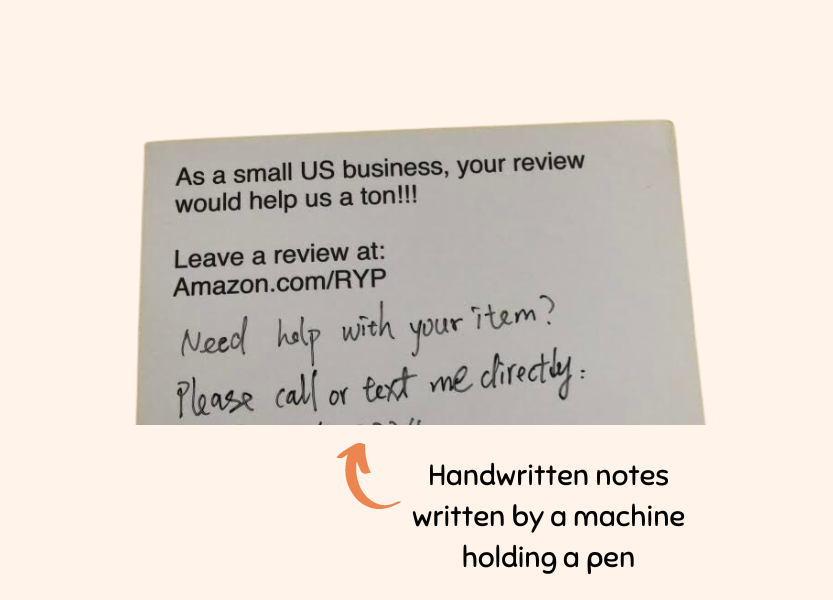
Handwritten Notes
Include a handwritten note with your contact details, encouraging customers to reach out with their feedback.
“We tested handwritten cards in the past, and they have a review rate of 9-11%.”
Consider using a machine to create handwritten cards to scale up your efforts. These are not “typed”. They are written by a machine that holds a physical pen.
Automated Post-Purchase Emails
Send a series of emails to buyers after they make a purchase. Make the communication personalized and useful, offering helpful tips and resources about the purchased product.
“We send an email or a series of emails to all buyers. If the product is simple, we send one email a few days after delivery. We send two emails if the product is more complex and requires some hand-holding and instruction.”
First Email Tips:
- Make your “thank you” message valuable. Don’t just send a generic note; add value to it.
- Include a few quick tips or answers to frequently asked questions about the product the customer has just purchased.
- For complex or electronic products, provide a link to a helpful video, such as a YouTube tutorial for setup.
- Inform the customer about the upcoming follow-up email, ensuring transparency and managing their expectations to prevent annoyance.
Second Email Tips:
- Send the second email ~five days after the first one
- Ask if the customer is happy with the product
- Provide two straightforward text links— one leading to the product review page for happy customers and the other directing dissatisfied customers to a page where they can contact you.
- Reiterate your availability to assist them if they didn’t have a 5-star experience, further emphasizing your commitment to customer satisfaction.
- Incentivize honest feedback (NOT paid reviews). An after-purchase email thanking customers for their purchase and asking for an honest review, coupled with a small discount on their next purchase, can go a long way.
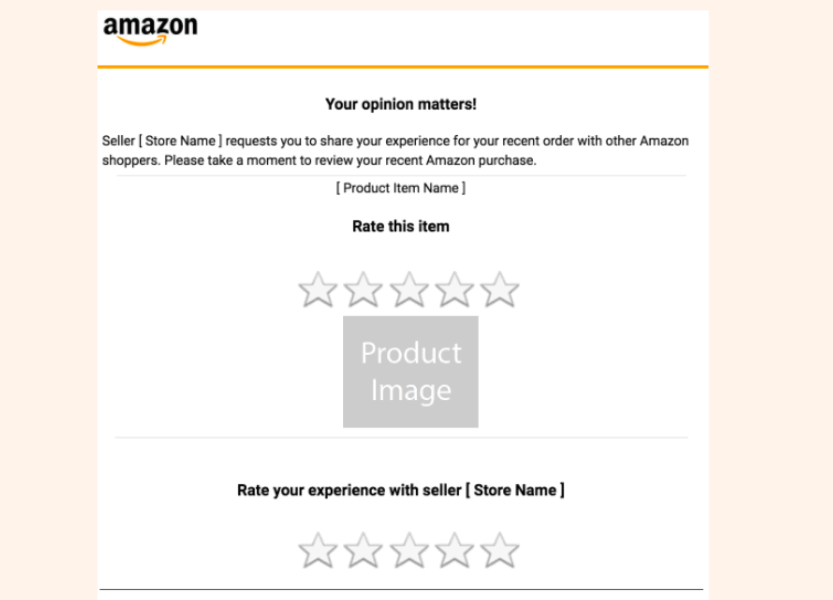
Utilize Amazon’s Request a Review Button
You could also use Amazon’s ‘Request a Review’ button, available at an order level in Seller Central. But these emails are more generic.
Pay Attention To Your Packaging Experience
A bad unboxing experience can equal negative reviews. This happened to Elizabeth Mercer, the Owner and Founder of Sleekform.com.
In Episode 485 of the ECF podcast, Elizabeth talks about how they had a bunch of 1-star reviews on Amazon because people were frustrated by the assembly instructions. They redesigned their packaging and unboxing experience, and the 1-star reviews disappeared. Best of all, after paying the one-time fee to redesign the packaging, their per-item cost only increased by $0.07. A small price to pay to prevent 1-star reviews.
How To Deal With Negative Reviews
It’s frustrating when you get a 1-star review, especially when you don’t deserve it. But monitoring and responding to reviews, good and bad, should be part of your customer service process.
This ECF member shares details about how they approached receiving a bunch of 1-star reviews—and completely turned them around.
“I wanted to see if I could reverse some of these reviews, so I sent conciliatory emails to all of these customers offering a refund and an explanation. Some of them already responded positively.”
Here is what the revised review said (from 1 star to 4 stars):
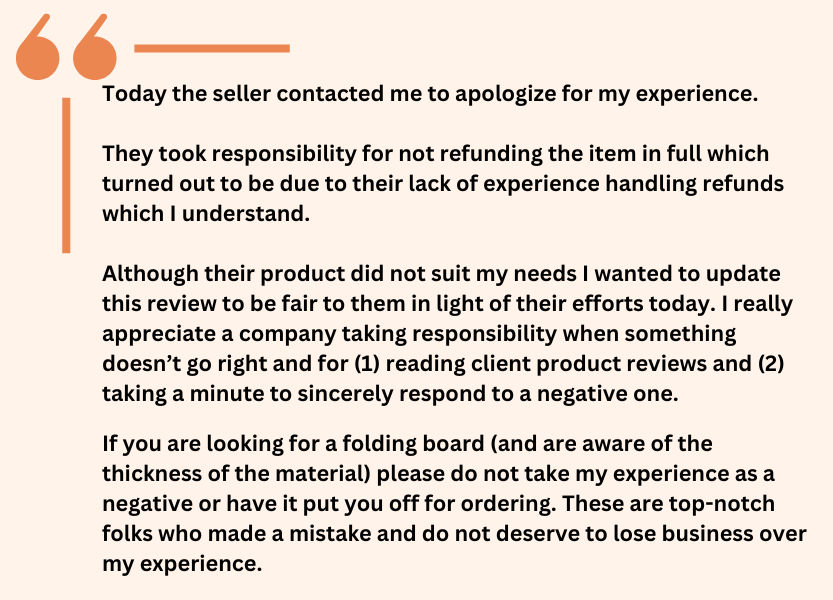
Takeaway: Despite the customer not being satisfied with the product, this member’s proactive approach to customer service transformed a potential 1-star rant into a more neutral “it’s not for me” sentiment. Even though it resulted in a full refund, the value of demonstrating their dedication to customer satisfaction to potential customers is worth the cost.
Amazon prioritizes sales-generating clicks, improving both customer experience and their commission. Monitor and enhance your product’s conversion rate, studying competing products to ensure your performance is at par or better.
According to Amazon’s data, launching a Sponsored Products campaign can provide an average weekly lift of 50% in ordered units in the first year.
- Keywords: Begin with keywords that align with customer intent for your product type. Start with highly relevant, detailed search terms and run broad match modifiers (+) on them.
- Justifying spend: When considering shutting off ads, assess the impact of your ad spend on organic rankings and sales, and on your bottom line. One ECF member found profitability increased after cutting ad spend by 95%. However, testing and optimization are also important.
- Testing: Experimenting with different ad metrics and budget adjustments can help balance profit growth without undercutting organic sales.
One ECF member tested various ad metrics to optimize profitability.
“We’ve had mixed results. It depends on the item and your goal. For one item, we turned off PPC consistently for Friday-Saturday, our profits went up, and our rank has stayed strong. In fact, last week we sold exactly one less unit in those two days as we did the same two-day span the week before when we sold 110 units with PPC. An extra $850 in our pockets.”
Some ECF members take a long-term approach, aiming for campaign break-even to boost organic rankings. This ECF member, who has an aggressive strategy for Amazon PPC campaigns, emphasizes the importance of a long-term outlook.
“Amazon PPC absolutely helps you rank for the keywords you’re bidding on. I’ve tested this over and over.”
Hot tip: Set up the Brand Referral Bonus. You’ll get 10% back on any external traffic you direct to Amazon. This can pay for some of your traffic.
Step 8: Monitoring and Adjusting Your Amazon Listing Optimization Strategy (A/B testing)
Despite following the guide’s optimization steps, conversion rate fluctuations are inevitable. So, continuous improvement requires A/B testing or split testing.
“We’ve seen drastic, like 2 -10% conversion rate improvements from changes, particularly to titles and main images for our clients.”
Split testing or A/B testing on Amazon typically involves experimenting with changes to product content, visuals, and pricing.
It can be quite a manual process. But if you’re an Amazon Brand Registered Seller, use Amazon’s tool: Manage Your Experiments. It allows you to create A/B tests for Titles, A+ Content, Bullet points, and Main Images.
The good news is that setting up an experiment is relatively easy, and one of ECF experts Joshua Rawe lays out the steps below:
Setting Up Your A/B Test
Find “Manage Experiments” in the menu under “Brands”

Choose your Experiment type here:
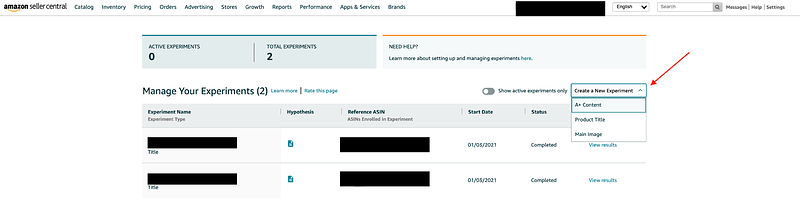
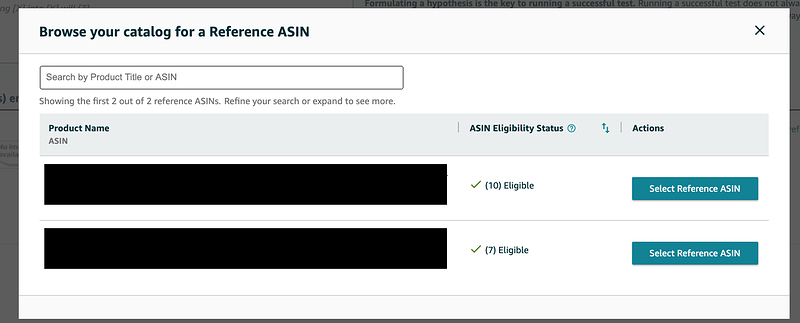
And choose the ASIN you wish to test here:
Defining Your Hypothesis
You’ll have to add a name for your experiment; go for something simple.
Select your duration, four weeks is the minimum, and ten weeks is the maximum.
Then, you need a clear hypothesis to give your results meaning and allow you to take action.
For example, “Adding our brand name to the title will improve conversions,” or “Reducing title length from 250 characters to 100 will improve conversions by reducing noise,” or “Adding XYZ keyword will increase conversions”.
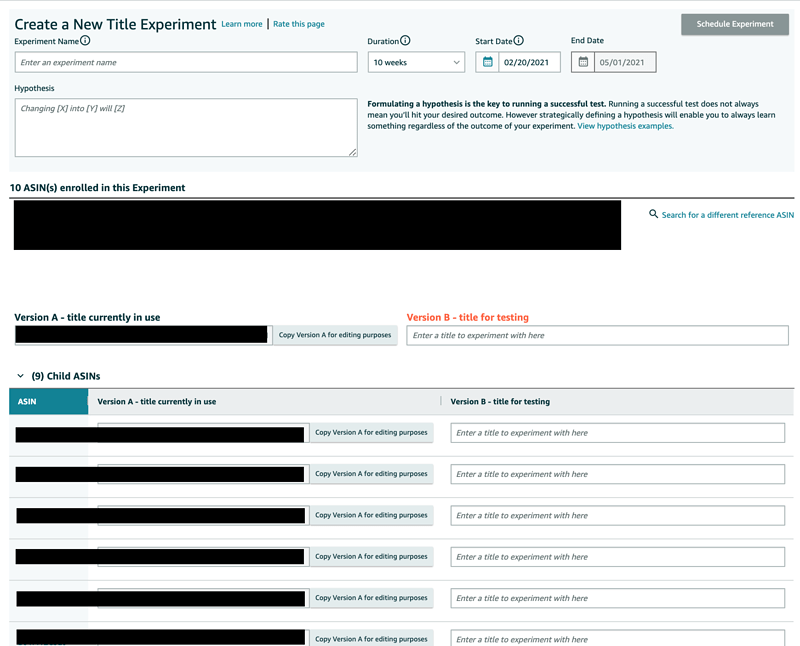
Create your Version B (the hypothesis to be tested)
If your hypothesis is: “Adding our brand name to the title will improve conversions,” then you’ll want to create a Version B title that includes the brand name.
For example:
- Version A (title currently in use): Garlic Press with Idiosyncratic Functionality and Smooth Handle for All Your Garlic Needs
- Version B (title to be tested): Kitchenaid Garlic Press with Idiosyncratic Functionality and Smooth Handle for All Your Garlic Needs
Click Schedule Experiment and a couple more confirmations.
Amazon will now vary the title on your listing between Version A and Version B over the period of testing and provide conversion data on the results.
Then, when you want to interpret results, check out this video:
[embedded content][embedded content]
But remember: A/B testing isn’t a magic cure for underperforming listings.
A successful product detail page requires high-definition images, engaging keyword-rich copy, A+ content, a carousel video, a rating of 4 stars or above, and over 100 reviews. Prioritize these aspects before contemplating A/B testing.
Final Thoughts: Optimization Is A Journey, Not a Destination
Optimization is a continual process, not an endpoint. You’ll encounter challenges like copycats of your Amazon listings and ever-evolving algorithm updates.
But, if you follow the comprehensive steps provided in this guide, you’ll be better prepared to improve your listing’s conversion rate and distinguish your product amid Amazon’s competitive marketplace.
Want access to 3000+ discussions of Amazon-related advice?
Sure, there’s no shortage of Amazon help guides and advice available out there. But wouldn’t you rather deep, nuanced advice explaining what it takes to optimize your Amazon listings and see results?
You’ll find it in the ECF community. You can learn more about the community or apply to join today.
Post by Courtney Goudswaard
Courtney Goudswaard is a freelance writer for eCommerce and related SaaS brands. She approaches her craft in a journalistic setting, delivering evidence-backed, action-packed, and easy-to-understand content that keeps your readers hooked. Connect with her via www.scribblecontent.com or on Twitter @courtig
- SEO Powered Content & PR Distribution. Get Amplified Today.
- PlatoData.Network Vertical Generative Ai. Empower Yourself. Access Here.
- PlatoAiStream. Web3 Intelligence. Knowledge Amplified. Access Here.
- PlatoESG. Automotive / EVs, Carbon, CleanTech, Energy, Environment, Solar, Waste Management. Access Here.
- BlockOffsets. Modernizing Environmental Offset Ownership. Access Here.
- Source: https://www.ecommercefuel.com/amazon-listing-optimization/?utm_source=rss&utm_medium=rss&utm_campaign=amazon-listing-optimization

