In today’s digital world, data is generated by a large number of disparate sources and growing at an exponential rate. Companies are faced with the daunting task of ingesting all this data, cleansing it, and using it to provide outstanding customer experience.
Typically, companies ingest data from multiple sources into their data lake to derive valuable insights from the data. These sources are often related but use different naming conventions, which will prolong cleansing, slowing down the data processing and analytics cycle. This problem particularly impacts companies trying to build accurate, unified customer 360 profiles. There are customer records in this data that are semantic duplicates, that is, they represent the same user entity, but have different labels or values. It’s commonly referred to as a data harmonization or deduplication problem. The underlying schemas were implemented independently and don’t adhere to common keys that can be used for joins to deduplicate records using deterministic techniques. This has led to so-called fuzzy deduplication techniques to address the problem. These techniques utilize various machine learning (ML) based approaches.
In this post, we look at how we can use AWS Glue and the AWS Lake Formation ML transform FindMatches to harmonize (deduplicate) customer data coming from different sources to get a complete customer profile to be able to provide better customer experience. We use Amazon Neptune to visualize the customer data before and after the merge and harmonization.
Overview of solution
In this post, we go through the various steps to apply ML-based fuzzy matching to harmonize customer data across two different datasets for auto and property insurance. These datasets are synthetically generated and represent a common problem for entity records stored in multiple, disparate data sources with their own lineage that appear similar and semantically represent the same entity but don’t have matching keys (or keys that work consistently) for deterministic, rule-based matching. The following diagram shows our solution architecture.

We use an AWS Glue job to transform the auto insurance and property insurance customer source data to create a merged dataset containing fields that are common to both datasets (identifiers) that a human expert (data steward) would use to determine semantic matches. The merged dataset is then used to deduplicate customer records using an AWS Glue ML transform to create a harmonized dataset. We use Neptune to visualize the customer data before and after the merge and harmonization to see how the transform FindMacthes can bring all related customer data together to get a complete customer 360 view.
To demonstrate the solution, we use two separate data sources: one for property insurance customers and another for auto insurance customers, as illustrated in the following diagram.


The data is stored in an Amazon Simple Storage Service (Amazon S3) bucket, labeled as Raw Property and Auto Insurance data in the following architecture diagram. The diagram also describes detailed steps to process the raw insurance data into harmonized insurance data to avoid duplicates and build logical relations with related property and auto insurance data for the same customer.

The workflow includes the following steps:
- Catalog the raw property and auto insurance data, using an AWS Glue crawler, as tables in the AWS Glue Data Catalog.
- Transform raw insurance data into CSV format acceptable to Neptune Bulk Loader, using an AWS Glue extract, transform, and load (ETL) job.
- When the data is in CSV format, use an Amazon SageMaker Jupyter notebook to run a PySpark script to load the raw data into Neptune and visualize it in a Jupyter notebook.
- Run an AWS Glue ETL job to merge the raw property and auto insurance data into one dataset and catalog the merged dataset. This dataset will have duplicates and no relations are built between the auto and property insurance data.
- Create and train an AWS Glue ML transform to harmonize the merged data to remove duplicates and build relations between the related data.
- Run the AWS Glue ML transform job. The job also catalogs the harmonized data in the Data Catalog and transforms the harmonized insurance data into CSV format acceptable to Neptune Bulk Loader.
- When the data is in CSV format, use a Jupyter notebook to run a PySpark script to load the harmonized data into Neptune and visualize it in a Jupyter notebook.
Prerequisites
To follow along with this walkthrough, you must have an AWS account. Your account should have permission to provision and run an AWS CloudFormation script to deploy the AWS services mentioned in the architecture diagram of the solution.
Provision required resources using AWS CloudFormation:
To launch the CloudFormation stack that configures the required resources for this solution in your AWS account, complete the following steps:
- Log in to your AWS account and choose Launch Stack:
![]()
- Follow the prompts on the AWS CloudFormation console to create the stack.
- When the launch is complete, navigate to the Outputs tab of the launched stack and note all the key-value pairs of the resources provisioned by the stack.

Verify the raw data and script files S3 bucket
On the CloudFormation stack’s Outputs tab, choose the value for S3BucketName. The S3 bucket name should be cloud360-s3bucketstack-xxxxxxxxxxxxxxxxxxxxxxxx and should contain folders similar to the following screenshot.

The following are some important folders:
- auto_property_inputs – Contains raw auto and property data
- merged_auto_property – Contains the merged data for auto and property insurance
- output – Contains the delimited files (separate subdirectories)
Catalog the raw data
To help walk through the solution, the CloudFormation stack created and ran an AWS Glue crawler to catalog the property and auto insurance data. To learn more about creating and running AWS Glue crawlers, refer to Working with crawlers on the AWS Glue console. You should see the following tables created by the crawler in the c360_workshop_db AWS Glue database:
- source_auto_address – Contains address data of customers with auto insurance
- source_auto_customer – Contains auto insurance details of customers
- source_auto_vehicles – Contains vehicle details of customers
- source_property_addresses – Contains address data of customers with property insurance
- source_property_customers – Contains property insurance details of customers
You can review the data using Amazon Athena. For more information about using Athena to query an AWS Glue table, refer to Running SQL queries using Amazon Athena. For example, you can run the following SQL query:
Convert the raw data into CSV files for Neptune
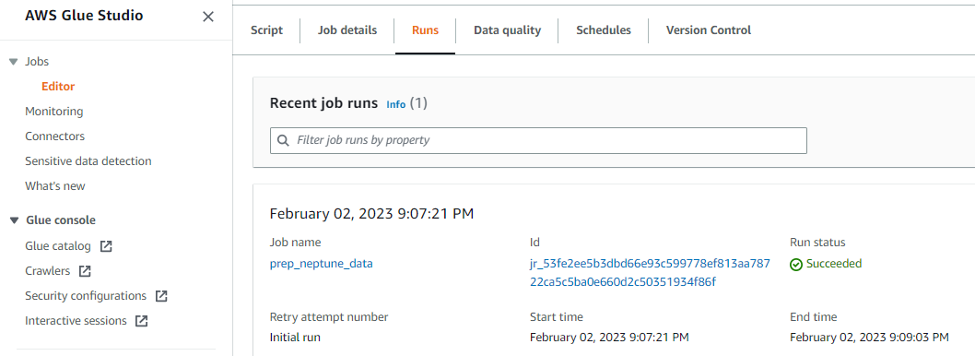
The CloudFormation stack created and ran the AWS Glue ETL job prep_neptune_data to convert the raw data into CSV format acceptable to Neptune Bulk Loader. To learn more about building an AWS Glue ETL job using AWS Glue Studio and to review the job created for this solution, refer to Creating ETL jobs with AWS Glue Studio.
Verify the completion of job run by navigating to the Runs tab and checking the status of most recent run.
Verify the CSV files created by the AWS Glue job in the S3 bucket under the output folder.

Load and visualize the raw data in Neptune
This section uses SageMaker Jupyter notebooks to load, query, explore, and visualize the raw property and auto insurance data in Neptune. Jupyter notebooks are web-based interactive platforms. We use Python scripts to analyze the data in a Jupyter notebook. A Jupyter notebook with the required Python scripts has already been provisioned by the CloudFormation stack.
- Start Jupyter Notebook.
- Choose the
Neptunefolder on the Files tab.

- Under the
Customer360folder, open the notebookexplore_raw_insurance_data.ipynb.

- Run Steps 1–5 in the notebook to analyze and visualize the raw insurance data.
The rest of the instructions are inside the notebook itself. The following is a summary of the tasks for each step in the notebook:
- Step 1: Retrieve Config – Run this cell to run the commands to connect to Neptune for Bulk Loader.
- Step 2: Load Source Auto Data – Load the auto insurance data into Neptune as vertices and edges.
- Step 3: Load Source Property Data – Load the property insurance data into Neptune as vertices and edges.
- Step 4: UI Configuration – This block sets up the UI config and provides UI hints.
- Step 5: Explore entire graph – The first block builds and displays a graph for all customers with more than four coverages of auto or property insurance policies. The second block displays the graph for four different records for a customer with the name
James.
These are all records for the same customer, but because they’re not linked in any way, they appear as different customer records. The AWS Glue FindMatches ML transform job will identify these records as customer James, and the records provide complete visibility on all policies owned by James. The Neptune graph looks like the following example. The vertex covers represents the coverage of auto or property insurance by the owner (James in this case) and the vertex locatedAt represents the address of the property or vehicle that is covered by the owner’s insurance.

Merge the raw data and crawl the merged dataset
The CloudFormation stack created and ran the AWS Glue ETL job merge_auto_property to merge the raw property and auto insurance data into one dataset and catalog the resultant dataset in the Data Catalog. The AWS Glue ETL job does the following transforms on the raw data and merges the transformed data into one dataset:
- Changes the following fields on the source table
source_auto_customer:
-
- Changes
policyidtoidand data type to string - Changes
fnametofirst_name - Changes
lnametolast_name - Changes
worktocompany - Changes
dobtodate_of_birth - Changes
phonetohome_phone - Drops the fields
birthdate,priority,policysince, andcreateddate
- Changes
- Changes the following fields on the
source_property_customers:
-
- Changes
customer_idtoidand data type to string - Changes
socialtossn - Drops the fields
job,email,industry,city,state,zipcode,netnew,sales_rounded,sales_decimal,priority, andindustry2
- Changes
- After converting the unique ID field in each table to string type and renaming it to
id, the AWS Glue job appends the suffix-autoto all id fields in thesource_auto_customertable and the suffix-propertyto allidfields in thesource_propery_customertable before copying all the data from both tables into themerged_auto_propertytable.
Verify the new table created by the job in the Data Catalog and review the merged dataset using Athena using below Athena SQL query:
For more information about how to review the data in the merged_auto_property table, refer to Running SQL queries using Amazon Athena.
Create, teach, and tune the Lake Formation ML transform
The merged AWS Glue job created a Data Catalog called merged_auto_property. Preview the table in Athena Query Editor and download the dataset as a CSV from the Athena console. You can open the CSV file for quick comparison of duplicates.

The rows with IDs 11376-property and 11377-property are mostly same except for the last two digits of their SSN, but these are mostly human errors. The fuzzy matches are easy to spot by a human expert or data steward with domain knowledge of how this data was generated, cleansed, and processed in the various source systems. Although a human expert can identify those duplicates on a small dataset, it becomes tedious when dealing with thousands of records. The AWS Glue ML transform builds on this intuition and provides an easy-to-use ML-based algorithm to automatically apply this approach to large datasets efficiently.
Create the FindMatches ML transform
- On the AWS Glue console, expand Data Integration and ETL in the navigation pane.
- Under Data classification tools, choose Record Matching.
This will open the ML transforms page.
- Choose Create transform.
- For Name, enter
c360-ml-transform. - For Existing IAM role, choose
GlueServiceRoleLab. - For Worker type, choose G.2X (Recommended).
- For Number of workers, enter
10. - For Glue version, choose as Spark 2.4 (Glue Version 2.0).
- Keep the other values as default and choose Next.

- For Database, choose
c360_workshop_db. - For Table, choose
merged_auto_property. - For Primary key, select
id. - Choose Next.

- In the Choose tuning options section, you can tune performance and cost metrics available for the ML transform. We stay with the default trade-offs for a balanced approach.
We have specified these values to achieve balanced results. If needed, you can adjust these values later by selecting the transform and using the Tune menu.
- Review the values and choose Create ML transform.

The ML transform is now created with the status Needs training.
Teach the transform to identify the duplicates
In this step, we teach the transform by providing labeled examples of matching and non-matching records. You can create your labeling set yourself or allow AWS Glue to generate the labeling set based on heuristics. AWS Glue extracts records from your source data and suggests potential matching records. The file will contain approximately 100 data samples for you to work with.
- On the AWS Glue console, navigate to the ML transforms page.
- Select the transform
c360-ml-transformand choose Train model.

- Select I have labels and choose Browse S3 to upload labels from Amazon S3.

Two labeled files have been created for this example. We upload these files to teach the ML transform.
- Navigate to the folder
labelin your S3 bucket, select the labeled file (Label-1-iteration.csv), and choose Choose. And Click “Upload labeling file from S3”.
- A green banner appears for successful uploads.

- Upload another label file (
Label-2-iteration.csv) and select Append to my existing labels. - Wait for the successful upload, then choose Next.

- Review the details in the Estimate quality metrics section and choose Close.

Verify that the ML transform status is Ready for use. Note that the label count is 200 because we successfully uploaded two labeled files to teach the transform. Now we can use it in an AWS Glue ETL job for fuzzy matching of the full dataset.

Before proceeding to the next steps, note the transform ID (tfm-xxxxxxx) for the created ML transform.
Harmonize the data, catalog the harmonized data, and convert the data into CSV files for Neptune
In this step, we run an AWS Glue ML transform job to find matches in the merged data. The job also catalogs the harmonized dataset in the Data Catalog and converts the merged [A1] dataset into CSV files for Neptune to show the relations in the matched records.
- On the AWS Glue console, choose Jobs in the navigation pane.
- Choose the job
perform_ml_dedup.

- On the job details page, expand Additional properties.
- Under Job parameters, enter the transform ID you saved earlier and save the settings.

-
- Choose Run and monitor the job status for completion.

- Run the following query in Athena to review the data in the new table
ml_matched_auto_property, created and cataloged by the AWS Glue job, and observe the results:


 Nishchai JM is an Analytics Specialist Solutions Architect at Amazon Web services. He specializes in building Big-data applications and help customer to modernize their applications on Cloud. He thinks Data is new oil and spends most of his time in deriving insights out of the Data.
 Varad Ram is Senior Solutions Architect in Amazon Web Services. He likes to help customers adopt to cloud technologies and is particularly interested in artificial intelligence. He believes deep learning will power future technology growth. In his spare time, he like to be outdoor with his daughter and son.
 Narendra Gupta is a Specialist Solutions Architect at AWS, helping customers on their cloud journey with a focus on AWS analytics services. Outside of work, Narendra enjoys learning new technologies, watching movies, and visiting new places
 Arun A K is a Big Data Solutions Architect with AWS. He works with customers to provide architectural guidance for running analytics solutions on the cloud. In his free time, Arun loves to enjoy quality time with his family
- SEO Powered Content & PR Distribution. Get Amplified Today.
- PlatoData.Network Vertical Generative Ai. Empower Yourself. Access Here.
- PlatoAiStream. Web3 Intelligence. Knowledge Amplified. Access Here.
- PlatoESG. Automotive / EVs, Carbon, CleanTech, Energy, Environment, Solar, Waste Management. Access Here.
- BlockOffsets. Modernizing Environmental Offset Ownership. Access Here.
- Source: https://aws.amazon.com/blogs/big-data/harmonize-data-using-aws-glue-and-aws-lake-formation-findmatches-ml-to-build-a-customer-360-view/

