In the past, people would painstakingly carve images onto surfaces such as walls, ceilings, or even doors in order to create photos. Wow, we’ve really made some progress!
Thanks to recent technological developments, it is now feasible to turn a snapshot into a work of art. You can transform a flat snapshot into a three-dimensional object by image 3D printing it. We achieve this by dissecting its colour components, which include saturation, hue, and chroma percentage.
The technology and motivation are there for anyone to do image 3D printing at home.
Why would you want to 3D print your photo?
An original and easy approach to keep a memory alive is by 3D printing a photo. When you’re at a loss for what to get a loved one for a birthday or other special event, think considering 3D printing. Who among us wouldn’t be interested in a custom-made, three-dimensional replica of our favourite photo?
A human being is not necessary for the existence of a 3D printed image or model. Consider having a 3D print of your beloved pet, a masterpiece, or even your young child’s first drawings made! With 3D printing, even the most ordinary family portrait may take on a whole new dimension. All of the 3D photos are incredibly interesting and beautiful.
The idea of a keychain featuring a miniature lithophane of someone’s portrait is a unique way to add a personal touch to commonplace items. 3D printing is also something that anyone can do for fun or even as a side hustle. Personality, taste, drive, and originality are the only determinants.
What is the process for making a 3D model from a single image?
To start, your model’s accuracy is directly proportional to the quantity and quality of your images; a higher resolution and more photos equals a more detailed 3D model. Anyone can make a decent 3D model and print it out; experienced 3D artists and designers aren’t necessary. All you need is a little bit of 3D expertise and some time.
Discover how 3D printers can bring your most imaginative ideas to reality. With 3D printing technology, you can make a model or avatar out of whatever you can imagine. You can even use pictures from video games to make a CAD model. The sky is the limit. The number of photos you’ve used to create your 3D model determines how we divide up the solutions.
You might be surprised to learn that all it takes to make a 3D model is one image.
Don’t get your hopes up just yet; it is feasible to make a 3D model with just images, but you should be aware that there will be restrictions on the options and level of detail you can include.
A single photo won’t be enough to produce a high-quality 360-degree panorama of your house or pet, for instance. Having a lot of photographs helps to generate a comprehensive model and an impressive result when using a printing procedure to acquire the desired form.
Perhaps in the not-too-distant future of 3D printing it will be able to build an ideal CAD model using just a single picture, but at the moment it’s not feasible.
Even yet, given the current state of additive manufacturing technology, you may still make a fascinating 3D printed item with this choice alone.
Material selection is key for success
1. A Digital Camera
Obviously, a regular old camera won’t cut it; you’ll need digital files that you can transfer to your computer. A digital single-lens reflex camera, with its three times greater pixel resolution and more customisable settings, will certainly produce a more detailed result than your smartphone’s camera.
If you want to get the most out of the light and your subject’s outline, this is the camera for you. For optimal results, use a low ISO level to reduce noise to a minimum. Its primary use is in assisting you in achieving a narrow aperture and shallow depth of field. By doing so, you can make the subject outline more precise and hence easier for the software to understand.
Keep in mind that the setup can be somewhat more involved if you plan on photographing a subject while they are in motion. Like in the illustration, you’ll require a triggering mechanism for many digital cameras, ranging from fifty to one hundred.
2. A Lighting Device
An additional light source is essential for better shooting, even if you manage to adjust your camera’s settings to make them more light-sensitive. Putting in a light will allow you to achieve both a low noise level and a high light sensitivity. You may get faster shutter speeds and less grain if you lowered your ISO.
Whether you’re shooting in natural or artificial light, it’s important to minimise shadows that could distort the subject’s form.
3. A Tripod
A steady base, such as a tripod, to keep both the subject and the camera steady. There will be less noise and higher clarity in the images. Pictures will be more flat and detailed.
How to transform a 2D picture into a 3D model using a software?
1. Making use of software for 3D modelling
For making 3D models out of 2D picture SelfCAD is the best software. It comes with image to 3D model tool that you can use to turn images to 3D models. It is also easy to use and you don’t need to have previous experience in 3D modeling to use it. Autodesk 3DS Max, Blender, and Maya are just a few of the many software programmes available for making 3D models.
These applications let you import a picture and then build a 3D model using a variety of tools and approaches.
Various tools are at your disposal to help you mould, sculpt, and polish the model while you add features and details as you see fit.
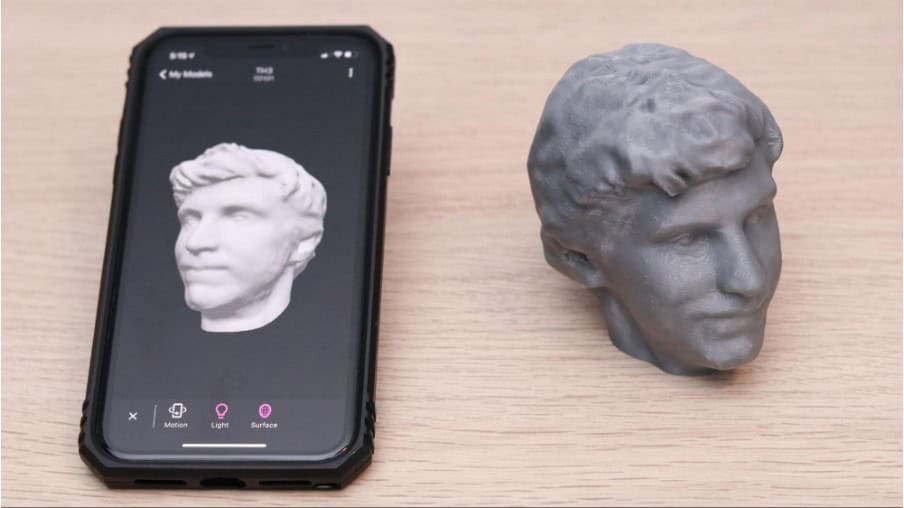
2. With the use of a 3D scanning programme
One more way to turn a 2D picture into a 3D model is to utilise a 3D scanning programme. These applications allow you to take a 3D picture of anything or any scene using the camera on your mobile device.
After that, you have two options: either utilise the scan as a starting point for a 3D model or import it into a 3D modelling programme.
3. With the help of photogrammetry software
Using a sequence of two-dimensional pictures, photogrammetry can build a three-dimensional model. Tools like RealityCapture and Agisoft Metashape use photogrammetry to transform 2D photos into 3D models.
The first step in using photogrammetry software is to capture a number of images of the subject from various perspectives. The software will utilise the photos to generate a three-dimensional model by analysing the shapes and details that overlap in the images.
By describing your desired outcome, the new AI generation tools will draw inspiration from AI art to generate an entirely original design. This, however, is clearly reserved for more experienced designers.
Printing your 3D Model
The process of printing your 3D model is as follows:
1. Slicing Your Model
Transform your model into printer instructions after you’ve discovered a suitable STL file. Printing instructions vary depending on the material and printer. Either a fast print with low quality or an extra high-quality print are available to you.
Starting at a very low temperature could be necessary to prevent filament burning when working with fresh material. This is why cutting your model into smaller pieces is usually the way to go. Known as G-code, these are the instructions that your printer follows.
The G-code format is similar to a recipe in that it consists of a series of directives. Among the many variables included are the current velocity, direction, temperature, and flow rate. Once you have the G-code for the printer and the model, saving the STL file is unnecessary.
2. Saving G-code into the SD Card
Storing the G-code on an SD card is the quickest and easiest way to print. Most printers that can take SD cards also have a display and some controls. Once you’ve found your G-code file, click the print button. Set up the printer in accordance with the manufacturer’s instructions before inserting the plastic filament.
3. Install the printer’s cable onto your computer
Use any slicing tool you like when you hook up a 3D printer to a computer via USB. While this method produces good results, it does require that your computer be on and linked to the printer at all times.
At this point, you ought to be able to hear your printer making its first printout.
Final Verdict
The process of turning a 2D photograph into a 3D model, regardless of the approach you take, may be laborious and detail-oriented. Nevertheless, it is possible to realise your concepts in 3D with precision and aesthetic appeal by employing the appropriate tools and techniques.
Image 3D Printing article and permission to publish here provided by Jason Momoa. Originally written for Supply Chain Game Changer and published on June 11, 2024.
Cover image provided by Jason Momoa.
- SEO Powered Content & PR Distribution. Get Amplified Today.
- PlatoData.Network Vertical Generative Ai. Empower Yourself. Access Here.
- PlatoAiStream. Web3 Intelligence. Knowledge Amplified. Access Here.
- PlatoESG. Carbon, CleanTech, Energy, Environment, Solar, Waste Management. Access Here.
- PlatoHealth. Biotech and Clinical Trials Intelligence. Access Here.
- Source: https://supplychaingamechanger.com/image-3d-printing-what-you-need-to-know/

