You are locked up high in the Divination Tower in the Magic DLC for Escape Simulator. Let me walk you through how to escape step by step. At the end, I’ll also show you the locations for the hidden Tokens!
Recommended Videos
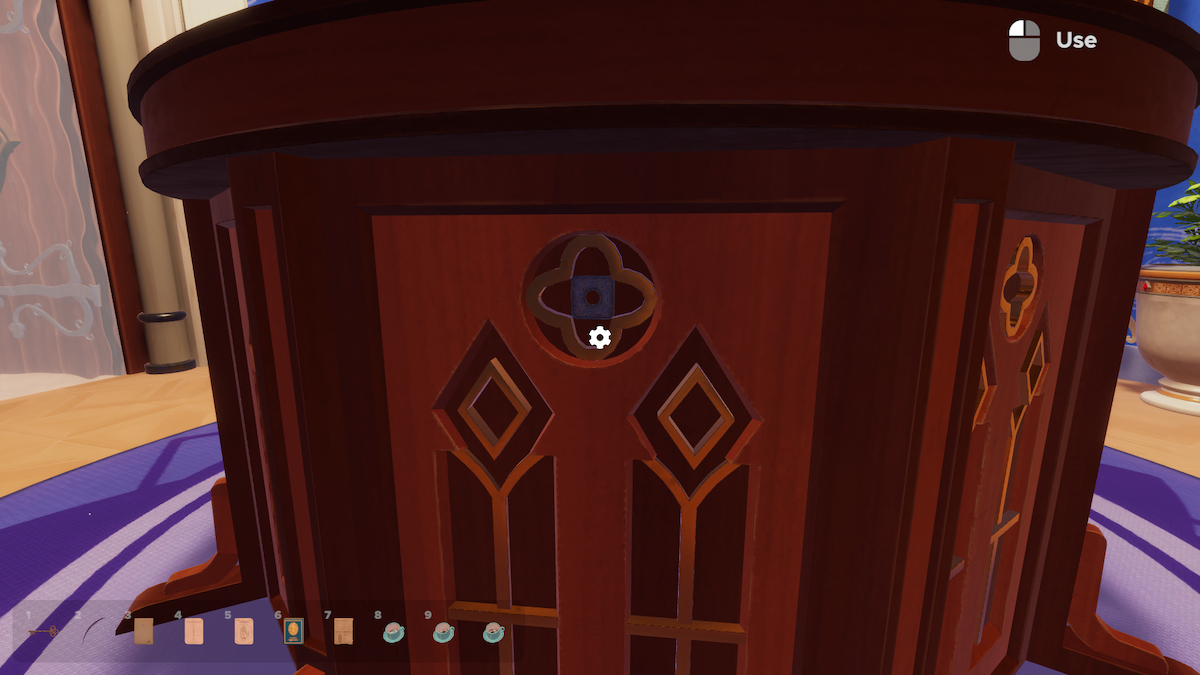
Activate the Teleporter
Before we do anything, let’s activate the Teleporter that will link the tower you’re in with the second tower to travel seamless for the future puzzles.
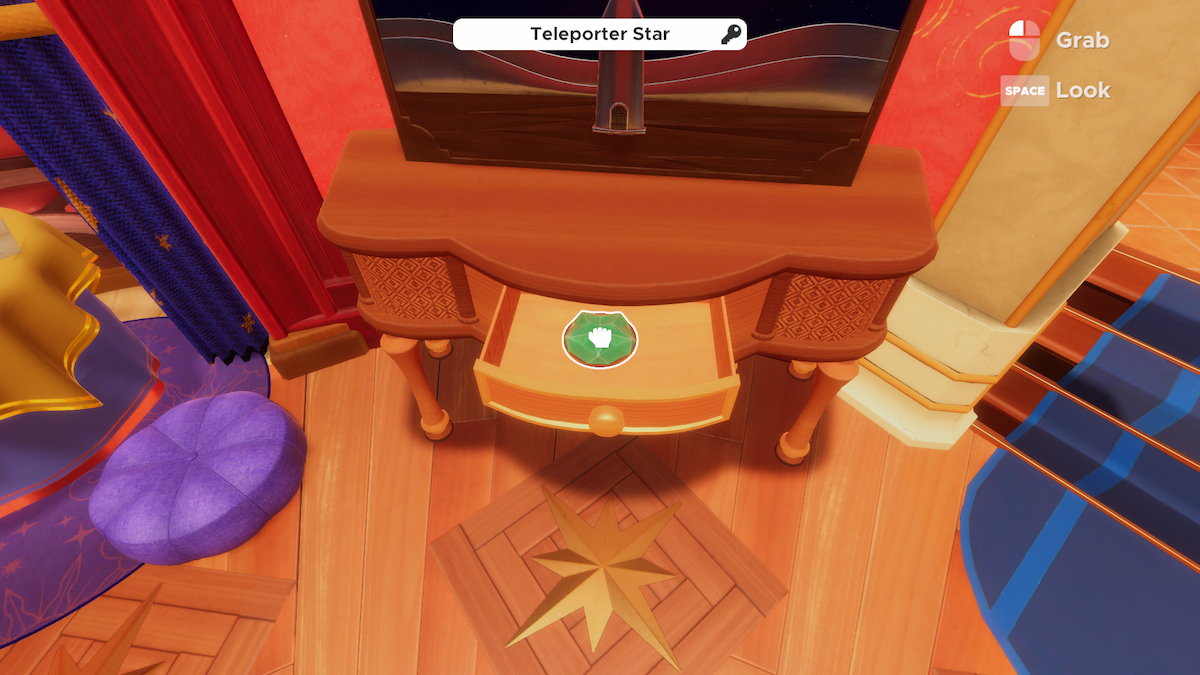
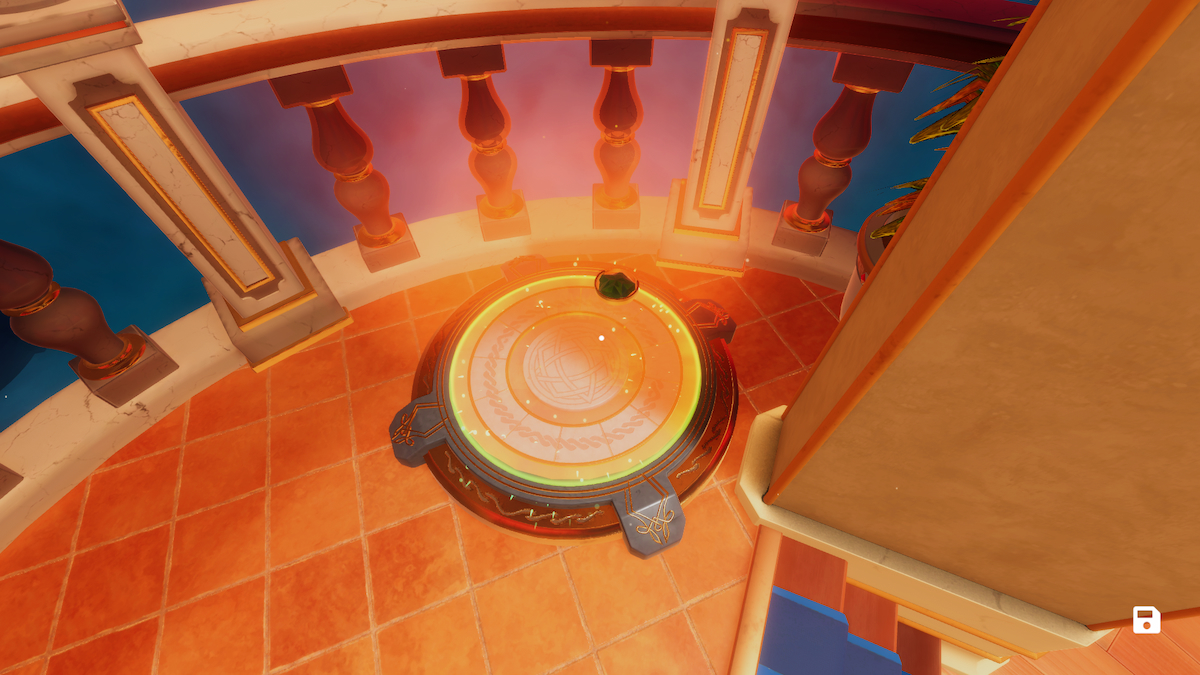
On the balcony of the first tower is a device. We need the Teleporter Star to activate it. This can be found in the draw under the giant book.
Grab the Teleporter Star and place it in the teleporter to activate it. Now for later puzzles, our flow won’t be interrupted.
The first puzzles we’re going to solve will mostly concern the first tower as we try to find three Starpins that we’ll need for the puzzle after. The first two are simple, but to find the third will require a lot of other puzzling. Let’s begin!
Starpin Puzzle 1 – The Globes
The simplest of all three Starpin Puzzles is the one that concerns the Globes dotted around the first tower. If you look at the central column, there is a side that hosts three dials, and above each one, a different Globe.
You can find these Globes on the three tables around the room. The bottoms of the Globes match up to those above the dials. You need to orientate yourself in a way to see the sigils each Globe is showing, and then rotate the respective dials to their sigils.


The combination on the wall should look like this before you press the button:
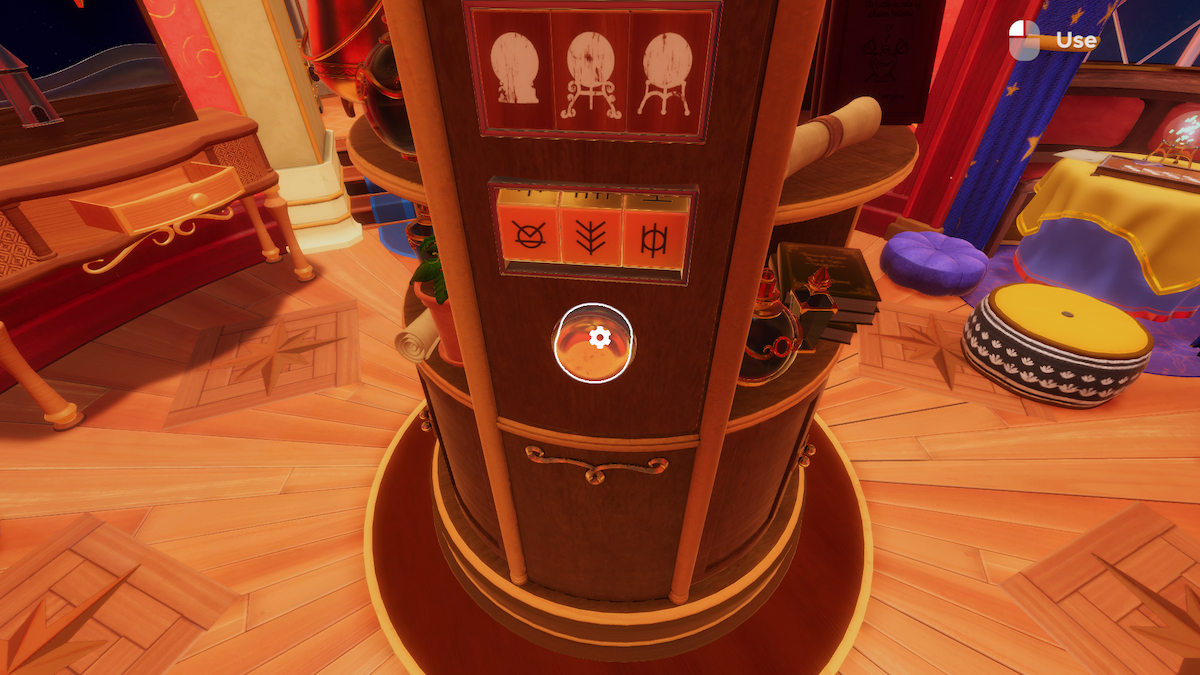
The wall will dissolve, revealing the first Starpin. On to the next.
Starpin Puzzle 2 – The Tea Cups
This next puzzle is a little more complicated, but easy once understood. On the three tables you will find three Tea Cups. Pick them all up.
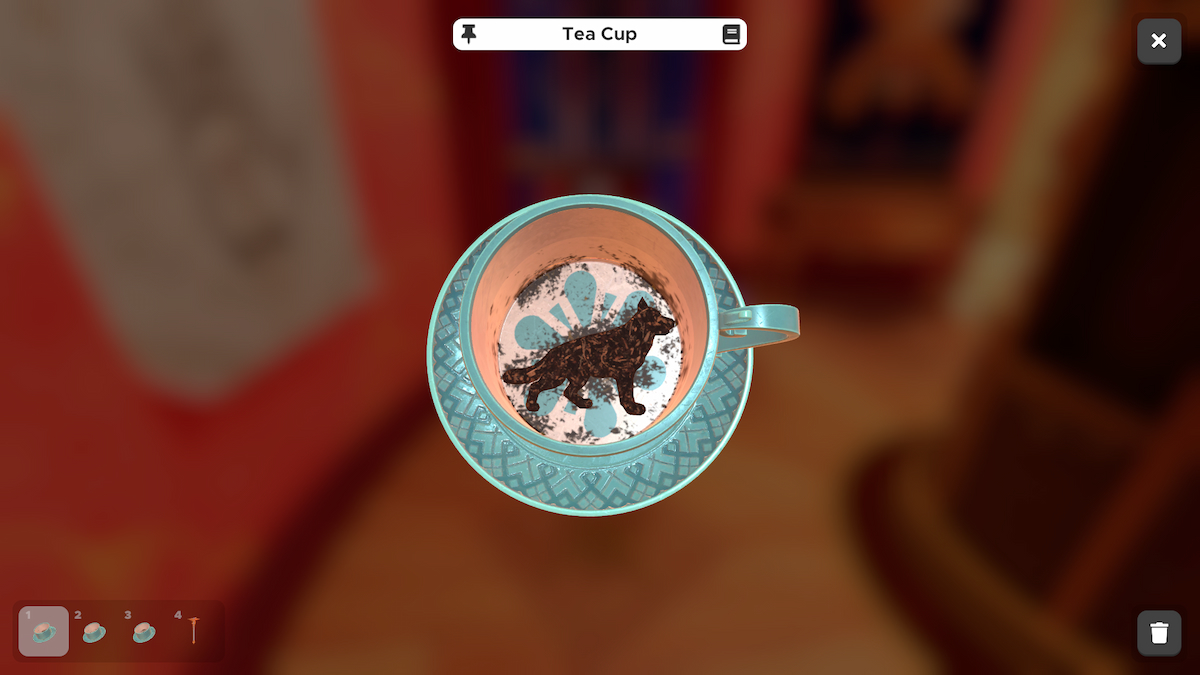
These Tea Cups all display an animal inside – a wolf, a raven, and an octopus. Also on a table will you find a ‘Deciphering Animal Runes’ note. Pick that up, too.
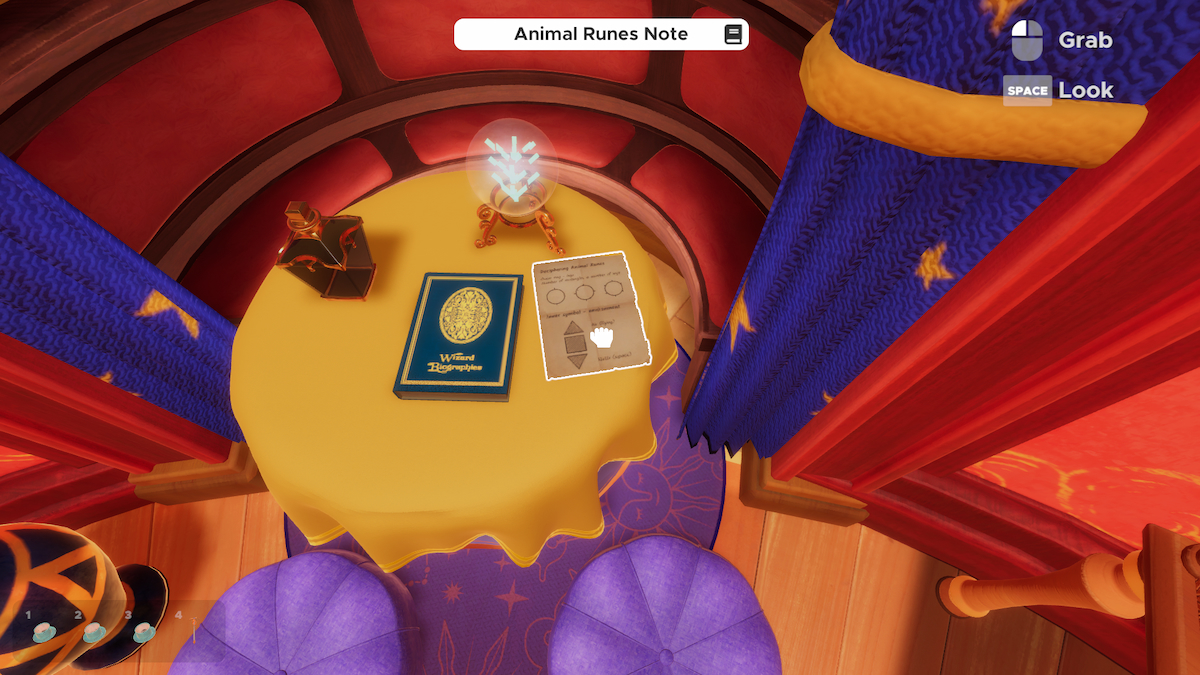
This note tell us how to transform an animal into a rune. The outer ring details the legs of the creature through rectangles, and the symbol in the middle details its habitat.
If you go to the central column again, you will find a wall with three suns and three dials with these runes.
At the bottom of the Tea Cups, under the animals, are sun signs. We must rotate the dials to match the animal rune to the sun that the animal is on top of in the Tea Cups. See below for the solution.
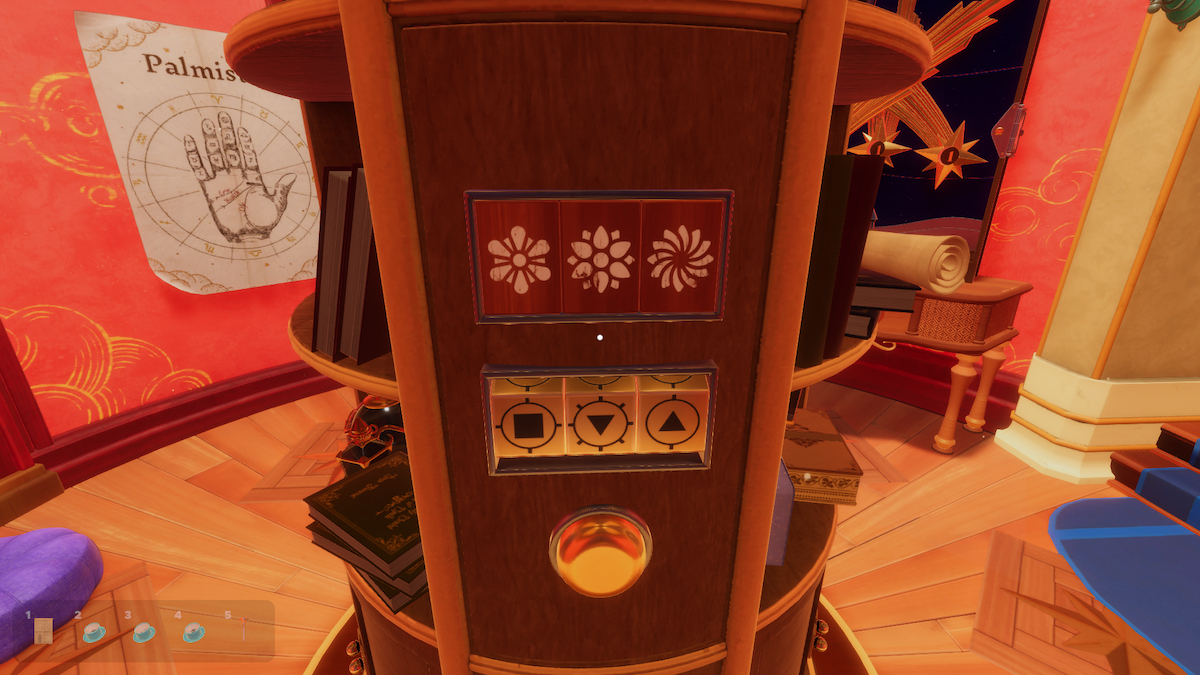
The Wolf is a land creature with four legs, so the circle has four rectangles that surrounds a square. This logic is followed for the other dials.
Press the button to dissolve that wall and find the second Starpin. On to the final one.
Starpin Puzzle 3 – The Tarot Cards
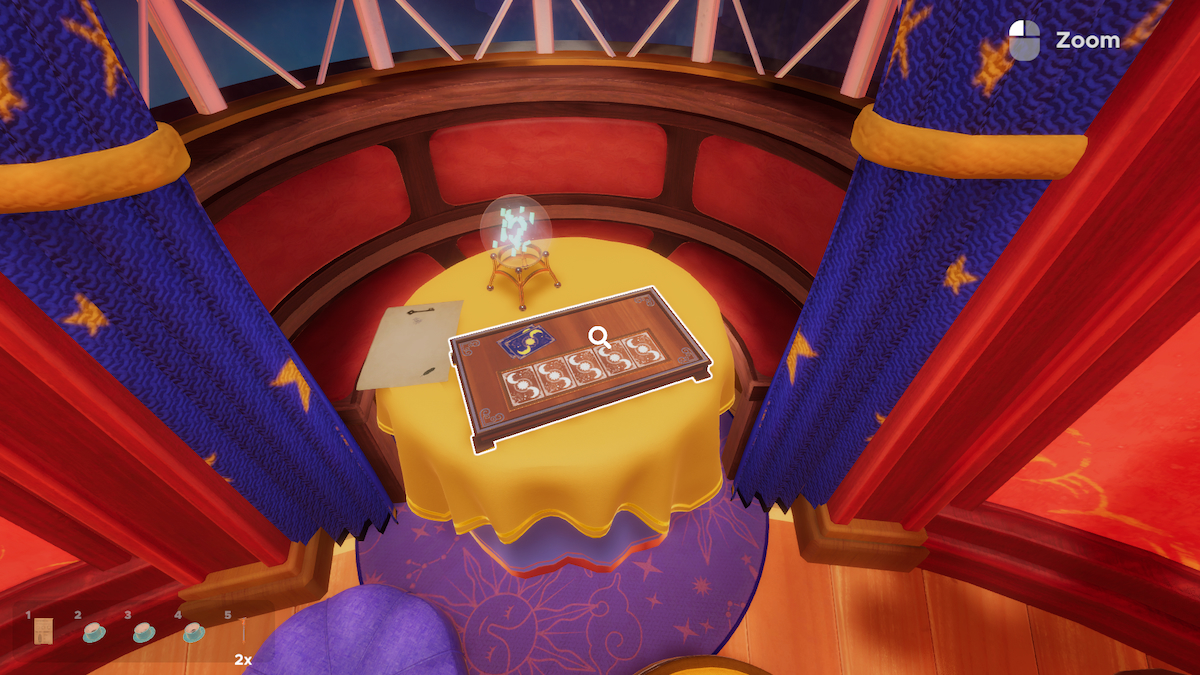
This Starpin puzzle is a little more complicated. On a table in the first tower is a stand with five slots for five Tarot Cards. There are two already on the stand, but we need three more.
The other three Tarot Cards are all in the locked chest on the balcony of the first tower. The tag for this lock has four shapes on it. To find this solution, we will need to solve another puzzle in the second tower.
Palm reading Fergus Grimm
Pick up the Wizard Biographies book on a table in the first tower – we’ll need it.
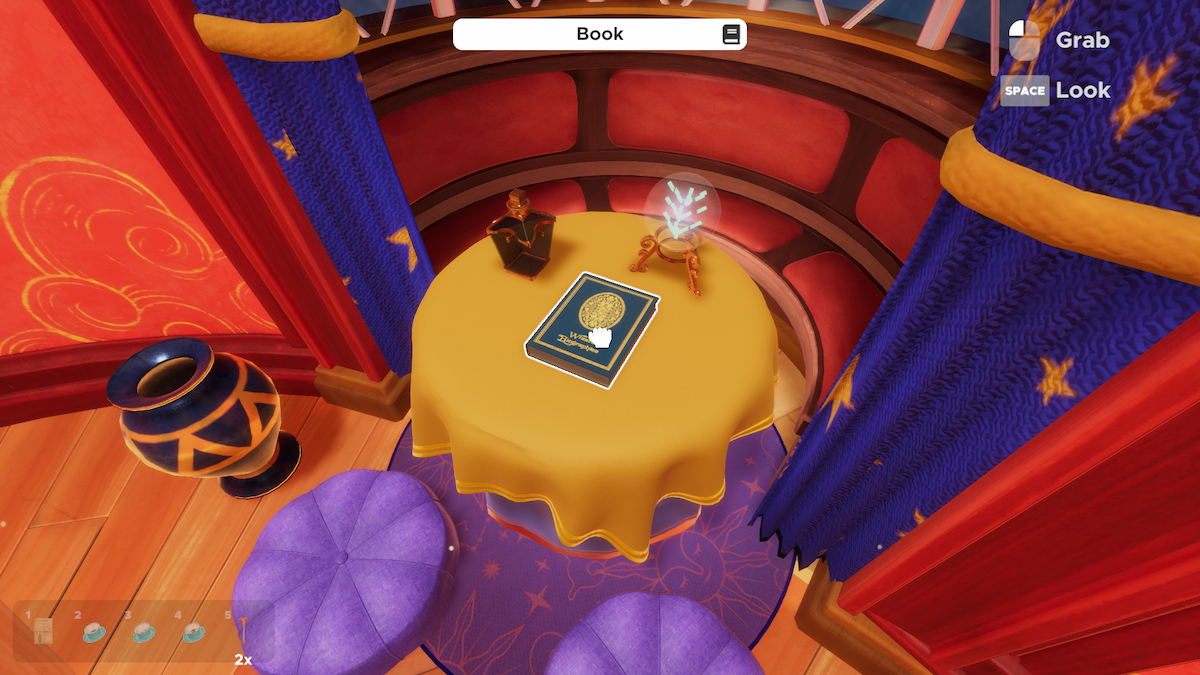
Open this book in your inventory and pin it. Also, grab the Palmistry Poster off the wall and also pin that in your inventory too. You’ll need to see both of these items to solve the coming puzzle.
Use the teleporter to travel to the balcony of the second tower. You can have a look around if you’d like, but all we need is the giant palm with Fergus Grimm inscribed upon it that’s on the balcony.
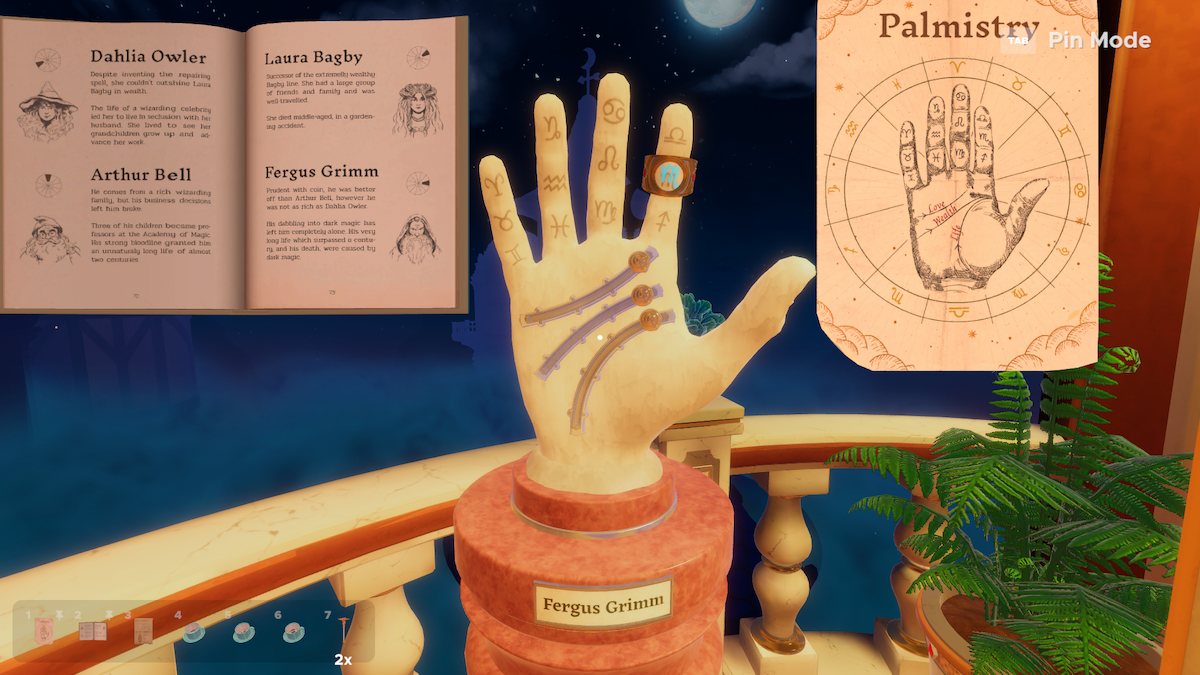
We need to set this palm using Fergus Grimm’s biography. There are four sliders on the palm, and thanks to the poster, we know that they stand for Love, Health, and Life. We need to rank Grimm against the three other Wizards to set the sliders corrently.
Reading his biography, we know that he was alone. We can set the first slider all the way to the left. He was the loneliest out of the other wizards.
We also know that he was richer than Arthur Bell, but poorer than Dahlia Owler, who in turn was poorer than Laura Bagby, making Brimm the second poorest of all the wizards. So we’ll set the second slider to the middle left position.
Finally, we know that he lived for just over a century. Arthur Bell lived for almost two centuries, and the other two wizards didn’t last one. We will set the final slider to the middle right position.
Finally, we must set the ring to the correct finger position. Above Fergus Grimm’s head in the book, there is a dial that points to the right. We can match that circular arc with the poster, finding a sigil. Take the ring off of the finger and place it at the top of the middle finger.
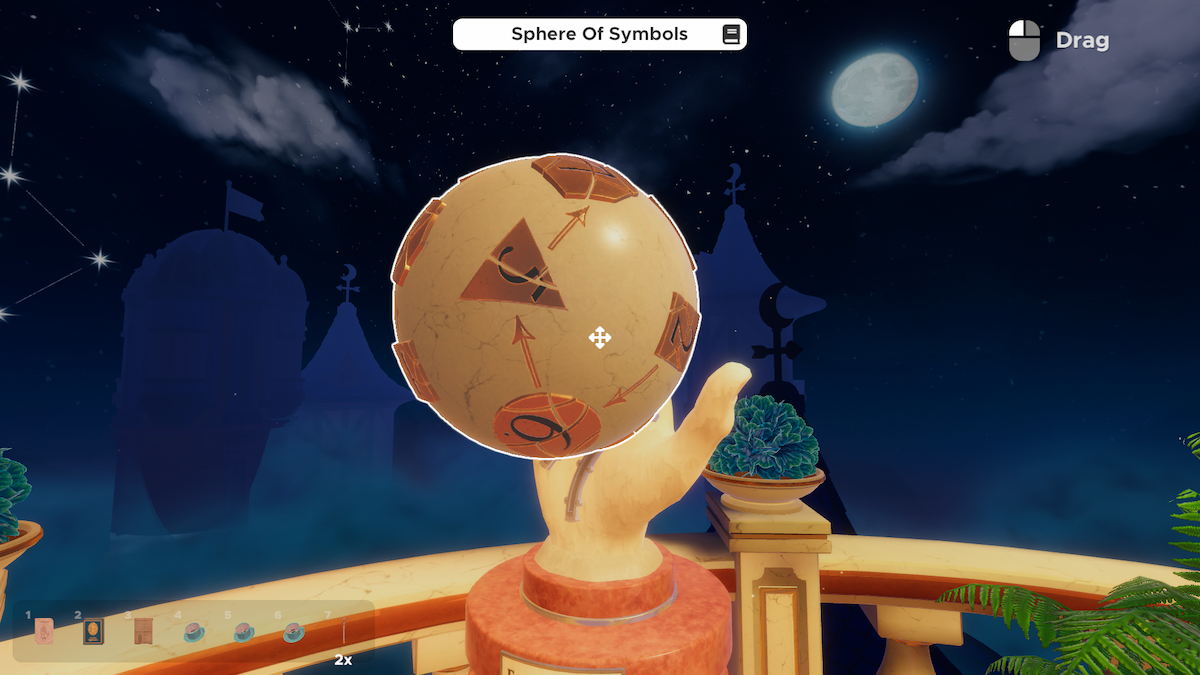
Upon doing this, the Sphere of Symbols will immediately materialize.
The Sphere of Symbols
Finally, we can use this Sphere of Symbols to crack the code for the chest. The tag had four shapes in this order: a square, a circle, a hexagon, and then a triangle.
The Sphere os Symbols has four patterns of shapes and numbers. We need to find that row of shapes and memorize the numbers they displayed.
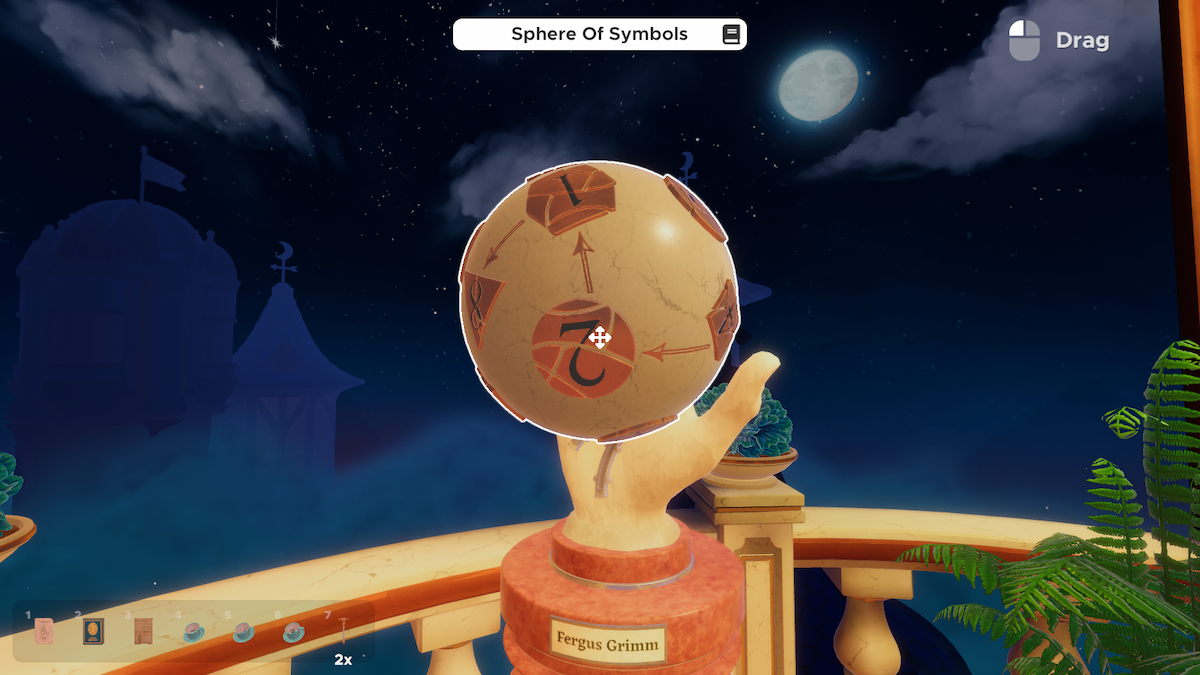
We will find the number sequence of 4218.
Upon putting that number combination into the lock of the chest on the first balcony, we’ll unlock the chest, revealing three Tarot Cards.
Solving the Tarot Cards
With all five Tarot Cards now in our possession, we need to place them all in the correct order on the Tarot Stand. They each have a picture on them, so keep placing and swapping them until you find the following picture:
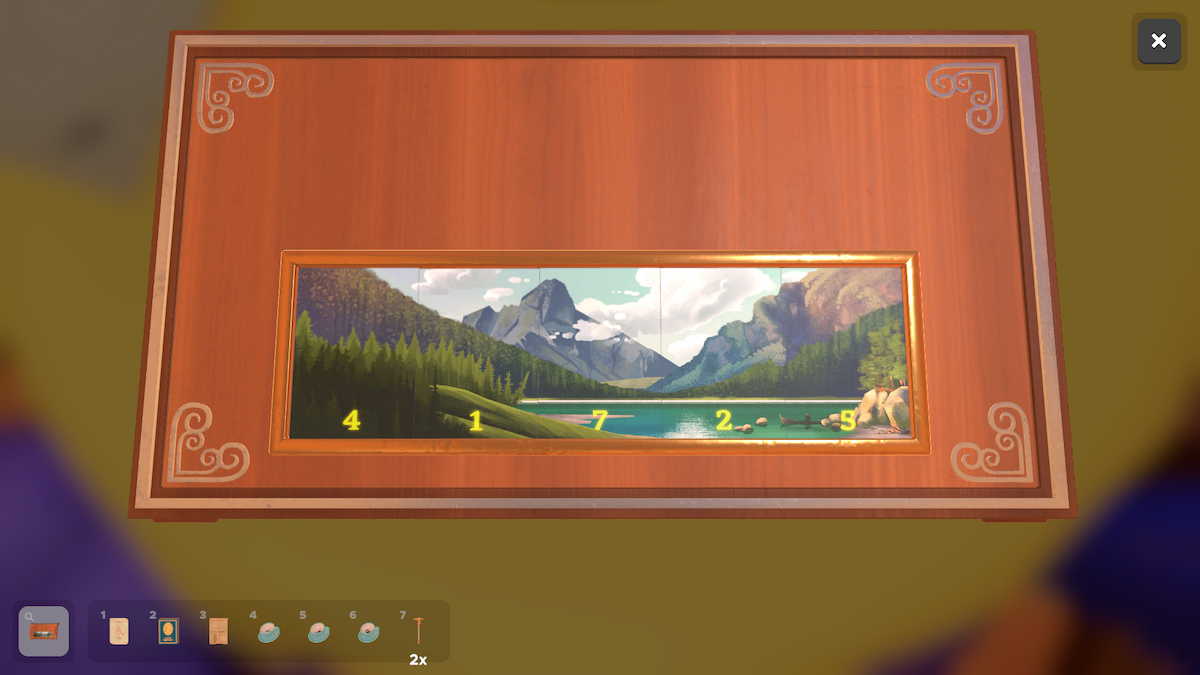
Upon doing so, you’ll reveal a number sequence. Find the final set of dials on the column in the centre of the room. Input the code 41725 to reveal the final Starpin.
Related: Escape Simulator Magic Shop Walkthrough & Token locations (Magic DLC)
The Constellations Puzzle
With all three Starpins, we can head over to the second tower. To the left is a large grid, with two glowing Starpin Connectors already in it. Using those connectors and the three Starpins, we will need to match the three constellations hovering in the sky outside.
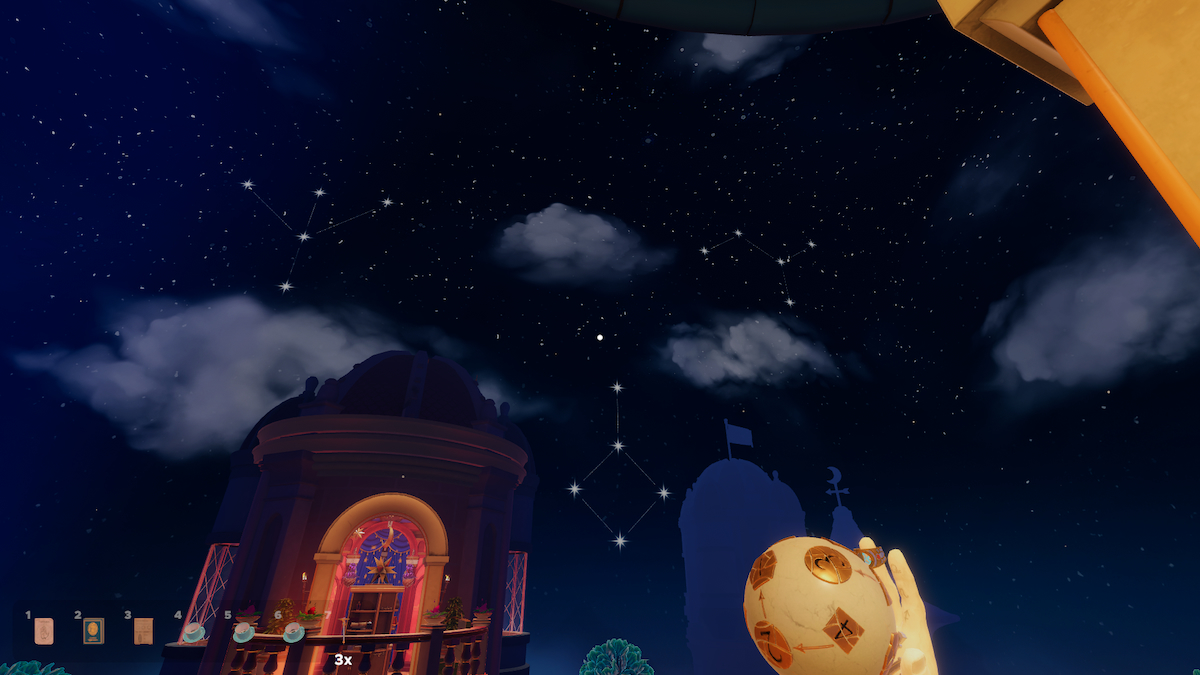
One at a time, organise the Starpins on the board – anywhere on the board – to imitate the constellations. Note that only the Starpin Connectors will connect with other Starpins, and they’ll only connect if they’re on one of the adjacent grid spaces.
See below for all three orientations to solve this puzzle.


Once all three constellations have been emulated, the Pendulum Crystal will be freed. This will be needed to solve the next puzzle.
The Pendulum Puzzle
Before we get started, we’ll need an important poster from the first tower. So quickly return and grab and pin the Pendulum Divination poster.

Return to the second tower and place the Pendulum Crystal on the hook hanging from a tower in the centre of the room.
There are four towers on that stand, and you can raise and drop them to display a certain roman numeral. The Pendulum Divination poster tells us that a simple swing from the Pendulum means ‘1’, and a circular swing means ‘5’.
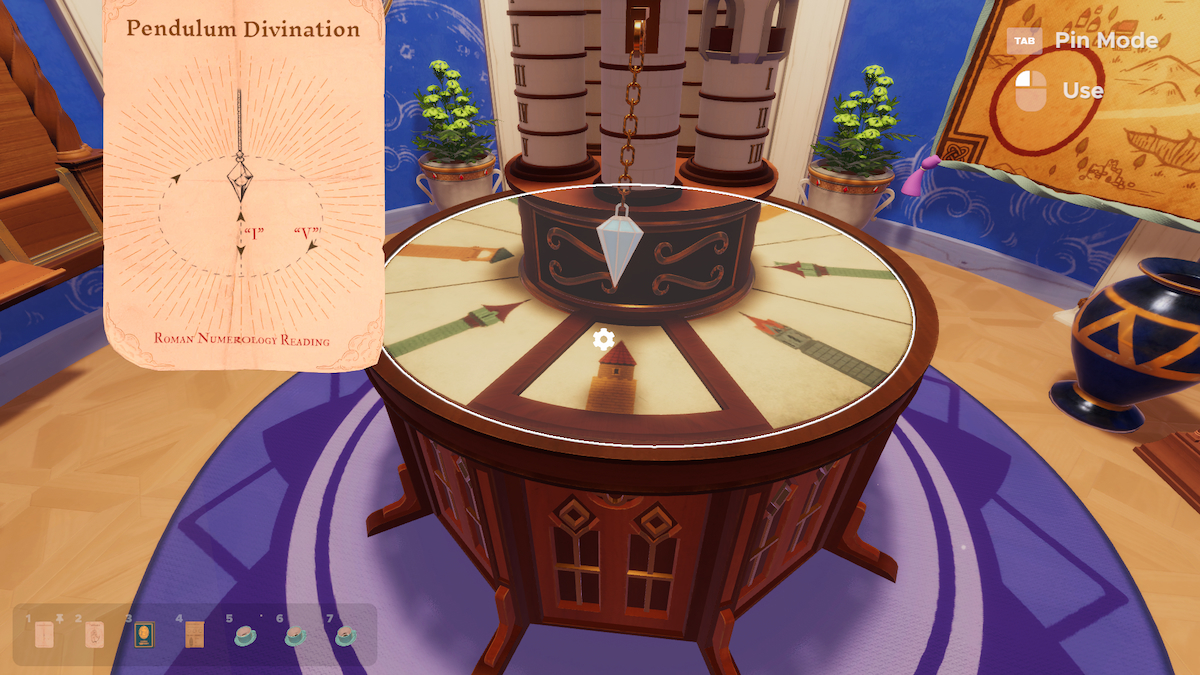
We need to rotate the table to show a tower identical to one of the towers on the stand, and add up the Pendulum swings to find a number. We will then set that tower to that roman numeral.
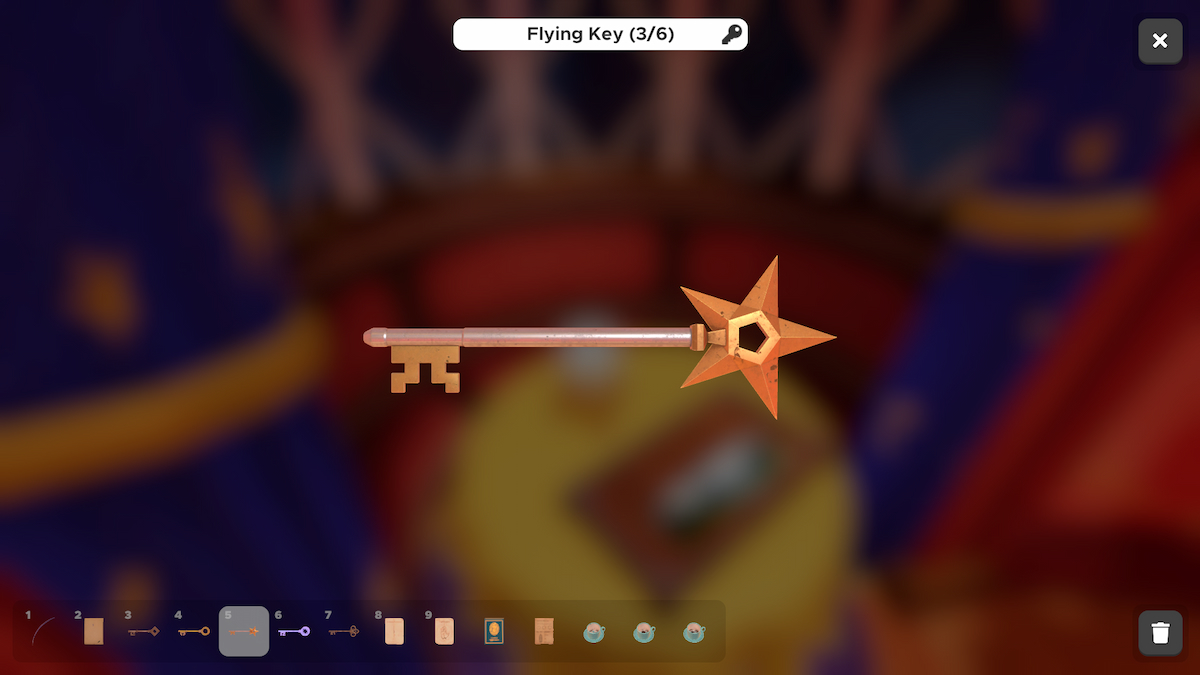
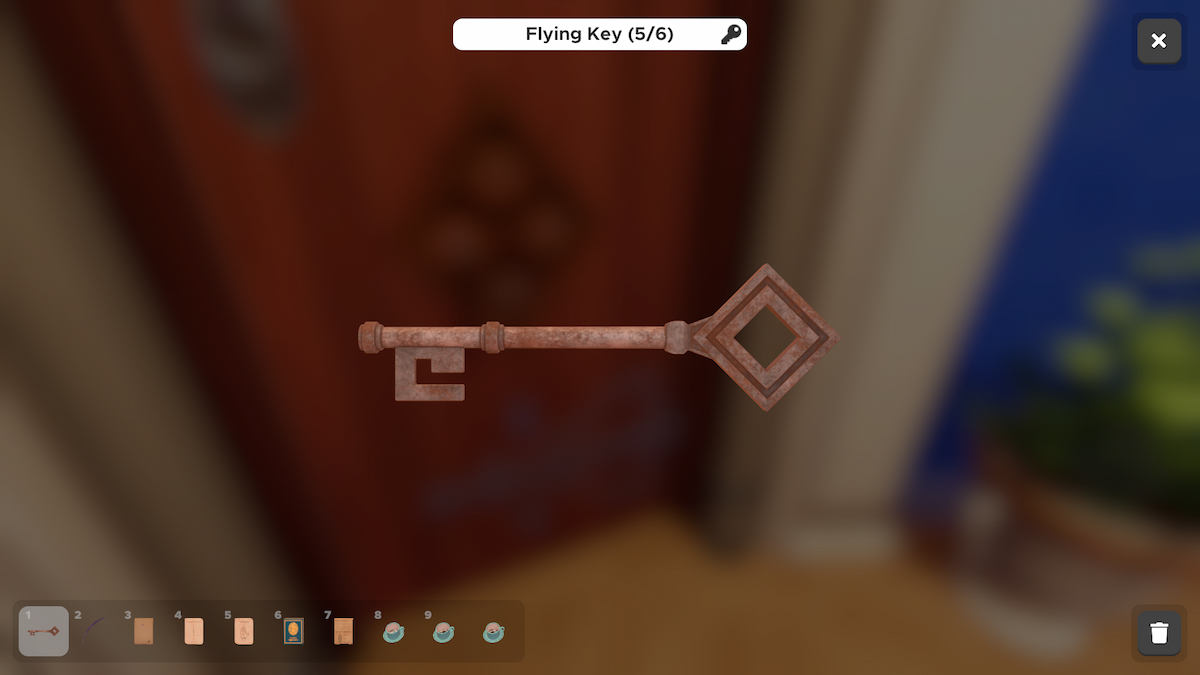
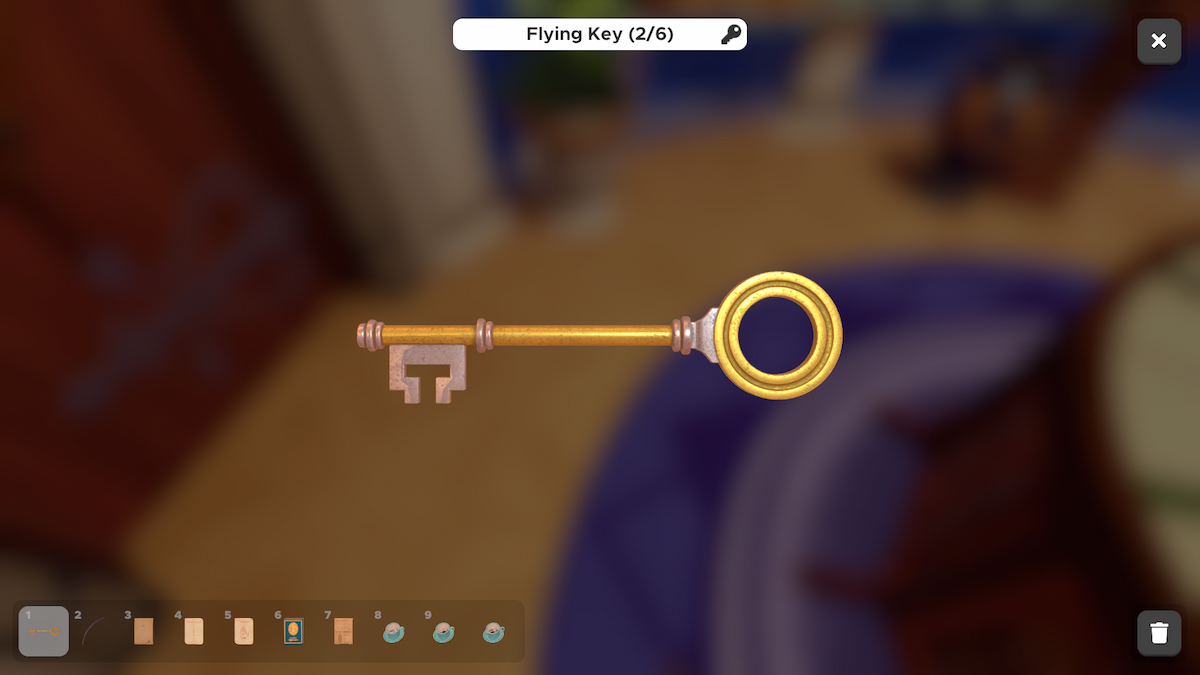
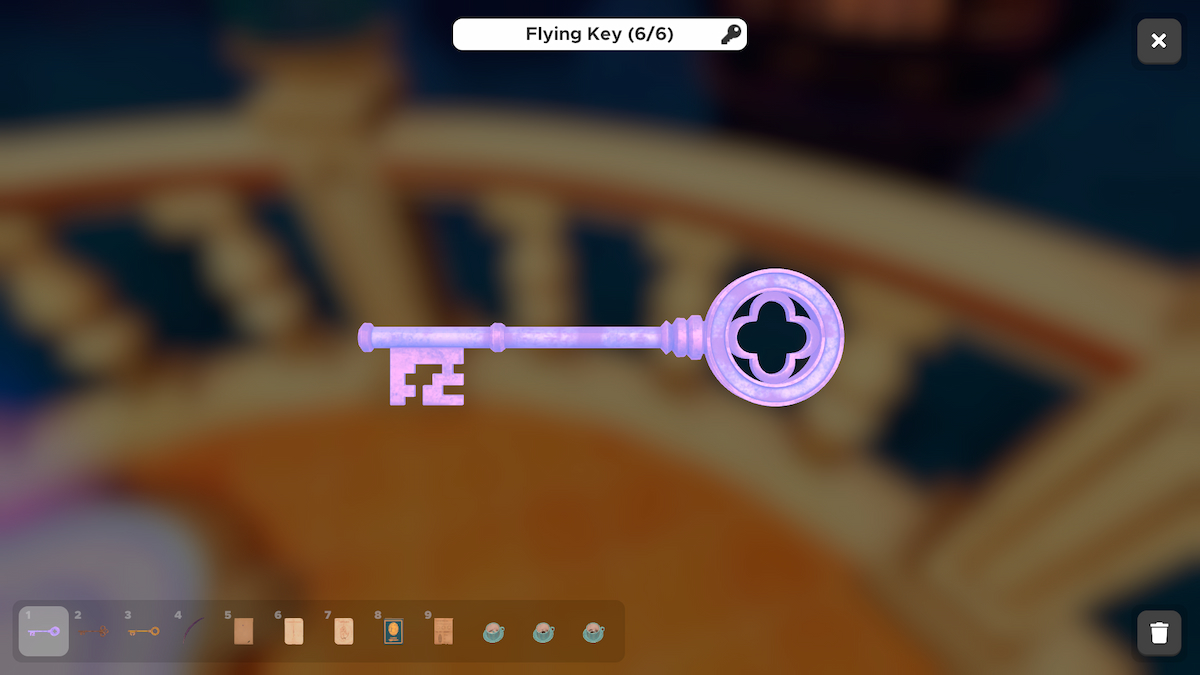
In a clockwise order from the Pendulum, the towers’ numbers are 5, 7, 1 and 3. Once you’ve set the towers to those roman numerals, they’ll all drop, and the six Flying Keys will all drop to the floor. Go around the table and pick them all up.
The Tapestry Puzzle
Four of these six keys will grant you your freedom, but you’ve not only got to figure out which ones, but also which lock they belong to.
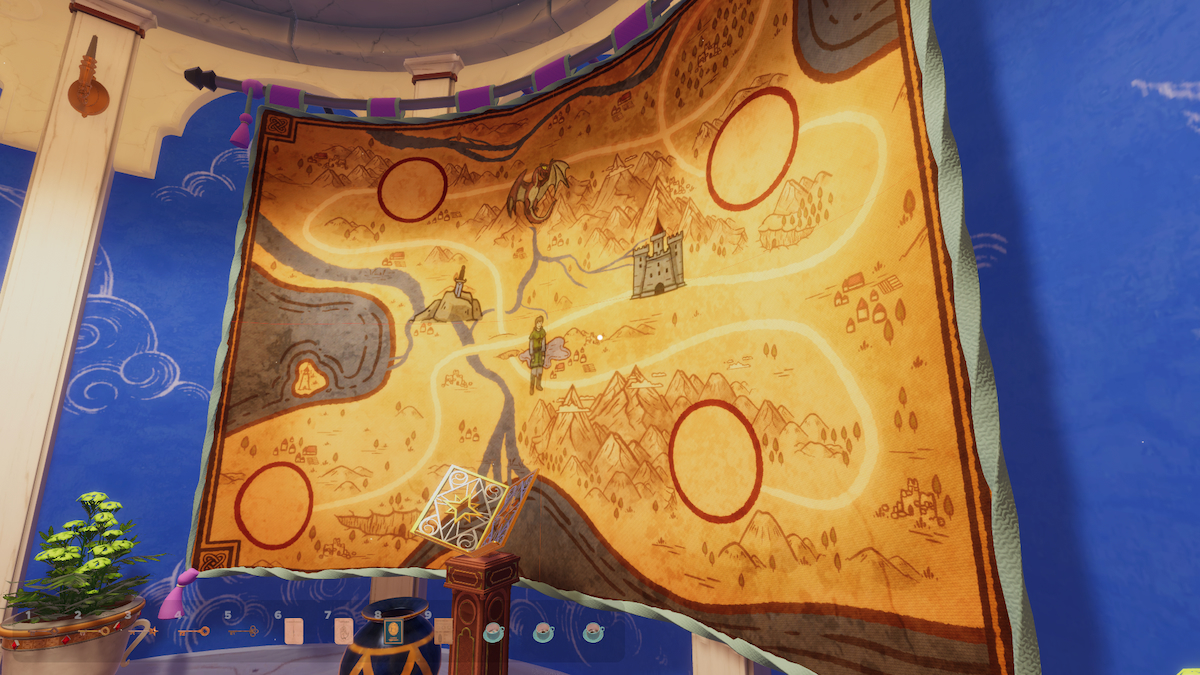
On the right side of the second tower is a large tapestry with a lectern in front of it. To solve this puzzle, we need the story book that fits in it. The only problem is, we’ve got to shrink it first.
Shrinking the Star Book
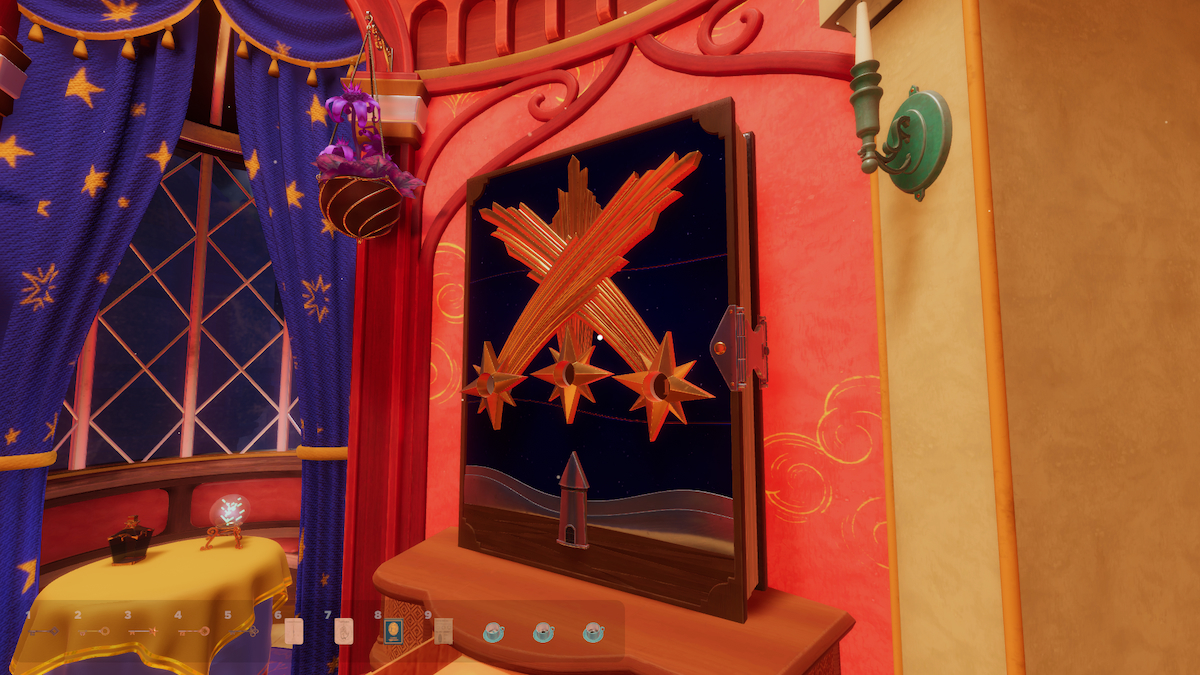
Head back to the first tower. On the right you’ll see a giant book with three shooting stars on it. If you look at the second tower, you’ll notice that numerous shooting stars arc in three different ways intermittently.


Count the stars in each arc, and set the shooting stars on the giant book to those numbers. The order should be 2,7,5.
Once the combination of the book is correct, the book will shrink, and you can pick it up.
With the Giant Book, go back to the lectern and place the Giant Book on it and it’ll unfold into a story book.
Story time
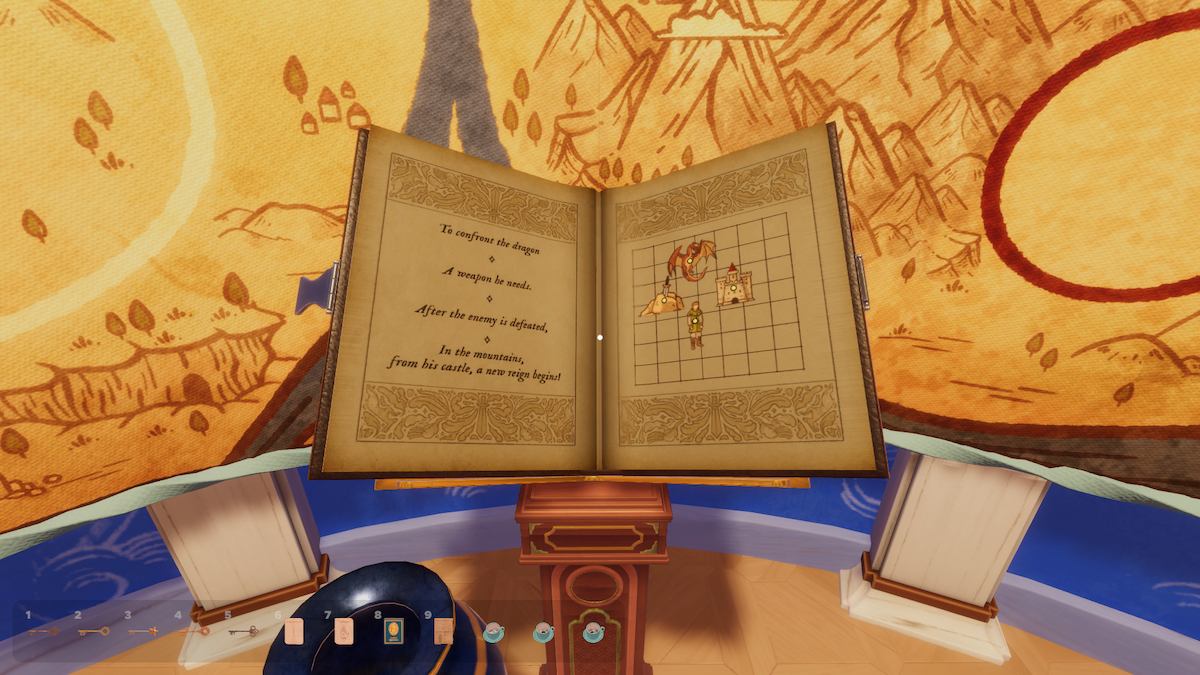
To solve the Tapestry puzzle, we need to set the images on the right page of the Giant Book in accordance with the tapestry and the story on the left page.
Upon moving an item on the right page, it’ll move on the tapestry. We need to move the items into the red circles in the right order.
The journey starts on the bottom left, so move the hero to the very bottom left of the page to fit in the bottom left circle. The story says he needs a sword, so we will move the sword image to the top right circle, as that’s the next stop.
Then, the hero slays the dragon, so we’ll move the dragon to the top left circle. Finally, we’ll place the castle in the bottom right circle.
With that done, you’ll get to watch the hero embark on his journey. With that complete, a component will open in the lectern, revealing a Self-Writing Quill.
Filtering the Keys
With this quill, we can reveal the order of the keys we need out of the six we have.
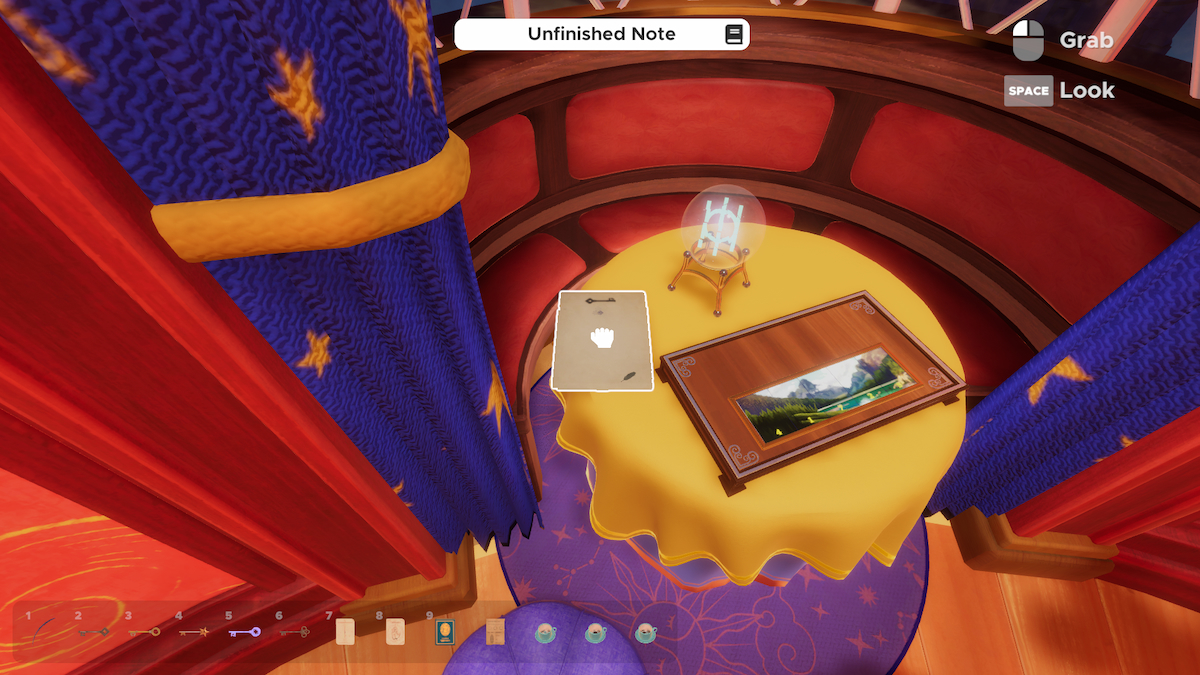
Go back to the first tower and grab the Unfinished Note on the table. Inspect the note in your inventory and use the Self-Writing Quill by dragging it on the note. It will reveal the behaviour of the keys we need, and the order in which they’ll get used.
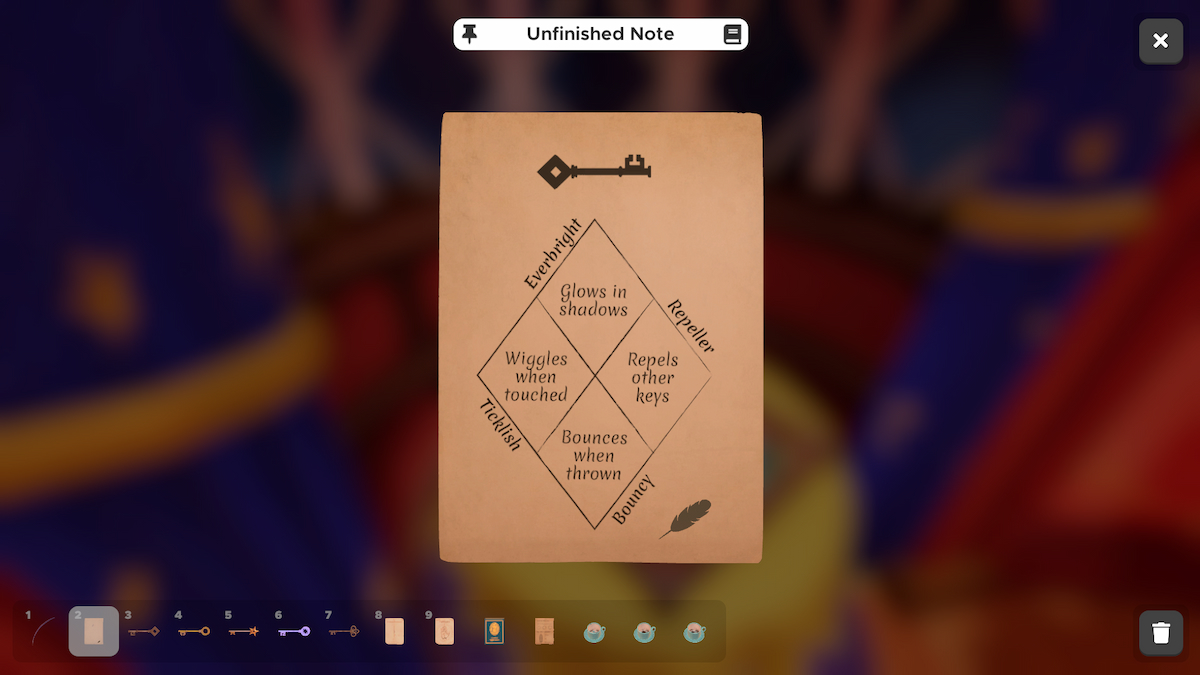
Using the behaviour here, we can filter out the keys we need. Head back to the first tower before we begin.
The easiest one to sort first is the Ticklish key. Go into your inventory and click on each of the six keys. The one that giggles and twitches goes into the right key hole. Insert it there now.
Then, one by one, drop the keys onto the floor in the same spot. If one bounces, then that’s the bouncy key, and belongs in the bottom lock.
If one key keeps pushing the others that are dropped away, then that’s the Repeller key and belongs in the right lock.
Lastly, one of the keys may or may not be glowing. If so, then that’s the Everbright key, and belongs in the top lock. If not, collect the remaining Keys and go outside. One will glow in your inventory, which will be the Everbright Key.
As soon as the last key is placed in the lock, the door will open, and you’d have escaped. Well done!
Related: Escape Simulator Potions Garden Walkthrough & Token locations (Magic DLC)
All Token locations for Divination Tower
Here are the locations for the Tokens in the Divination Tower that I’ve managed to find so far. I’ll update this list as I find more, so return back later!
In the clouds
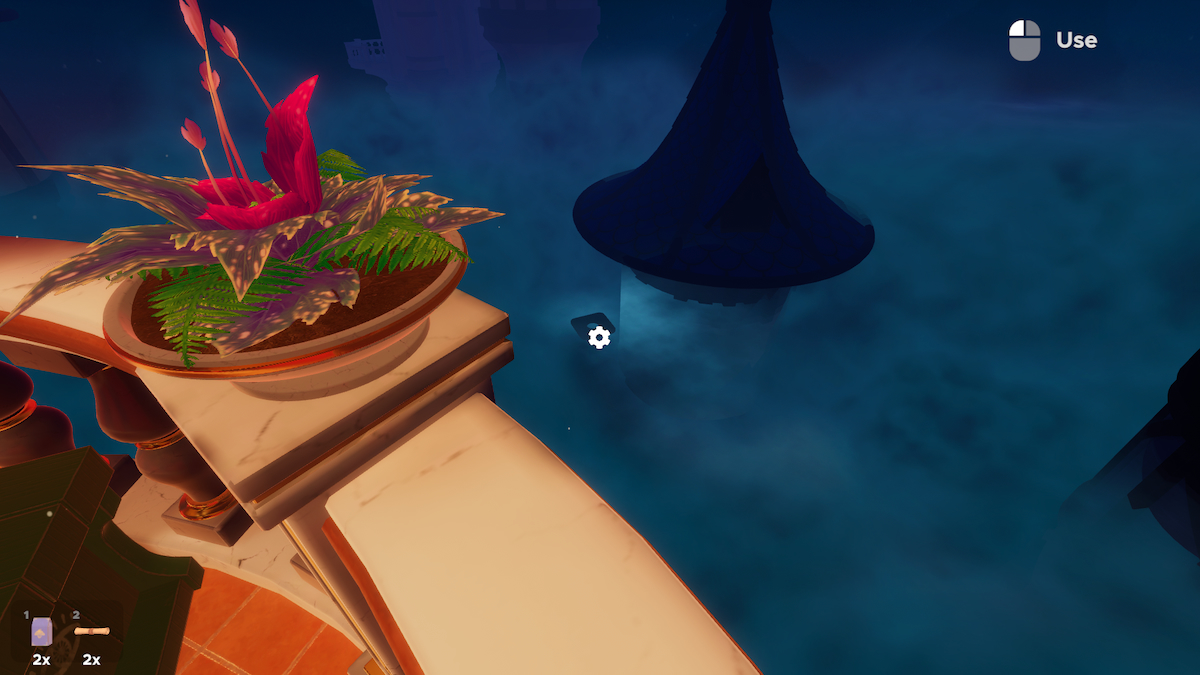
If you look outside from the balcony of the first tower, you’ll a giant Token next to a tower.
In the painting
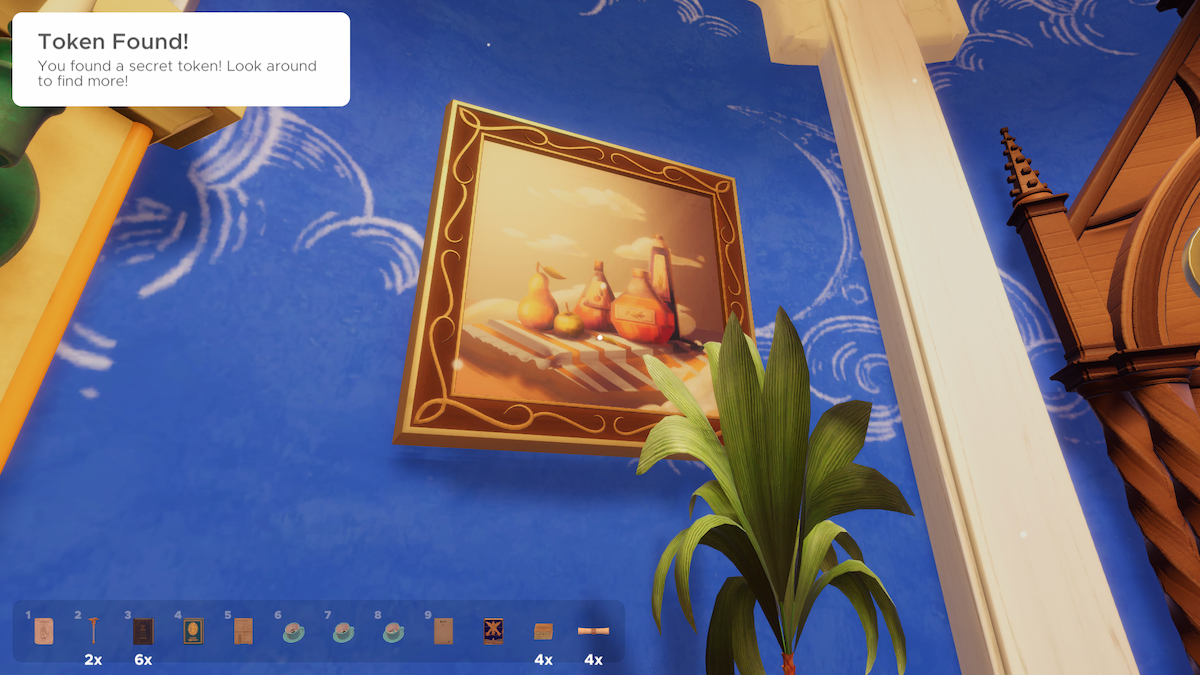
In this painting in the second tower, a Token is present.
In the tapestry
There is a Token in the tapestry in the second tower.
On the shelf
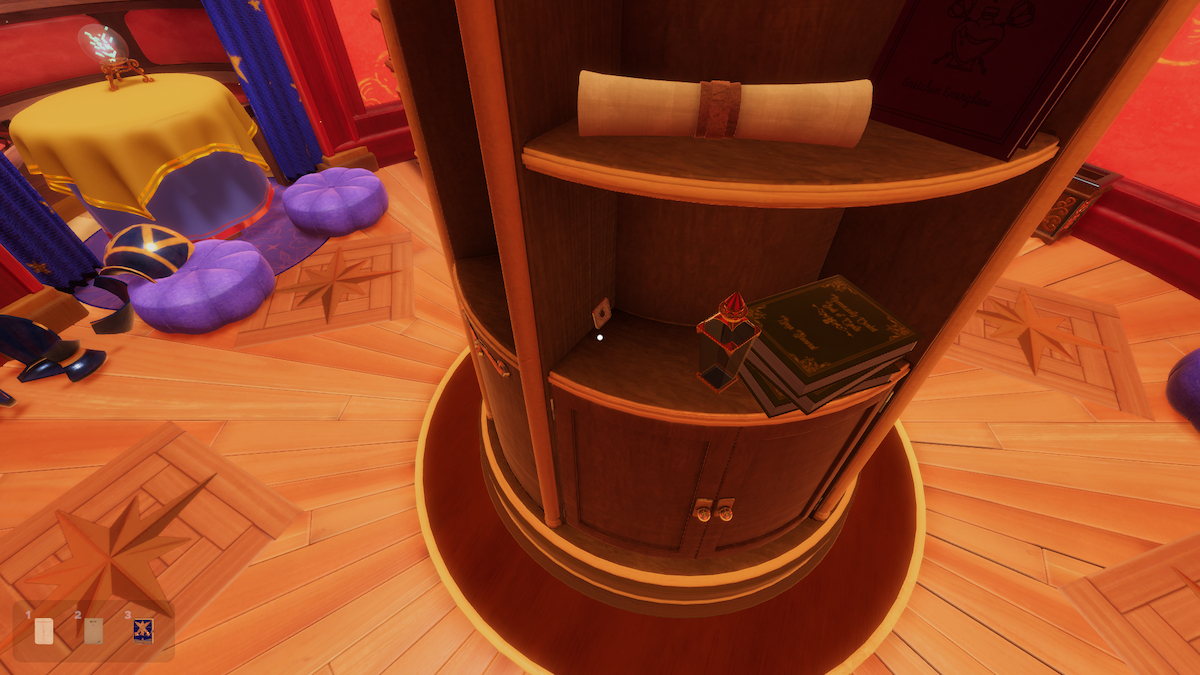
On this shelf in the first tower, a Token sits.
In the stand
In the stand in the second room hides a Token.
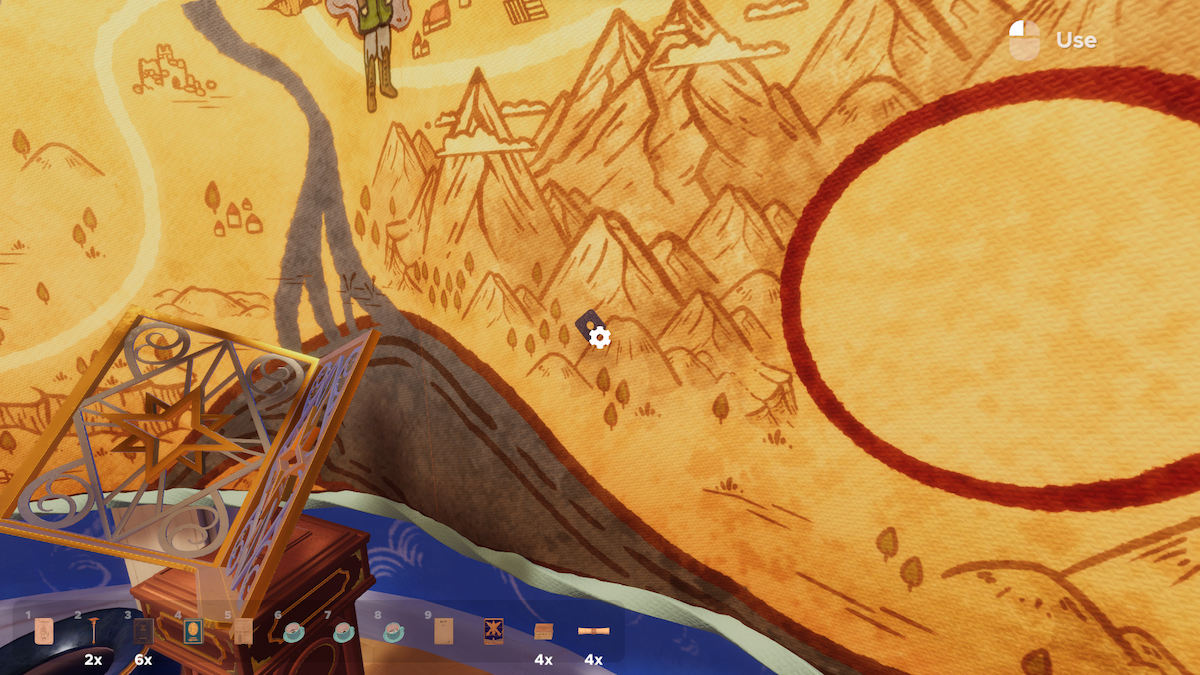
In the Stars
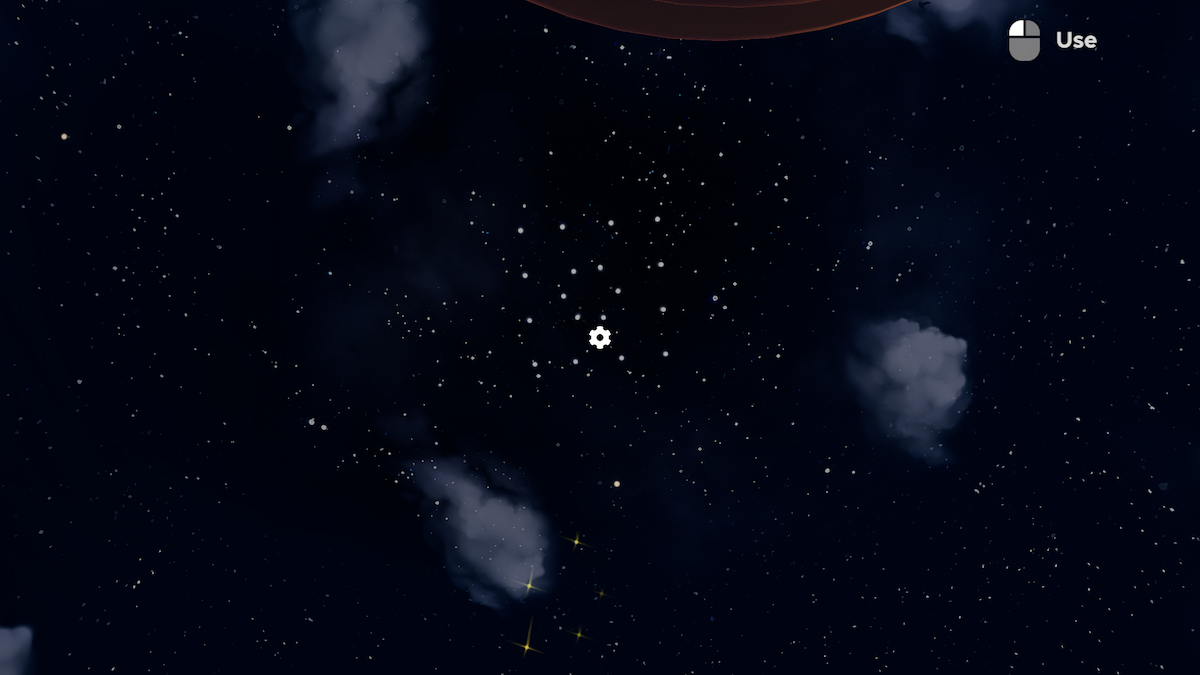
In the sky, there is a Token in this loose constellation.
There we have it, your walkthrough of the Divination Tower of the Magic DLC for Escape Simulator, as well as almost all of the Tokens. Why don’t you see our walkthrough of the Chronomancy Hall if you’re struggling with it?
- SEO Powered Content & PR Distribution. Get Amplified Today.
- PlatoData.Network Vertical Generative Ai. Empower Yourself. Access Here.
- PlatoAiStream. Web3 Intelligence. Knowledge Amplified. Access Here.
- PlatoESG. Carbon, CleanTech, Energy, Environment, Solar, Waste Management. Access Here.
- PlatoHealth. Biotech and Clinical Trials Intelligence. Access Here.
- Source: https://www.pcinvasion.com/escape-simulator-divination-tower-walkthrough-token-locations-magic-dlc/

