Introduction
AutoGen Studio, powered by the AutoGen framework, is a revolutionary platform for developing AI agents that seamlessly collaborate to accomplish tasks. In this blog post, we will explore the capabilities of AutoGen Studio and integrate it with free alternatives of OpenAI like Text Generation Web UI and LM Studio. By the end of this guide, you’ll have a comprehensive understanding of how to locally use AutoGen Studio with alternative language model tools.
Learning Objectives
- Understand the fundamentals of AutoGen and AutoGen Studio.
- Learn the installation process of AutoGen Studio.
- Integrate AutoGen Studio with Text Generation Web UI for text generation tasks.
- Explore the utilization of AutoGen Studio with LM Studio for language model interactions.
This article was published as a part of the Data Science Blogathon.
Table of contents
What is AutoGen?
AutoGen is a framework designed for developing applications that utilize Language Model (LLM) agents capable of collaborating to solve tasks. These agents, which are both customizable and conversational, seamlessly integrate human participation and operate in various modes, employing combinations of LLMs, human inputs, and tools.
AutoGen Studio serves as an AI application, featuring a user interface powered by the AutoGen framework. Its primary objective is to streamline the prototyping process of AI agents, empowering users to augment these agents with various skills, structure them into coherent workflows, and engage in interactive task completion.
What is the purpose AutoGen Studio?
Enhancing User Interaction
AutoGen Studio’s intuitive interface enables users to declaratively define and modify agents and multi-agent workflows effortlessly. The need to delve into complex code or intricate configurations is eliminated. Instead, users can leverage a point-and-click, drag-and-drop interface to specify the parameters of agents and their interactions. It’s akin to providing a digital canvas where users design the choreography, and AutoGen Studio ensures that the agents seamlessly follow their instructions.
Realizing Agent Potential: Adding Skills with Ease
Consider a scenario where a virtual team needs to acquire new skills to address evolving tasks. In a traditional setting, integrating these skills might involve navigating through intricate lines of code. However, AutoGen Studio simplifies the process of explicitly adding skills to agents. The interface provides a clear view of existing skills and offers an accessible platform for incorporating new ones. It’s like empowering a team with new tools, achieved with just a few clicks.
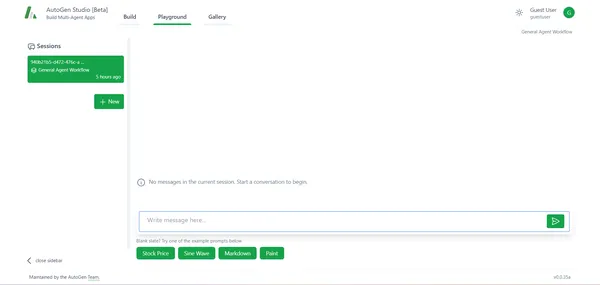
Making Collaboration Tangible: The Playground Section
Moving beyond the theoretical setup, AutoGen Studio introduces a Playground section where users can interact with the agent workflows defined earlier. This virtual space is where the magic happens – a digital environment where users engage in sessions, observe chat interactions, and witness the results of their orchestrated collaboration. It’s like having a virtual rehearsal room where users fine-tune the performance of their digital ensemble.
Sharing Success: The Gallery Section
Once users have perfected their agent choreography and witnessed successful sessions, AutoGen Studio provides a platform to share achievements through the Gallery section. This section serves as a repository of successful agent collaborations, similar to showcasing a digital masterpiece to a wider audience. It fosters collaboration and inspiration within the AutoGen community.
To learn more about Autogen Studio refer this blog
Step-by-Step Guide to Implement AutoGen Studio with Text-Generation-Web UI
Text Generation Web UI is a user-friendly web-based interface designed for creating text using various large language models, including transformers, GPTQ, llama.cpp, and others. It offers an array of features, such as model switching, notebook mode, chat mode, and more, making it versatile for applications like creative writing and chatbot development.
Step1: Installation Process
To run a large language model locally on your computer, follow these steps:
- Clone the repository using the command:
git clone https://github.com/oobabooga/text-generation-webui- Navigate into the “text generation web UI” folder.
cd text-generation-webui- Choose the appropriate start script based on your operating system.
Example: If your using Windows OS, run the following command:
.start_windows.bat --api --listen-port 7822 --extensions openai- Linux: ./start_linux.sh
- Windows: start_windows.bat
- macOS: ./start_macos.sh
- WSL: ./start_wsl.bat
Press enter. This will automatically download and install the required packages for text generation web UI. The installation might take around a minute.
Step2: Selecting GPU
- During installation, it will prompt you to select your GPU. Choose the appropriate GPU, for example, ‘N’ in the case if you don’t have GPU and want to run the model in CPU mode, and press enter.
- The script will install the necessary packages according to the specified GPU.
Step3: Copy OpenAI-compatible API-URL
Copy the generated OpenAI-compatible URL. You will need this in a later step.

Step4: Opening Web UI
- Navigate to the provided Local URL mentioned in the output.
- Open your browser and enter the URL. The web interface should appear.

Step5: Downloading Models
- In the interface, go to the “models” tab.
- Download the desired model.
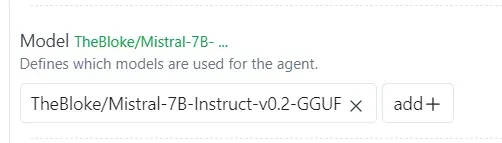
- Enter the hugging face username/model path in the first box. Example: TheBloke/Mistral-7B-Instruct-v0.2-GGUF
- To download a single file( for GGUF models ), enter its name in the second box. Example: In hugging face this the model i choose to work TheBloke/Mistral-7B-Instruct-v0.2-GGUF. if you navigate to the provided files section, you will see the different models of TheBloke/Mistral-7B-Instruct-v0.2-GGUF. I choose mistral-7b-instruct-v0.2.Q4_K_M.gguf

Monitor the terminal to confirm the successful download of the model. It may take a minute to complete.
Step6: Refreshing Interface
- After downloading, refresh the web interface by clicking the refresh🔃 button.
- The downloaded model should now be listed in the drop-down menu.
Step7: Choosing the Model
- Choose the desired model from the drop-down list.
- Click the “load” button to load the selected model.
Step8: Model Loaded
- Upon successful loading, a confirmation message will appear, indicating that the model has been successfully loaded.
- Then click the “save settings” , now we can see the settings got saved

Step9: Running Autogen Studio
Open new terminal and execute following commands
The next step is to install AutoGen Studio. For a smooth experience, I recommend using a virtual environment (e.g., conda) to avoid conflicts with existing Python packages. With Python 3.10 or newer active in your virtual environment, use the following pip command:
pip install autogenstudioautogenstudio ui --port 8080output server_autogenstudio.log
INFO:     Started server process [11050]
INFO:     Waiting for application startup.
INFO:     Application startup complete.
INFO:     Uvicorn running on http://127.0.0.1:8080 (Press CTRL+C to quit)
Step10: Setting up an LLM Provider in Autogen UI
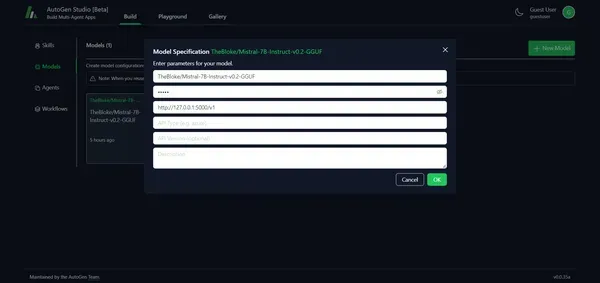
- In the AutoGen Studio UI, navigate to the top and locate the “Build” section. Click on it, then choose “Model”
- Click on “New Model” to insert a new model. Enter the Model Name, base URL (paste the OpenAI-compatible API URL that you copied.) E.g. http://0.0.0.0:5000/v1) and set the API key as “NoApi (type any string, don’t leave it empty).
- Once done, click “OK.”

Step11: Setting the workflow
Configure an agent workflow that can be used to handle tasks.
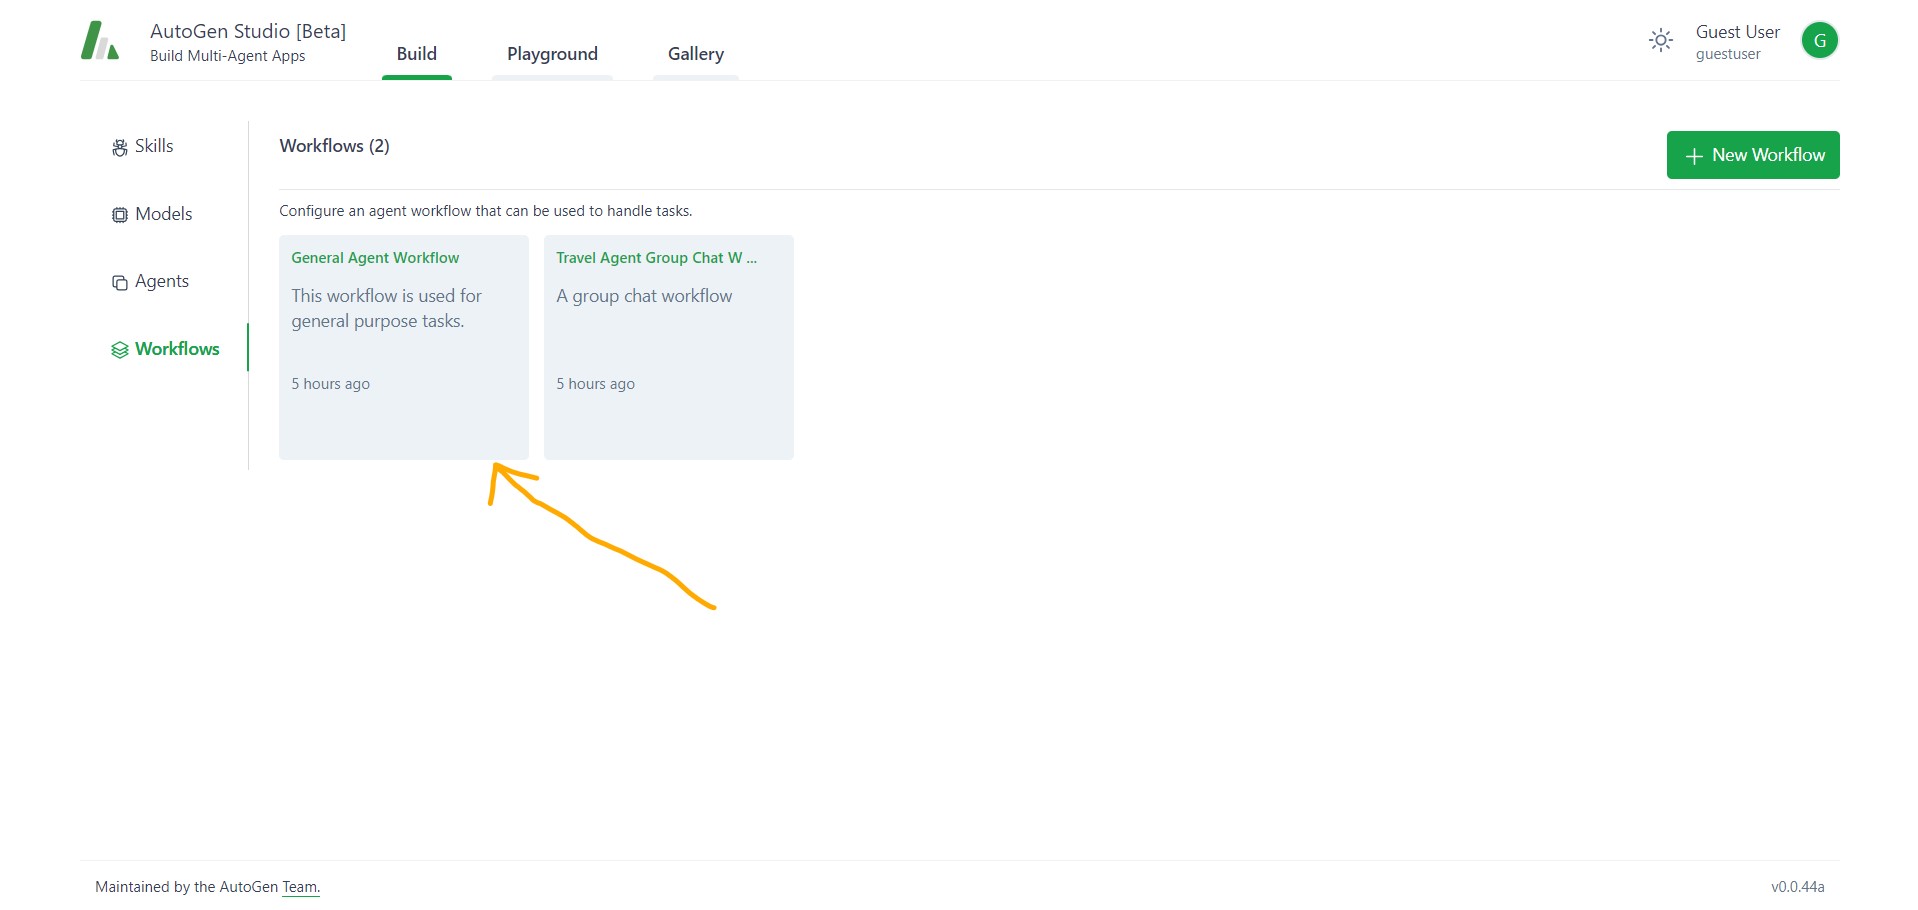
- Navigate to workflow section then click General Agent Workflow

- Click the user_proxy agent and Click on “Add” under the model section and choose the model you want to use from the dropdown.


- Follow the same steps for the primary_assistant. Ensure that the name of your chosen model is displayed next to the model section in green color. Finally, click “OK” again to confirm.
Example usage
Click playground section and create new section by clicking the “new” button

Choose the general agent workflow and press Create button

When the session is successfully created. Now execute the query and press the send btton
Now consider this query: List out the top 5 rivers in Africa and their length and return that as a markdown table. Do not try to write any code, just write the table.

Text generation web UI Log
To verify LLM starts generating output, After a few minutes you will be able to see the log in Text-generation-webui that the tokens are getting generated. This proves that autogen UI is using LLM through Text-generation-webui.

Autogen Studio Log in Terminal
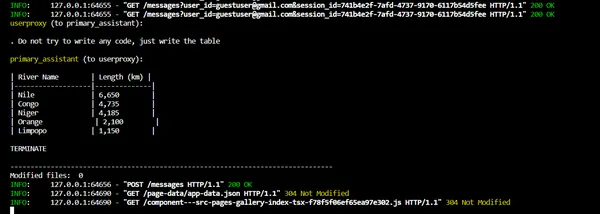
Result

Step-by-Step Guide to Implement AutoGen Studio with LM Studio
LM Studio, a groundbreaking project, stands at the forefront of enabling users to interact with open-source LLMs seamlessly. Developed around the llama.cpp library, this tool facilitates the installation, management, and utilization of various LLMs on desktop environments.
Step1: Download LM Studio
Navigate to the official LM Studio website (https://lmstudio.ai/) and choose the version compatible with your operating system (Windows or Mac or Linux).Click on the download link to initiate the download process.
Step2: Search and Choose a Model
In the middle of the main screen, locate the search bar. Enter keywords or a specific model name to explore available options. Choose a model that aligns with your exploration goals.
Step3: Start Local Server
Local Server – Locate the double-arrow icon on the left, click it, and start the local server.
Copy the base url and paste it in autogen studio.

Step4: Running autogen studio
The next step is to install AutoGen Studio. For a smooth experience, I recommend using a virtual environment (e.g., conda) to avoid conflicts with existing Python packages. With Python 3.10 or newer active in your virtual environment, use the following pip command:
pip install autogenstudioautogenstudio ui --port 8080output server_autogenstudio.log
INFO:     Started server process [11050]
INFO:     Waiting for application startup.
INFO:     Application startup complete.
INFO:     Uvicorn running on http://127.0.0.1:8080 (Press CTRL+C to quit)
Step5: Setting up an LLM Provider in Autogen UI
- In the AutoGen Studio UI, navigate to the top and locate the “Build” section. Click on it, then choose “Model”
- Click on “New Model” to insert a new model. Enter the Model Name, base URL (paste the OpenAI-compatible API URL that you copied.) E.g. http://0.0.0.0:5000/v1) and set the API key as “NoApi (type any string, don’t leave it empty).
- Once done, click “OK.”
Step6: Setting the workflow
Configure an agent workflow that can be used to handle tasks.
- Navigate to workflow section then click General Agent Workflow
- Click the user_proxy agent and Click on “Add” under the model section and choose the model you want to use from the dropdown.

Important Tip: Also Set Human Input Mode as “ALWAYS”( otherwise you won’t get an output in autogen studio)
- Follow the same steps for the primary_assistant. Ensure that the name of your chosen model is displayed next to the model section in green color. Finally, click “OK” again to confirm.
Example usage
Now consider this query: List out the top 5 rivers in Africa and their length and return that as a markdown table. Do not try to write any code, just write the table.
Click playground section and create new section by clicking the “new” button

Choose the general agent workflow and press Create button

When the session is successfully created. Now execute the query and press the send button.
Important: Once you give any task in autogen studio in playground section, go to the autogen studio terminal and there you will see this “Provide feedback to userproxy. Press enter to skip and use auto-reply, or type ‘exit’ to end the conversation:”. now press “Enter”.
LM Studio Logs
To verify LLM starts generating output, you will be able to see the log in LM studio that the tokens are getting generated. This proves that autogen UI is using LLM through LM Studio.

AutoGen Studio Log

Result
Conclusion
In conclusion, AutoGen Studio emerges as a powerful tool for developing and interacting with AI agents. By combining it with free alternatives like Text Generation Web UI and LM Studio, users can extend the functionalities and explore various language models locally. This guide equips you with the knowledge to harness the potential of AutoGen Studio alongside alternative tools, opening doors to innovative AI applications.
Key Takeaways
- AutoGen Studio simplifies the development of AI agents through an intuitive user interface.
- The Playground and Gallery sections in AutoGen Studio provide virtual spaces for interaction and collaboration.
- Installing and setting up Text Generation Web UI allows local text generation using various language models.
- LM Studio enables the seamless integration of open-source language models for diverse applications.
- The integration of AutoGen Studio with alternative tools offers flexibility and expands the capabilities of AI development.
Frequently Asked Questions
A. AutoGen Studio stands out for its user-friendly interface, allowing you to effortlessly prototype and improve AI agents. Its intuitive design eliminates the need for complex coding, making it accessible for both beginners and seasoned developers.
A. Installing AutoGen Studio is a breeze. Simply use the recommended pip command within a virtual environment, ensuring a smooth experience. The process is well-documented, making it accessible for users with varying levels of technical expertise.
A. Absolutely! By following the outlined steps, you can seamlessly integrate Text Generation Web UI with AutoGen Studio. This combination opens up a world of possibilities for tasks ranging from creative writing to chatbot development.
A. LM Studio is a project that simplifies the interaction with open-source language models. When integrated with AutoGen Studio.
The media shown in this article is not owned by Analytics Vidhya and is used at the Author’s discretion.
- SEO Powered Content & PR Distribution. Get Amplified Today.
- PlatoData.Network Vertical Generative Ai. Empower Yourself. Access Here.
- PlatoAiStream. Web3 Intelligence. Knowledge Amplified. Access Here.
- PlatoESG. Carbon, CleanTech, Energy, Environment, Solar, Waste Management. Access Here.
- PlatoHealth. Biotech and Clinical Trials Intelligence. Access Here.
- Source: https://www.analyticsvidhya.com/blog/2024/02/how-to-use-autogen-studio-locally-using-lm-studio-or-text-generation-web-ui/

