In the world of gaming, the PlayStation 4 (PS4) continues to be a popular console choice for gamers around the globe. Whether you’re diving into epic adventures, competitive multiplayer matches, or immersive single-player narratives, the PS4 offers a wide array of gaming experiences. However, one common task that can sometimes stump users is ejecting a disc from the console. In this comprehensive guide titled “How to Eject Disc from PS4,” we’ll walk you through several methods to safely remove your game or movie discs from your PS4.
Ejecting a disc from your PS4 is a simple process, but it’s important to follow the correct steps to ensure the safety of both your console and the disc. Whether you’re switching games, encountering an issue with your current disc, or simply wanting to pack away your console, knowing how to eject a disc from a PS4 is essential. Here’s how to perform this task efficiently and safely:
Step 1: Power On Your PS4
Ensure that your PS4 console is turned on or in rest mode. Ejecting a disc is only possible when the console has power. If your PS4 is completely off, press the power button to turn it on or to bring it out of rest mode.
Step 2: Locate the Eject Button
The eject button’s location varies slightly depending on the model of your PS4.
- For the original PS4 model, the eject button is a touch-sensitive button located on the front face of the console, just below the disc slot.
- On the PS4 Slim and PS4 Pro models, the eject button is a more traditional, physical button that you can press, situated on the lower front side of the console.
Identifying the correct button is crucial to ensure you’re not accidentally powering off your console while attempting to eject a disc.
Step 3: Press the Eject Button
Once you’ve located the eject button, gently press it. You should hear a beep sound, indicating that the console has received the eject command. If you’re using the original PS4 model with a touch-sensitive button, a light touch should suffice. For the PS4 Slim and Pro models, a gentle press on the physical button will do the trick.
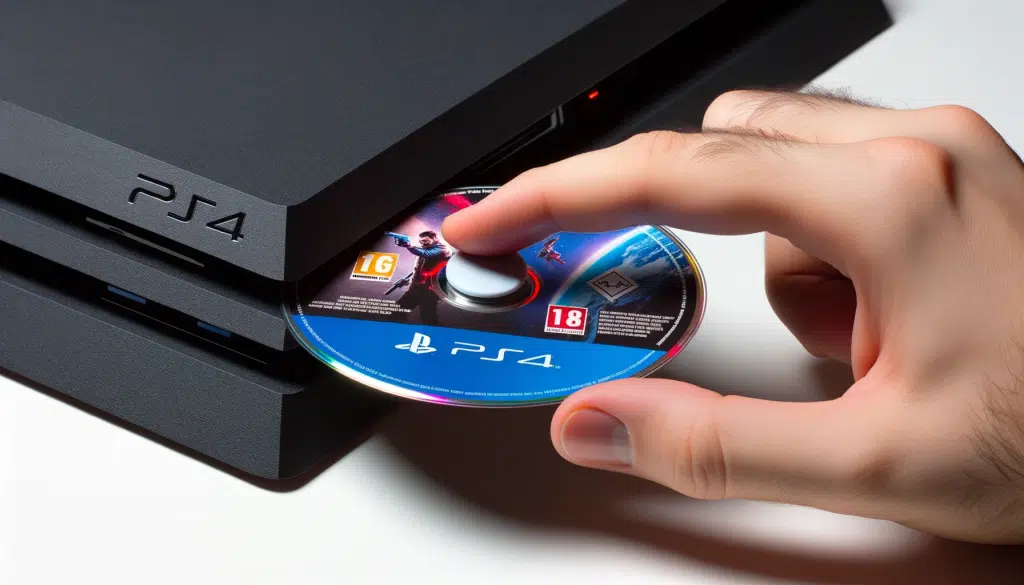
Step 4: Remove the Disc
After pressing the eject button, wait a moment for the disc to be ejected from the slot. The disc should emerge slightly, allowing you to grasp it. Gently pull the disc the rest of the way out, taking care not to touch the surface of the disc to avoid fingerprints or scratches.
Tips for Smooth Ejection
- If your PS4 is positioned vertically, ensure you support the disc as it’s ejected to prevent it from falling.
- In case the disc doesn’t eject on the first attempt, wait a few seconds before trying again. Continuous pressing of the eject button in rapid succession can confuse the system or potentially cause harm to the disc or the console.
By following these steps, you should be able to successfully eject a disc from your PS4. This method is straightforward and is the recommended first approach whenever you need to remove a disc from your console.
How to Manually Eject Disc from PS4
There may be instances when the standard method of ejecting a disc from your PS4 using the eject button does not work. This could be due to a malfunctioning eject button, a software glitch, or other hardware issues. In such cases, manually ejecting the disc from your PS4 is a viable alternative. This process involves using a screwdriver to turn a manual eject screw located within the console. It’s important to proceed with caution to avoid damaging your PS4. Here’s a step-by-step guide on how to manually eject a disc from your PS4.
Step 1: Power Off Your PS4
Before attempting to manually eject a disc, ensure that your PS4 is completely powered off. Hold down the power button until the system beeps twice and then unplug all cables from the console to prevent any electrical hazards or damage.
Step 2: Remove the HDD Bay Cover or Access Panel
Depending on your PS4 model, you will need to remove the hard drive bay cover (original PS4) or access the manual eject screw through a small hole (PS4 Slim and Pro).
- For the original PS4: Slide the shiny part of the top cover towards the left side of the console and then lift it off to reveal the hard drive bay.
- For PS4 Slim and Pro models: Locate the small hole on the back or bottom of the console that provides access to the manual eject screw.
Step 3: Locate the Manual Eject Screw
Within the hard drive bay (original PS4) or through the small hole (PS4 Slim and Pro), you’ll find the manual eject screw. This screw is designed to manually eject the disc in situations where the electronic method fails.
- Original PS4: The screw is located near the front of the PS4, in a vertical line with the eject button.
- PS4 Slim and Pro: The screw can be accessed directly through the small hole designed for this purpose.
Step 4: Turn the Screw to Eject the Disc
Insert a small Phillips or flat-head screwdriver into the slot of the manual eject screw. Gently turn the screw counterclockwise. You may need to apply slight pressure, but avoid using too much force to prevent stripping the screw. As you turn the screw, the disc should slowly start to emerge from the disc slot.
Step 5: Retrieve the Disc
Once the disc has been manually ejected far enough, carefully grab it and pull it out the rest of the way. Be sure to handle the disc by its edges to avoid fingerprints or damage.
Step 6: Reassemble Your PS4
After successfully ejecting the disc, reattach the HDD bay cover or ensure that any panels or covers removed during the process are securely put back in place.
Important Considerations
- Manually ejecting a disc should be considered a last resort and performed only if the standard electronic method fails.
- If you’re uncomfortable performing these steps or if the manual eject does not work, it might be best to consult with a professional or contact Sony customer support for assistance.
By following these detailed instructions, you should be able to manually eject a disc from your PS4 safely and effectively, ensuring your gaming experience remains uninterrupted even when faced with technical difficulties.
How to Eject Disc from PS4 with Controller
Ejecting a disc from your PS4 using the console’s controller is a convenient feature that allows you to remove a disc without needing to physically interact with the console itself. This method can be particularly useful when your PS4 is positioned out of easy reach or if you prefer the simplicity of using the controller for console operations. Here’s how to eject a disc from your PS4 using the DualShock 4 controller:
Step 1: Turn On Your PS4 and Controller
Ensure that your PS4 is powered on and that your DualShock 4 controller is connected to the console. You can connect the controller either via a USB cable or wirelessly if it’s already paired with your PS4.
Step 2: Navigate to the Function Screen
Press the PS button on your controller to access the PS4’s main dashboard, also known as the Dynamic Menu. From here, you’ll need to navigate to the function screen, which displays various options and applications.
Step 3: Select the Disc Icon
Using your controller, navigate to the disc icon on the function screen. This icon represents the currently inserted disc and is usually located on the far-left side of the screen. Highlight the disc icon by using the directional buttons or the left analog stick on your controller.
Step 4: Options Menu
Once the disc icon is highlighted, press the “Options” button on your controller. The “Options” button is located on the right side of your controller, just next to the touchpad. Pressing this button will bring up a small side menu with additional options for the selected item.
Step 5: Eject the Disc
In the side menu that appears after pressing the “Options” button, look for the “Remove Disc” or “Eject Disc” option. Use the controller to navigate to this option and select it by pressing the “X” button. This action sends a command to your PS4 to eject the disc from the console.
Step 6: Remove the Disc
Once the disc has been ejected and is partially protruding from the disc slot, carefully remove it by hand. Be sure to grab the disc by its edges to avoid any damage or fingerprints.
Important Notes
- Ensure there’s no ongoing data transfer or game saving process involving the disc you’re about to eject to prevent data corruption.
- If the disc does not eject on the first attempt, avoid repeatedly pressing the eject option in quick succession. Instead, wait a few moments before trying again or use the physical eject button on the console as an alternative.
Using these steps, you can easily eject a disc from your PS4 using the controller, adding an extra layer of convenience to your gaming experience. This method highlights the user-friendly design of the PS4, catering to gamers’ preferences for seamless and efficient interaction with their console.
How to Eject a PS4 Disc Using a Button
Ejecting a disc from your PS4 using the physical eject button on the console is one of the most direct and reliable methods. This traditional approach is straightforward and can be particularly handy if you’re facing issues with the controller or the PS4’s software interface. Here’s a detailed guide on how to eject a PS4 disc using the button designed for this purpose:
Step 1: Locate the Eject Button
The first step is to identify where the eject button is located on your PS4, as its position varies slightly depending on the model of the console you have.
- Original PS4 Model: On the original PS4, the eject button is a slim, touch-sensitive button located on the front of the console, just below the disc slot and beside the power button.
- PS4 Slim and PS4 Pro Models: For the PS4 Slim and PS4 Pro, the eject button is more pronounced and tactile. It’s located on the front left side of the console, beneath the disc slot.
Step 2: Power On Your PS4
Ensure that your PS4 is turned on or in rest mode. The eject button will not function if the console is completely powered off. You can turn on the PS4 by pressing the power button or by pressing the PS button on a connected controller.
Step 3: Press the Eject Button
Once you’ve located the eject button and your PS4 is powered on, gently press the button. You should feel a physical click on the PS4 Slim and Pro models, while the original PS4 model may not have a noticeable tactile response due to its touch-sensitive design.
- For a touch-sensitive button: A gentle touch is sufficient. There’s no need to apply pressure, as the sensor should register the touch.
- For a tactile button: Press until you feel a click, indicating that the button has been engaged.
Step 4: Wait for the Disc to Eject
Upon pressing the eject button, wait for the console to process the command. You’ll typically hear a beep sound indicating the action has been registered. The disc should then be ejected partway out of the disc slot, making it easy for you to grasp and pull it out completely.
Step 5: Remove the Disc Carefully
Gently grab the ejected disc by its edges and pull it out of the slot. It’s important to handle the disc carefully to avoid fingerprints, scratches, or other damages.
Additional Tips
- If the disc does not eject on the first attempt, avoid repeatedly pressing the eject button in rapid succession. This could confuse the console or potentially cause damage. Instead, wait a few seconds before trying again.
- Make sure there’s no ongoing data transfer or game saving process involving the disc before attempting to eject it. Ejecting a disc during such operations can lead to data loss or corruption.
By following these steps, you can efficiently and safely eject a disc from your PS4 using the dedicated eject button on the console. This method is quick, reliable, and requires no additional tools or equipment, making it an ideal solution for gamers looking to switch discs or remove a disc from their console.
Conclusion
- SEO Powered Content & PR Distribution. Get Amplified Today.
- PlatoData.Network Vertical Generative Ai. Empower Yourself. Access Here.
- PlatoAiStream. Web3 Intelligence. Knowledge Amplified. Access Here.
- PlatoESG. Carbon, CleanTech, Energy, Environment, Solar, Waste Management. Access Here.
- PlatoHealth. Biotech and Clinical Trials Intelligence. Access Here.
- Source: https://www.techpluto.com/how-to-eject-disc-from-ps4/

