Image by Author
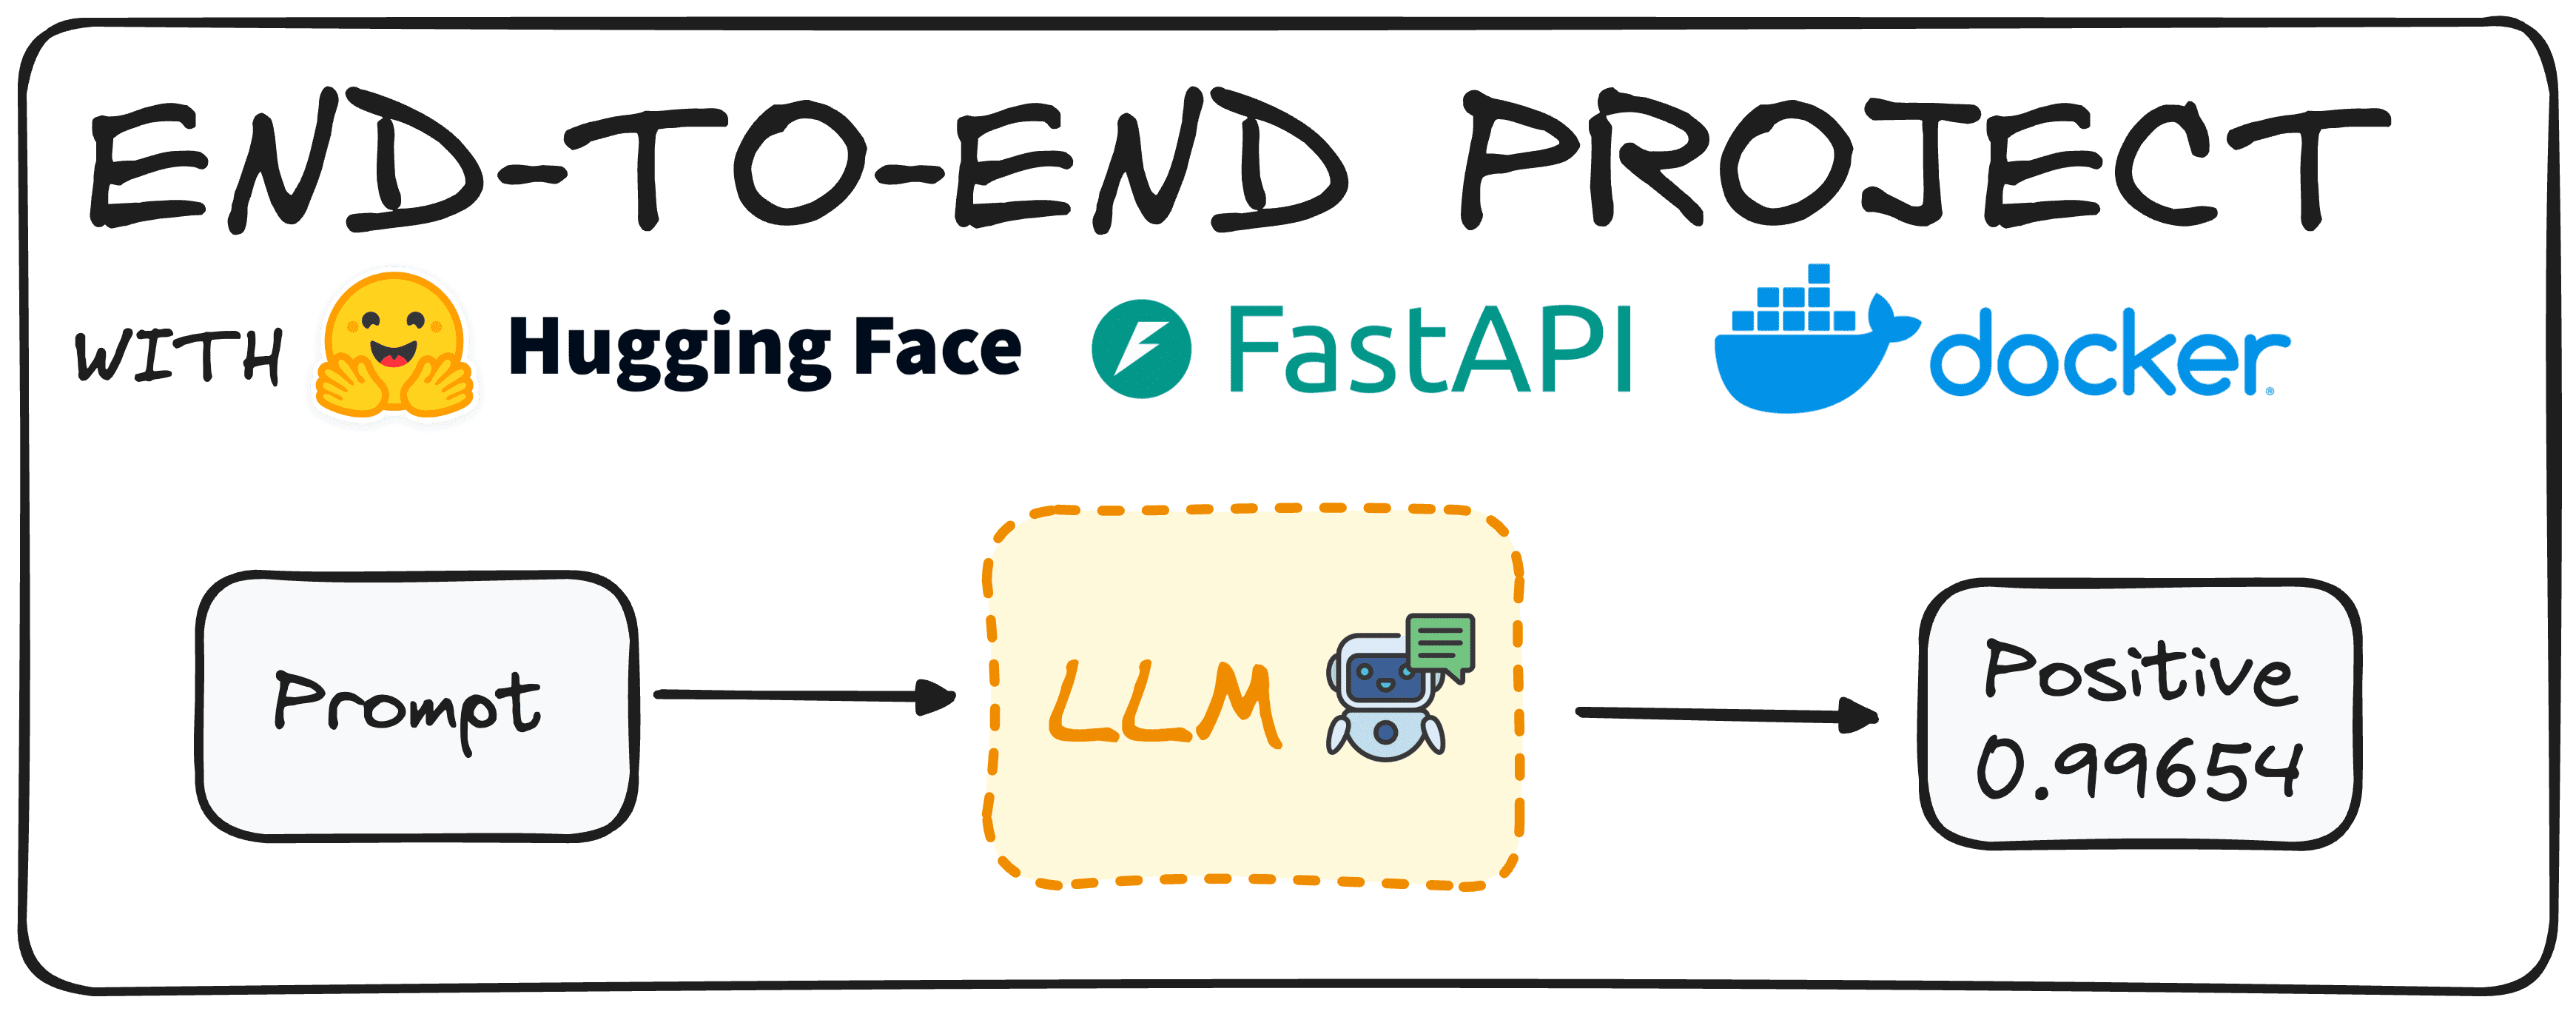
Imagine taking advantage of a Hugging Face model to determine the sentiment of reviews. Traditionally, the first step would involve crafting such a model and ensuring it works properly.
However, today’s pre-trained models allow us to have such Large Language Models (LLMs) ready with minimal effort.
Once we have this model ready to be used, our main goal is to enable colleagues within a company to use this model without needing to download or implement it from scratch.
To do so, we would create an endpoint API, enabling users to call and use the model independently. This is what we refer to as an end-to-end project, built from start to finish.
Today, we will deploy a simple model using Hugging Face, FastAPI, and Docker, demonstrating how to achieve this goal efficiently.
Step 1: Choosing our HuggingFace Model
The first thing to do is to pick a Hugging Face Model that adapts to our needs. To do so, we can easily install hugging face in our environment using the following command:
pip install transformers

# remember to work with transformers we need either tensorflow or pytorch installed as well

pip install torch
pip install tensorflow
Now we need to import the pipeline command of the transformers library.
from transformers import pipeline
Then using the pipeline command we can easily generate a model that defines the sentiment of a given text. We can do so using two different approaches: By defining the task “sentiment analysis” or by defining the model, as can be seen in the following piece of code.
# Defining directly the task we want to implement.
pipe = pipeline(task="sentiment-analysis")

# Defining the model we choose.
pipe = pipeline(model="model-to-be-used")
It is important to note that using the task-based approach is not recommended, as it limits our control over the specific model being used.
In my case I chose the “distilbert-base-uncased-fine tuned-sst-2-english” but you are free to browse the Hugging Face Hub and choose any model that suits your needs. You can find a simple guide to Hugging Face in the following article.
pipe = pipeline(model="distilbert/distilbert-base-uncased-finetuned-sst-2-english")
Now that we have our pipe model defined, just sending a simple prompt we will get our result back. For instance, for the following command:
print(pipe("This tutorial is great!"))
We would get [{‘label’: ‘POSITIVE’, ‘score’: 0.9998689889907837}]
Let’s imagine that we prefer that our users get a natural language sentence regarding this classification. We can implement a simple Python code that does this too:
def generate_response(prompt:str):
   response = pipe("This is a great tutorial!")
   label = response[0]["label"]
   score = response[0]["score"]
   return f"The '{prompt}' input is {label} with a score of {score}"

print(generate_response("This tutorial is great!"))
And repeating the same experiment we would get:
The ‘This tutorial is great!’ input is POSITIVE with a score of 0.9997909665107727
So now we have a working model and we can proceed to define our API.
Step 2: Write API endpoint for the Model with FastAPI
To define our API we will use FastAPI. It is a Python framework for building high-performance web APIs. First, install the FastAPI library using the pip command and import it into our environment. Additionally, we will utilize the pydantic library to ensure our inputs are of the desired type.
The following code will generate a working API that our colleagues can directly use.
from fastapi import FastAPI
from pydantic import BaseModel
from transformers import pipeline

# You can check any other model in the Hugging Face Hub
pipe = pipeline(model="distilbert/distilbert-base-uncased-finetuned-sst-2-english")

# We define the app
app = FastAPI()

# We define that we expect our input to be a string
class RequestModel(BaseModel):
   input: str

# Now we define that we accept post requests
@app.post("/sentiment")
def get_response(request: RequestModel):
   prompt = request.input
   response = pipe(prompt)
   label = response[0]["label"]
   score = response[0]["score"]
   return f"The '{prompt}' input is {label} with a score of {score}"
Here’s what happens step-by-step in the code:
- Importing Necessary Libraries: The code starts by importing FastAPI, and Pydantic, which ensures that the data we receive and send is structured correctly.
- Loading the Model: Then we load a pre-trained sentiment analysis model, as we have already done in the first step.
- Setting Up the FastAPI Application:
app = FastAPI()initializes our FastAPI app, making it ready to handle requests. - Defining the Request Model: Using Pydantic, a RequestModel class is defined. This class specifies that we expect an input string, ensuring that our API only accepts data in the correct format.
- Creating the Endpoint: The
@app.post("/sentiment")decorator tells FastAPI that this function should be triggered when a POST request is made to the /sentiment endpoint. The get_response function takes a RequestModel object as input, which contains the text we want to analyze. - Processing the Request: Inside the
get_responsefunction, the text from the request is extracted and passed to the model(pipe(prompt)). The model returns a response with the sentiment label (like “POSITIVE” or “NEGATIVE”) and a score indicating the confidence of the prediction. - Returning the Response: Finally, the function returns a formatted string that includes the input text, the sentiment label, and the confidence score, providing a clear and concise result for the user.
If we execute the code, the API will be available in our local host, as can be observed in the image below.
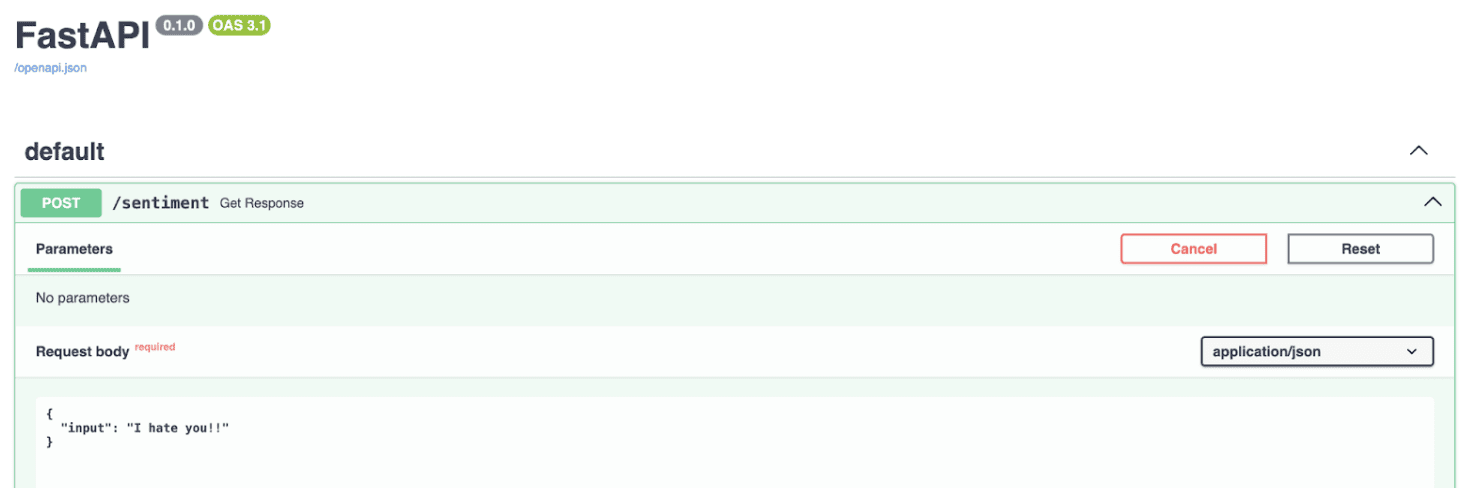
Screenshot of local host end point with FastAPI
To put it simply, this code sets up a simple web service, where you can send a piece of text to, and it will reply with an analysis of the sentiment of that text, leveraging the powerful capabilities of the Hugging Face model via FastAPI.
Next, we should containerize our application so that it can be executed anywhere, not just on our local computer. This will ensure greater portability and ease of deployment.
Step 3: Use Docker to Run our Model
Containerization involves placing your application into a container. A Docker container runs an instance of a Docker image, which includes its own operating system and all necessary dependencies for the application.
For example, you can install Python and all required packages within the container, so it can run everywhere without the need of installing such libraries.
To run our sentiment analysis app in a Docker container, we first need to create a Docker image. This process involves writing a Dockerfile, which acts as a recipe specifying what the Docker image should contain.
If Docker is not installed on your system, you can download it from Docker’s website. Here’s the Dockerfile we’ll use for this project, named Dockerfile in the repository.
# Use an official Python runtime as a parent image
FROM python:3.10-slim

# Set the working directory in the container
WORKDIR /sentiment

# Copy the requirements.txt file into the root
COPY requirements.txt .

# Copy the current directory contents into the container at /app as well
COPY ./app ./app

# Install any needed packages specified in requirements.txt
RUN pip install -r requirements.txt

# Make port 8000 available to the world outside this container
EXPOSE 8000

# Run main.py when the container launches, as it is contained under the app folder, we define app.main
CMD ["uvicorn", "app.main:app", "--host", "0.0.0.0", "--port", "8000"]
Then we just need to run the following command in the terminal to build the docker image.
docker build -t sentiment-app .
And then to execute we have two options:
- Using our terminal with commands.
docker run -p 8000:8000 --name name_of_cointainer sentiment-hf - Using the docker hub. We can easily go to the docker hub and click on the run button of the image.
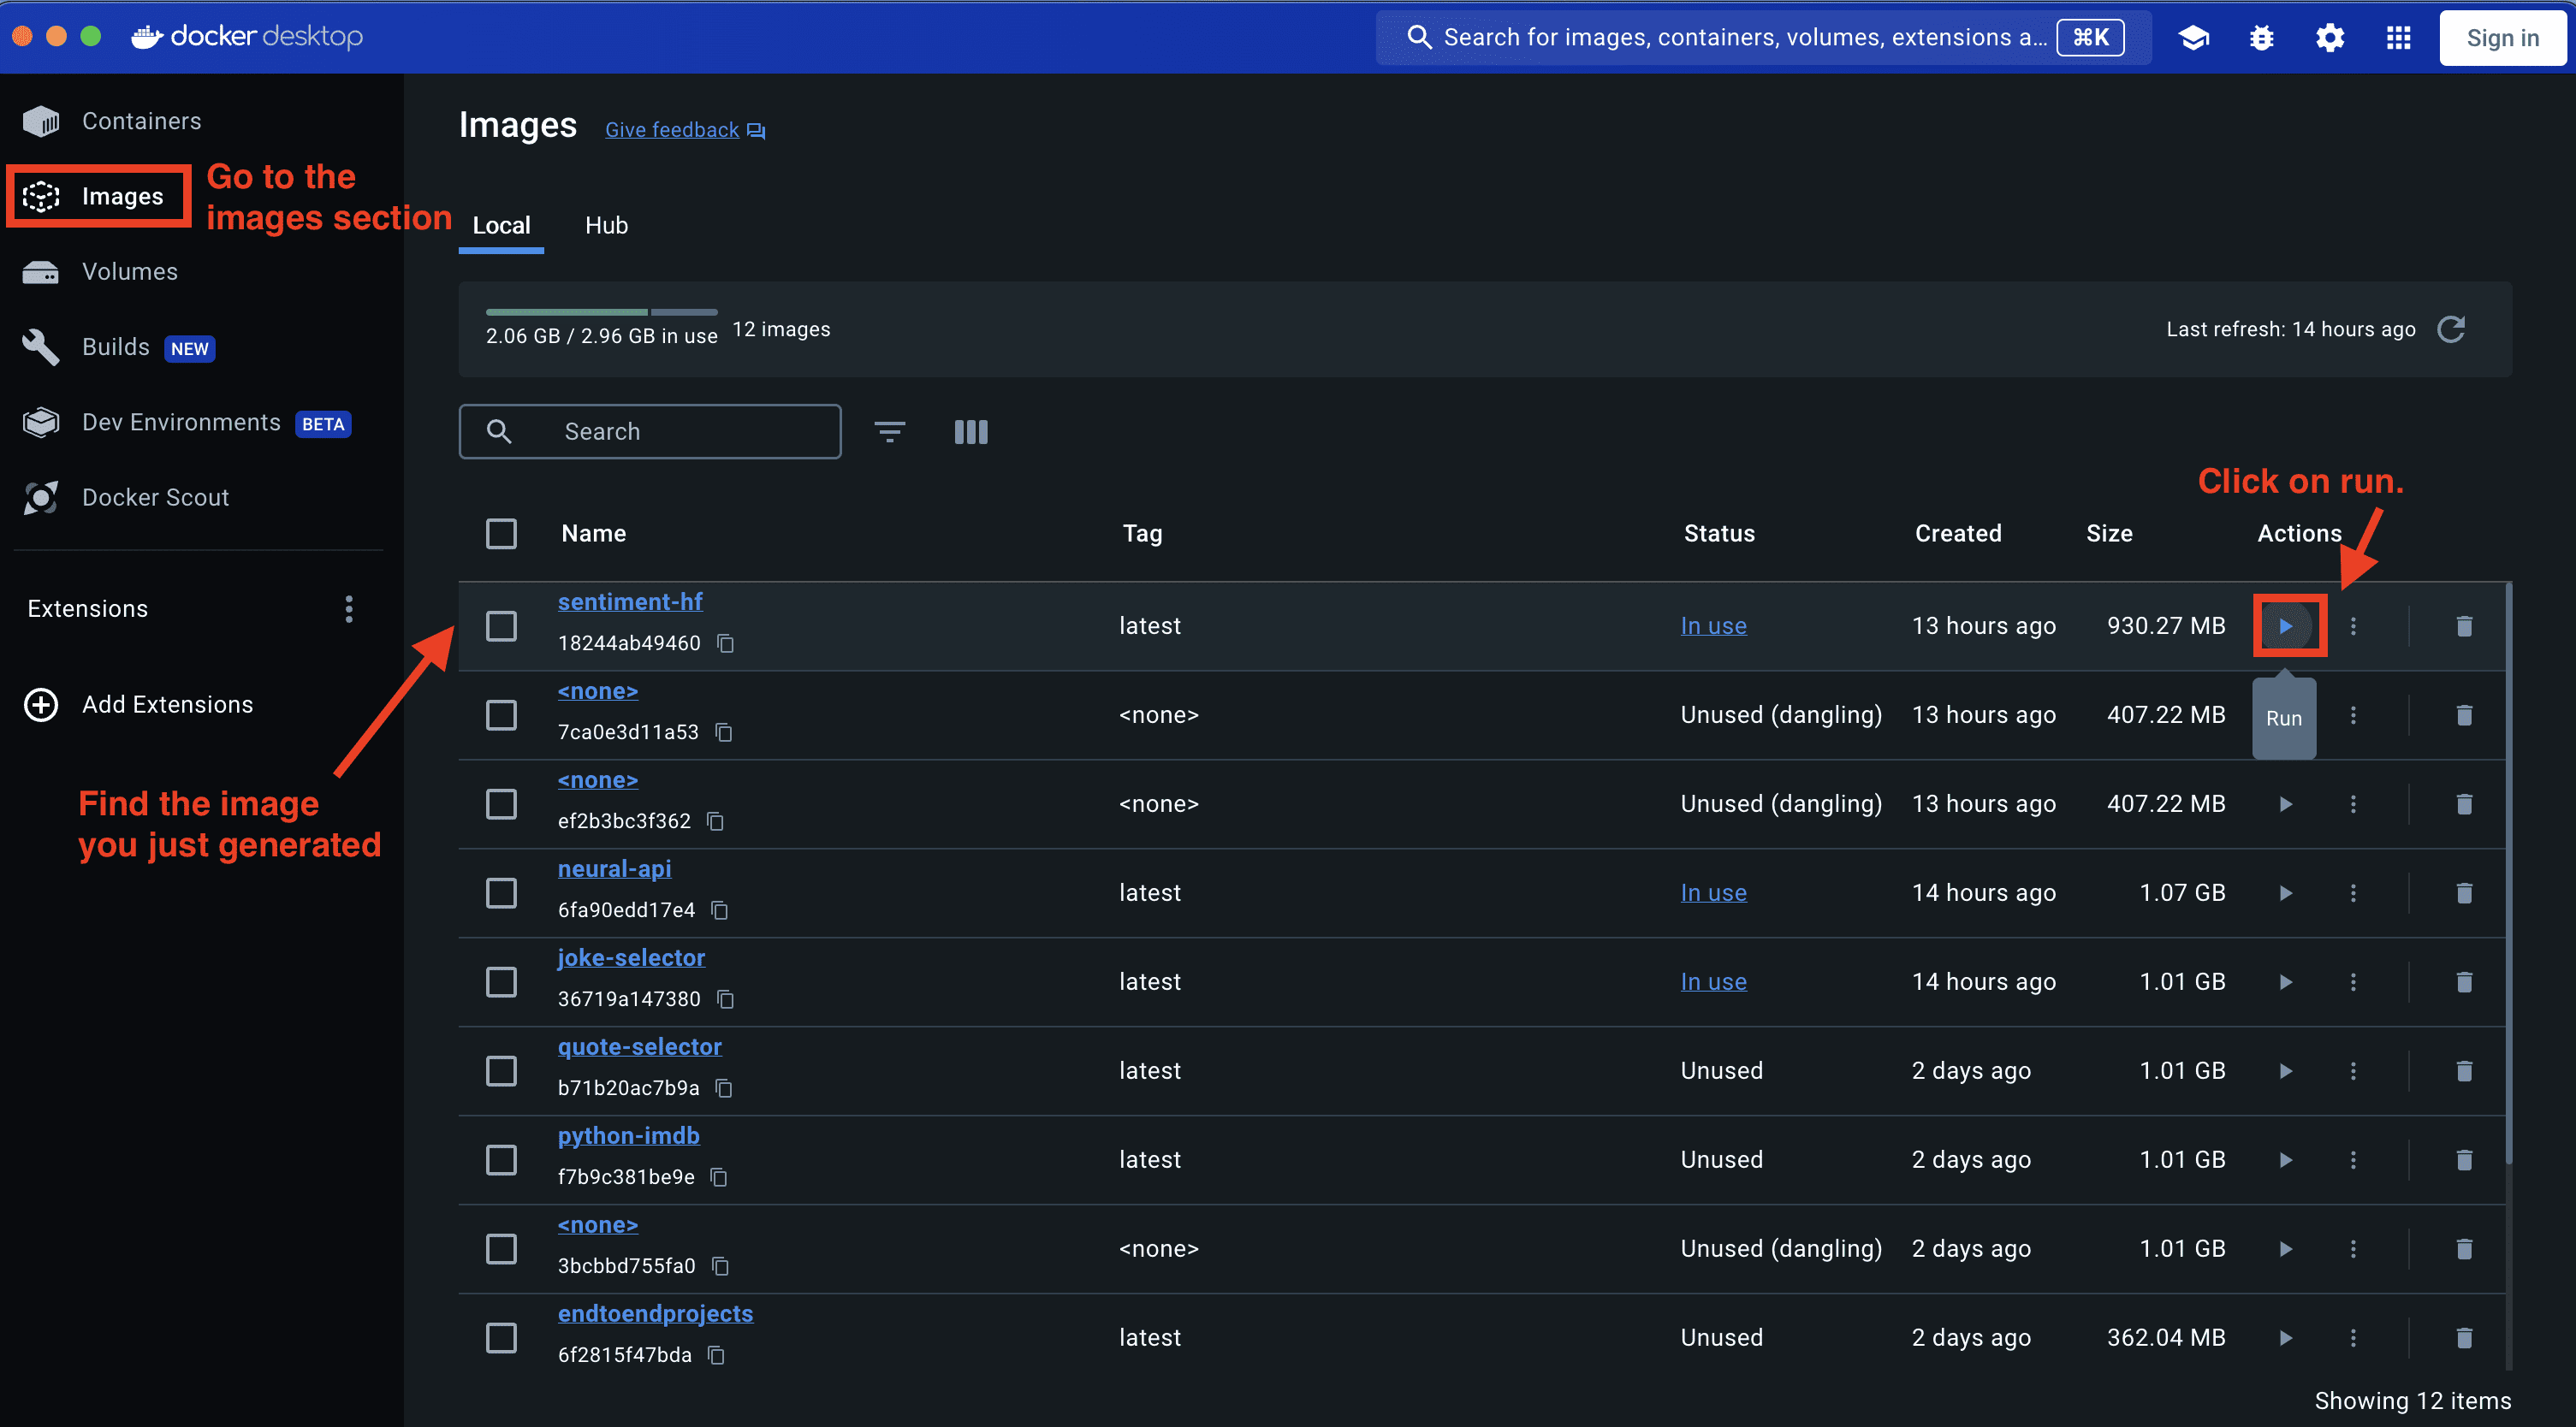
Screenshot of the Dockerhub
And this is all! Now we have a working sentiment classification model what can work anywhere and can be executed using an API.
In Brief
- Model Selection and Setup: Choose and configure a Hugging Face pre-trained model for sentiment analysis, ensuring it meets your needs.
- API Development with FastAPI: Create an API endpoint using FastAPI, enabling easy interaction with the sentiment analysis model.
- Containerization with Docker: Containerize the application using Docker to ensure portability and seamless deployment across different environments.
You can check my whole code in the following GitHub repo.
Josep Ferrer is an analytics engineer from Barcelona. He graduated in physics engineering and is currently working in the data science field applied to human mobility. He is a part-time content creator focused on data science and technology. Josep writes on all things AI, covering the application of the ongoing explosion in the field.
- SEO Powered Content & PR Distribution. Get Amplified Today.
- PlatoData.Network Vertical Generative Ai. Empower Yourself. Access Here.
- PlatoAiStream. Web3 Intelligence. Knowledge Amplified. Access Here.
- PlatoESG. Carbon, CleanTech, Energy, Environment, Solar, Waste Management. Access Here.
- PlatoHealth. Biotech and Clinical Trials Intelligence. Access Here.
- Source: https://www.kdnuggets.com/a-simple-to-implement-end-to-end-project-with-huggingface?utm_source=rss&utm_medium=rss&utm_campaign=a-simple-to-implement-end-to-end-project-with-huggingface

