작성자 별 이미지
이 튜토리얼에서는 다양한 사용 사례에 맞게 OpenAI API를 설정하고 사용하는 방법을 알아봅니다. 이 튜토리얼은 Python 프로그래밍에 대한 지식이 부족한 사람들도 쉽게 따라할 수 있도록 설계되었습니다. 누구나 응답을 생성하고 고품질의 대규모 언어 모델에 액세스할 수 있는 방법을 살펴보겠습니다.
XNUMXD덴탈의 오픈AI API 개발자는 OpenAI가 개발한 다양한 AI 모델에 쉽게 액세스할 수 있습니다. 개발자가 최첨단 OpenAI 모델로 구동되는 지능형 기능을 애플리케이션에 통합할 수 있는 사용자 친화적인 인터페이스를 제공합니다. API는 텍스트 생성, 다단계 채팅, 임베딩, 전사, 번역, 텍스트 음성 변환, 이미지 이해, 이미지 생성 등 다양한 목적으로 사용될 수 있습니다. 또한 API는 컬, Python 및 Node.js와 호환됩니다.
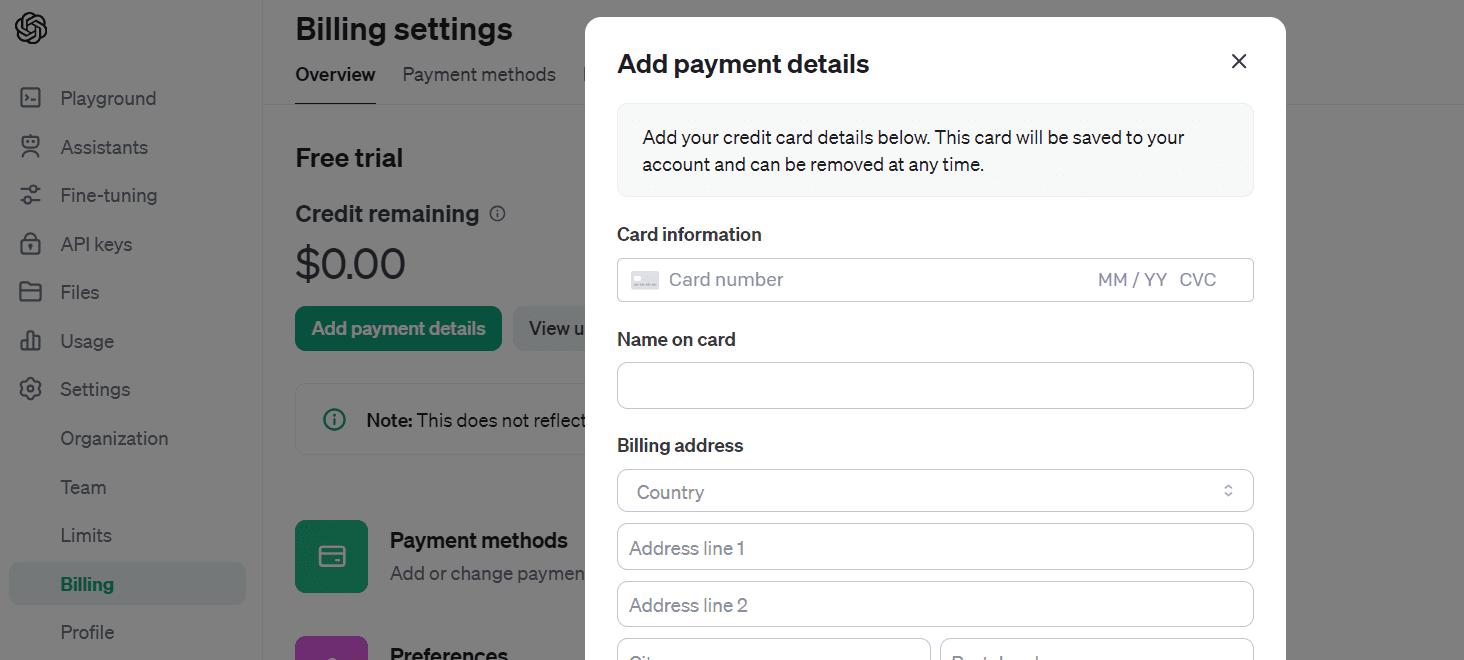
OpenAI API를 시작하려면 먼저 openai.com에서 계정을 만들어야 합니다. 이전에는 모든 사용자에게 무료 크레딧이 제공되었지만 이제 신규 사용자는 크레딧을 구매해야 합니다.
크레딧을 구매하려면 '설정', '청구', 마지막으로 '결제 세부정보 추가'로 이동하세요. 직불카드나 신용카드 정보를 입력하고 자동 충전을 비활성화하세요. 10 USD를 충전하면 XNUMX년 동안 사용할 수 있습니다.
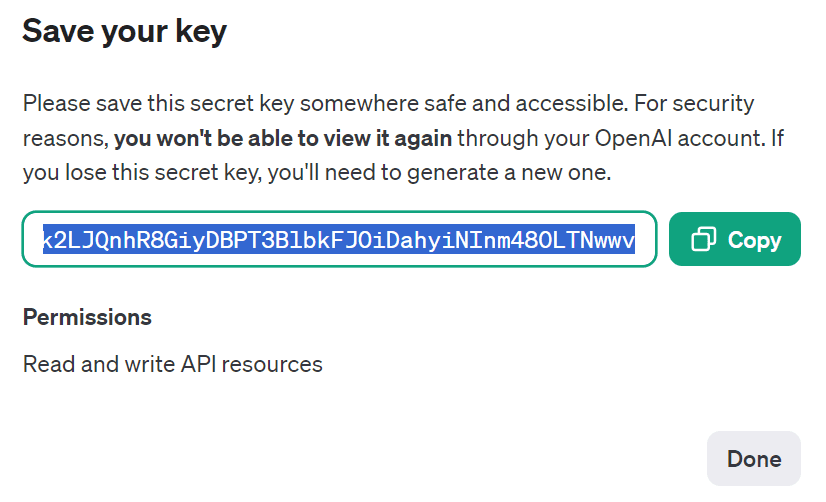
“API 키”로 이동한 후 “새 비밀 키 생성”을 선택하여 API 키를 생성해 보겠습니다. 이름을 지정하고 "비밀 키 만들기"를 클릭하세요.

API를 복사하고 로컬 머신에 환경 변수를 만듭니다.
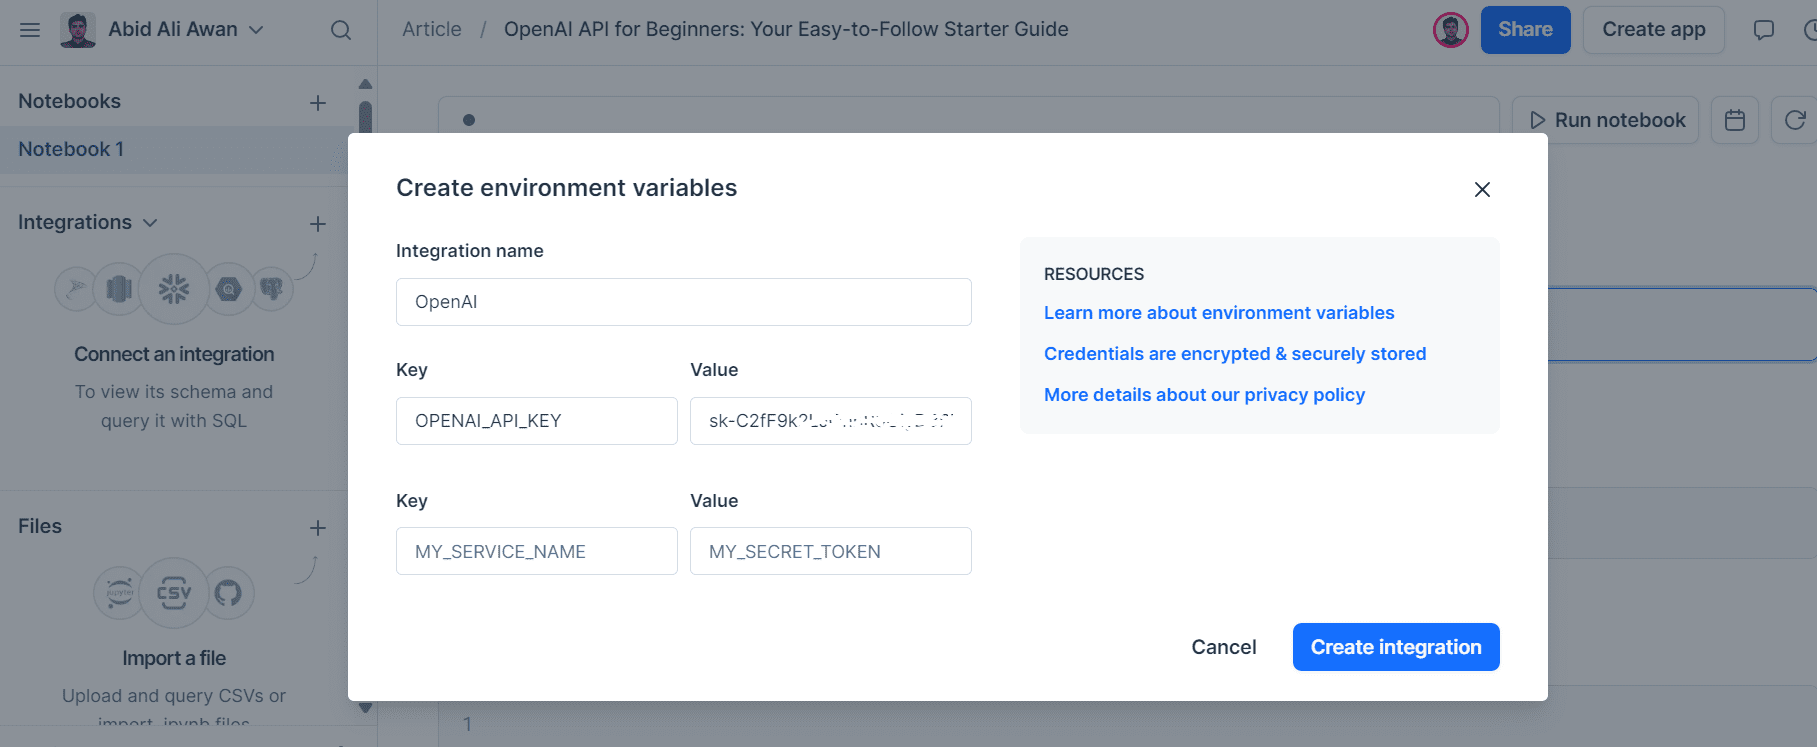
저는 Deepnote를 IDE로 사용합니다. 환경변수를 만드는 것은 쉽습니다. "통합"으로 이동하여 "환경 변수 생성"을 선택하고 키의 이름과 값을 제공하고 통합을 생성하기만 하면 됩니다.
다음으로 pip를 사용하여 OpenAI Python 패키지를 설치하겠습니다.
%pip install --upgrade openai이제 전 세계적으로 다양한 유형의 모델에 액세스할 수 있는 클라이언트를 생성하겠습니다.
“OPENAI_API_KEY”라는 이름으로 환경 변수를 설정한 경우 OpenAI 클라이언트에 API 키를 제공할 필요가 없습니다.
from openai import OpenAI

client = OpenAI()
환경 변수 이름이 기본 이름과 다른 경우에만 API 키를 제공해야 합니다.
import os
from openai import OpenAI

client = OpenAI(
  api_key=os.environ.get("SECRET_KEY"),
 )
레거시 함수를 사용하여 응답을 생성하겠습니다. 완성 기능에는 응답을 생성하기 위한 모델 이름, 프롬프트 및 기타 인수가 필요합니다.
completion = client.completions.create(
model="gpt-3.5-turbo-instruct",
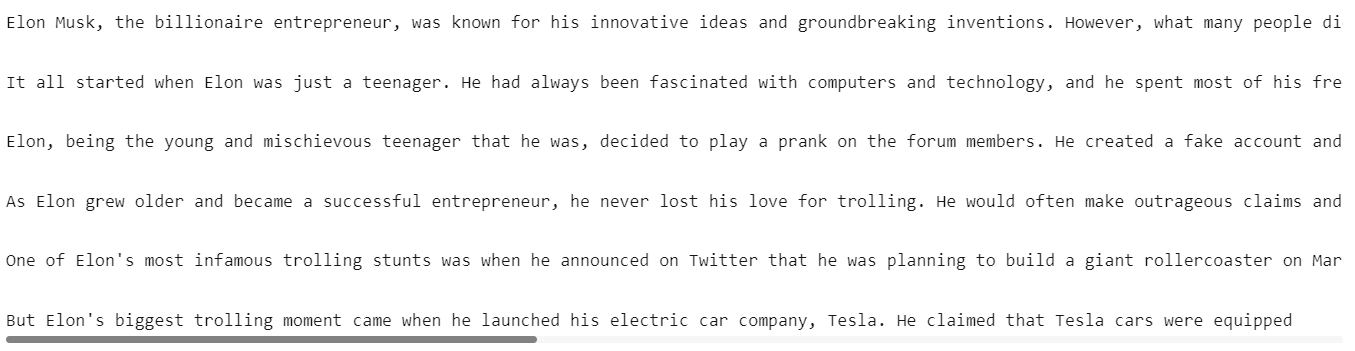
prompt="Write a short story about Elon Musk being the biggest troll.",
max_tokens=300,
temperature=0.7,
)
print(completion.choices[0].text)
GPT3.5 모델은 Elon Musk에 대한 놀라운 이야기를 만들어냈습니다.
추가 인수 `stream`을 제공하여 응답을 스트리밍할 수도 있습니다.
스트림 기능을 사용하면 완전한 응답을 기다리는 대신 출력이 생성되는 즉시 출력을 처리할 수 있습니다. 이 접근 방식은 언어 모델 토큰의 출력을 한 번에 모두 반환하는 대신 토큰별로 반환하여 인지된 대기 시간을 줄이는 데 도움이 됩니다.
stream = client.completions.create(
    model="gpt-3.5-turbo-instruct",
    prompt="Write a Python code for accessing the REST API securely.",
    max_tokens=300,
    temperature=0.7,
    stream = True
)
for chunk in stream:
        print(chunk.choices[0].text, end="")

모델은 API 채팅 완성을 사용했습니다. 응답을 생성하기 전에 사용 가능한 모델을 살펴보겠습니다.
사용 가능한 모든 모델 목록을 보거나 모델 공식 문서 페이지.
print(client.models.list())
최신 버전의 GPT-3.5를 사용하고 시스템 프롬프트 및 사용자 메시지에 대한 사전 목록을 제공합니다. 동일한 메시지 패턴을 따라야 합니다.
completion = client.chat.completions.create(
    model="gpt-3.5-turbo-1106",
    messages=[
        {
            "role": "system",
            "content": "You are an experienced data scientist, adept at presenting complex data concepts with creativity.",
        },
        {
            "role": "user",
            "content": "What is Feature Engineering, and what are some common methods?",
        },
    ],
)

print(completion.choices[0].message.content)
보시다시피 레거시 API와 비슷한 결과를 생성했습니다. 그렇다면 이 API를 사용하는 이유는 무엇입니까? 다음으로 채팅 완료 API가 더 유연하고 사용하기 쉬운 이유를 알아봅니다.
Feature engineering is the process of selecting, creating, or transforming features (variables) in a dataset to improve the performance of machine learning models. It involves identifying the most relevant and informative features and preparing them for model training. Effective feature engineering can significantly enhance the predictive power of a model and its ability to generalize to new data.

Some common methods of feature engineering include:

1. Imputation: Handling missing values in features by filling them in with meaningful values such as the mean, median, or mode of the feature.

2. One-Hot Encoding: Converting categorical variables into binary vectors to represent different categories as individual features.

3. Normalization/Standardization: Scaling numerical features to bring t.........
이제 AI 모델과 다단계 대화를 나누는 방법을 알아 보겠습니다. 이를 위해 이전 대화에 어시스턴트의 응답을 추가하고 동일한 메시지 형식으로 새 프롬프트도 포함합니다. 그 후 채팅 완료 기능에 사전 목록을 제공하겠습니다.
chat=[
    {"role": "system", "content": "You are an experienced data scientist, adept at presenting complex data concepts with creativity."},
    {"role": "user", "content": "What is Feature Engineering, and what are some common methods?"}
  ]
chat.append({"role": "assistant", "content": str(completion.choices[0].message.content)})
chat.append({"role": "user", "content": "Can you summarize it, please?"})

completion = client.chat.completions.create(
  model="gpt-3.5-turbo-1106",
  messages=chat
)

print(completion.choices[0].message.content)
모델은 컨텍스트를 이해하고 기능 엔지니어링을 요약했습니다.
Feature engineering involves selecting, creating, or transforming features in a dataset to enhance the performance of machine learning models. Common methods include handling missing values, converting categorical variables, scaling numerical features, creating new features using interactions and polynomials, selecting important features, extracting time-series and textual features, aggregating information, and reducing feature dimensionality. These techniques aim to improve the model's predictive power by refining and enriching the input features.고급 애플리케이션을 개발하려면 텍스트를 임베딩으로 변환해야 합니다. 이러한 임베딩은 유사성 검색, 의미 검색 및 추천 엔진에 사용됩니다. API 텍스트와 모델 이름을 제공하여 임베딩을 생성할 수 있습니다. 그렇게 간단합니다.
text = "Data Engineering is a rapidly growing field that focuses on the collection, storage, processing, and analysis of large volumes of structured and unstructured data. It involves various tasks such as data extraction, transformation, loading (ETL), data modeling, database design, and optimization to ensure that data is accessible, accurate, and relevant for decision-making purposes."

DE_embeddings = client.embeddings.create(input=text, model="text-embedding-3-small")
print(chat_embeddings.data[0].embedding)
[0.0016297283582389355, 0.0013418874004855752, 0.04802832752466202, -0.041273657232522964, 0.02150309458374977, 0.004967313259840012,.......]이제 텍스트를 음성으로, 음성을 텍스트로 변환하고 오디오 API를 사용하여 번역할 수도 있습니다.
전사
우리는 Wi-Fi 7은 모든 것을 변화시킬 것입니다 YouTube 동영상을 mp3로 변환하세요. 그 후, 파일을 열어 오디오 스크립트 API에 제공하겠습니다.
audio_file= open("Data/techlinked.mp3", "rb")
transcript = client.audio.transcriptions.create(
  model="whisper-1",
  file=audio_file
)
print(transcript.text)
Whisper 모델은 놀랍습니다. 오디오의 완벽한 대본이 있습니다.
The Consumer Electronics Show has officially begun in Las Vegas and we'll be bringing you all the highlights from right here in our regular studio where it's safe and clean and not a desert. I hate sand. The Wi-Fi Alliance announced that they have officially confirmed the Wi-Fi 7 standard and they've already started to certify devices to ensure they work together. Unlike me and Selena, that was never gonna last. The new standard will have twice the channel bandwidth of Wi-Fi 5, 6, and 6E, making it better for, surprise,......번역
영어 오디오를 다른 언어로 변환할 수도 있습니다. 우리의 경우 우르두어로 변환하겠습니다. 우리는 또 다른 인수 `언어`를 추가하고 ISO 언어 코드 "ur"를 제공할 것입니다.
translations = client.audio.transcriptions.create(
    model="whisper-1",
    response_format="text",
    language="ur",
    file=audio_file,
)

print(translations)
라틴어가 아닌 언어에 대한 번역은 불완전하지만 최소한의 실행 가능한 제품에는 사용할 수 있습니다.
کنسومر ایلیکٹرانک شاہی نے لاس بیگیس میں شامل شروع کیا ہے اور ہم آپ کو جمہوری بہترین چیزیں اپنے ریگلر سٹوڈیو میں یہاں جارہے ہیں جہاں یہ آمید ہے اور خوبصورت ہے اور دنیا نہیں ہے مجھے سانڈ بھولتا ہے وائ فائی آلائنٹس نے اعلان کیا کہ انہوں نے وائ فائی سیبن سٹانڈرڈ کو شامل شروع کیا اور انہوں ن........
음성에 텍스트
귀하의 텍스트를 자연스러운 오디오로 변환하기 위해 음성 API를 사용하여 모델명, 성우 이름 및 입력 텍스트를 제공합니다. 다음으로 오디오 파일을 "Data" 폴더에 저장하겠습니다.
response = client.audio.speech.create(
  model="tts-1",
  voice="alloy",
  input= '''I see skies of blue and clouds of white
            The bright blessed days, the dark sacred nights
            And I think to myself
            What a wonderful world
         '''
)

response.stream_to_file("Data/song.mp3")
Deepnote Notebook 내에서 오디오 파일을 듣기 위해 IPython 오디오 기능을 사용하겠습니다.
from IPython.display import Audio
Audio("Data/song.mp3")

OpenAI API는 사용자에게 채팅 완료 기능을 통해 다중 모드 모델에 대한 액세스를 제공합니다. 이미지를 이해하기 위해 최신 GPT-4 비전 모델을 사용할 수 있습니다.
메시지 인수에서 이미지와 이미지 URL에 대한 질문을 묻는 프롬프트를 제공했습니다. 이미지의 출처는 Pixabay. 오류를 방지하려면 동일한 메시지 형식을 따라야 합니다.
response = client.chat.completions.create(
    model="gpt-4-vision-preview",
    messages=[
        {
            "role": "user",
            "content": [
                {
                    "type": "text",
                    "text": "Could you please identify this image's contents and provide its location?",
                },
                {
                    "type": "image_url",
                    "image_url": {
                        "url": "https://images.pexels.com/photos/235731/pexels-photo-235731.jpeg?auto=compress&cs=tinysrgb&w=1260&h=750&dpr=2",
                    },
                },
            ],
        }
    ],
    max_tokens=300,
)

print(response.choices[0].message.content)
출력은 이미지를 완벽하게 설명합니다.
This is an image of a person carrying a large number of rice seedlings on a carrying pole. The individual is wearing a conical hat, commonly used in many parts of Asia as protection from the sun and rain, and is walking through what appears to be a flooded field or a wet area with lush vegetation in the background. The sunlight filtering through the trees creates a serene and somewhat ethereal atmosphere.

It's difficult to determine the exact location from the image alone, but this type of scene is typically found in rural areas of Southeast Asian countries like Vietnam, Thailand, Cambodia, or the Philippines, where rice farming is a crucial part of the agricultural industry and landscape.
이미지 URL을 제공하는 대신 로컬 이미지 파일을 로드하여 채팅 완료 API에 제공할 수도 있습니다. 그러기 위해서는 먼저 이미지를 다운로드해야 합니다. 만지트 싱 야다브 pexels.com에서.
!curl -o /work/Data/indian.jpg "https://images.pexels.com/photos/1162983/pexels-photo-1162983.jpeg?auto=compress&cs=tinysrgb&w=1260&h=750&dpr=2"
그런 다음 이미지를 로드하고 base64 형식으로 인코딩하겠습니다.
import base64

def encode_image(image_path):
  with open(image_path, "rb") as image_file:
    return base64.b64encode(image_file.read()).decode('utf-8')

image_path = "Data/indian.jpg"

# generating the base64 string
base64_image = encode_image(image_path)
이미지 URL을 제공하는 대신 메타데이터와 이미지의 base64 문자열을 제공합니다.
response = client.chat.completions.create(
    model="gpt-4-vision-preview",
    messages=[
        {
            "role": "user",
            "content": [
                {
                    "type": "text",
                    "text": "Could you please identify this image's contents.",
                },
                {
                    "type": "image_url",
                    "image_url": {
                        "url": f"data:image/jpeg;base64,{base64_image}"
                    },
                },
            ],
        }
    ],
    max_tokens=100,
)

print(response.choices[0].message.content)
모델은 이미지를 성공적으로 분석하고 이에 대한 자세한 설명을 제공했습니다.
The image shows a woman dressed in traditional Indian attire, specifically a classical Indian saree with gold and white colors, which is commonly associated with the Indian state of Kerala, known as the Kasavu saree. She is adorned with various pieces of traditional Indian jewelry including a maang tikka (a piece of jewelry on her forehead), earrings, nose ring, a choker, and other necklaces, as well as bangles on her wrists.

The woman's hairstyle features jasmine flowers arranged in
DALLE-3 모델을 사용하여 이미지를 생성할 수도 있습니다. 모델 이름, 프롬프트, 크기, 품질 및 이미지 수를 이미지 API에 제공하기만 하면 됩니다.
response = client.images.generate(
  model="dall-e-3",
  prompt="a young woman sitting on the edge of a mountain",
  size="1024x1024",
  quality="standard",
  n=1,
)

image_url = response.data[0].url
생성된 이미지는 온라인에 저장되며, 다운로드하여 로컬에서 볼 수 있습니다. 이를 위해 `요청` 기능을 사용하여 이미지를 다운로드하고 이미지 URL과 저장하려는 로컬 디렉터리를 제공합니다. 그런 다음 Pillow 라이브러리의 이미지 기능을 사용하여 이미지를 열고 표시합니다.
import urllib.request

from PIL import Image

urllib.request.urlretrieve(image_url, '/work/Data/woman.jpg')

img = Image.open('/work/Data/woman.jpg')

img.show()
우리는 고품질의 생성된 이미지를 받았습니다. 정말 놀랍습니다!

OpenAI Python API를 실행하는 데 어려움을 겪고 있다면 언제든지 내 프로젝트를 확인해 보세요. 딥노트.
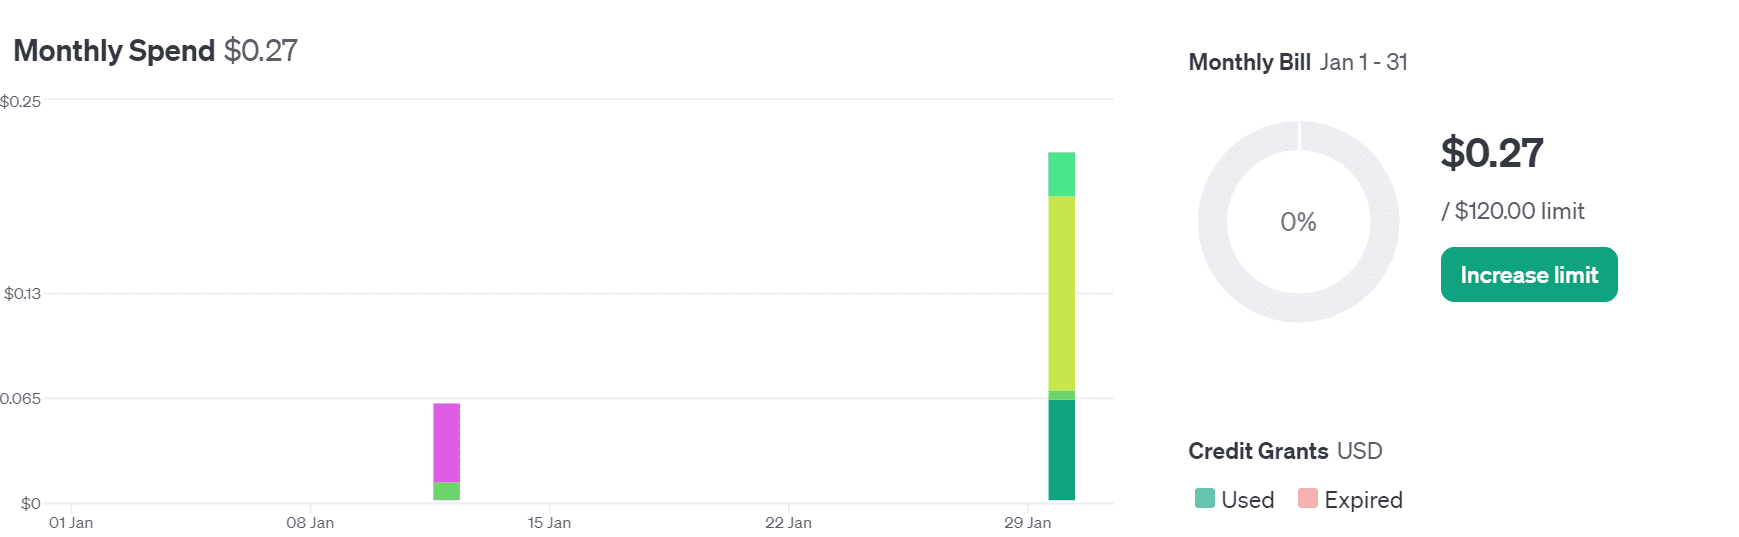
저는 한동안 OpenAPI를 실험해 왔으며 결국 0.22달러의 크레딧만 사용하게 되었는데, 이는 꽤 저렴하다고 생각합니다. 내 가이드를 통해 초보자라도 자신만의 AI 애플리케이션 구축을 시작할 수 있습니다. 이는 간단한 프로세스입니다. 자체 모델을 교육하거나 배포할 필요가 없습니다. 새로운 릴리스가 나올 때마다 지속적으로 개선되는 API를 사용하여 최첨단 모델에 액세스할 수 있습니다.
이 가이드에서는 OpenAI Python API를 설정하고 간단한 텍스트 응답을 생성하는 방법을 다룹니다. 또한 멀티턴 채팅, 임베딩, 전사, 번역, 텍스트 음성 변환, 비전 및 이미지 생성 API에 대해서도 알아봅니다.
이 API를 사용하여 고급 AI 애플리케이션을 구축하려면 알려주시기 바랍니다.
읽어 주셔서 감사합니다.
아비드 알리 아완 (@1abidaliawan)은 기계 학습 모델 구축을 좋아하는 공인 데이터 과학자 전문가입니다. 현재 그는 콘텐츠 제작에 집중하고 있으며 머신 러닝 및 데이터 과학 기술에 대한 기술 블로그를 작성하고 있습니다. Abid는 기술 관리 석사 학위와 통신 공학 학사 학위를 보유하고 있습니다. 그의 비전은 정신 질환으로 고생하는 학생들을 위해 그래프 신경망을 사용하여 AI 제품을 만드는 것입니다.
- SEO 기반 콘텐츠 및 PR 배포. 오늘 증폭하십시오.
- PlatoData.Network 수직 생성 Ai. 자신에게 권한을 부여하십시오. 여기에서 액세스하십시오.
- PlatoAiStream. 웹3 인텔리전스. 지식 증폭. 여기에서 액세스하십시오.
- 플라톤ESG. 탄소, 클린테크, 에너지, 환경, 태양광, 폐기물 관리. 여기에서 액세스하십시오.
- PlatoHealth. 생명 공학 및 임상 시험 인텔리전스. 여기에서 액세스하십시오.
- 출처: https://www.kdnuggets.com/openai-api-for-beginners-your-easy-to-follow-starter-guide?utm_source=rss&utm_medium=rss&utm_campaign=openai-api-for-beginners-your-easy-to-follow-starter-guide

