Tag: Battery life
Intel’s newest laptop chips power a fresh generation of affordable notebooks
If history is any guide, your next notebook's new processor launched today, as Intel unveiled a fresh lineup of 12th-gen Core CPUs for laptops—specifically the chips codenamed Alder Lake-P for mainstream notebooks, and Alder Lake-U for ultraportable PCs and tablets.
Intel ships about 80 percent of all notebook PC processors each year, meaning that you'll probably end up buying a notebook PC with one of these new chips inside. In January, Intel announced the Alder Lake-H, Alder Lake-P, and Alder Lake-U series, as part of Intel's notebook processor plans for 2022. Because of the way in which Intel rolls out its new chips, we already have our first review of the 12th-gen Core i9-12900HK, a fire-breathing, gaming-class processor that crushed the (older) laptop competition.
It's less likely, however, that you'll buy a gaming laptop in 2022 than a more mainstream device. Intel believes more than 250 different laptop models will include these new P- and U-series chips, which have already begun shipping. (Intel says that the proportions will favor the U series over the P series, roughly 75 percent to 25 percent.) Unfortunately, however, we don't yet have one of these new P-series or U-series notebooks in for testing, so we've instead summarized what we know of these new chips — including the specs, features, and estimated performance — in our summary below.
Don't count out AMD, Intel's chipmaking rival. The company recently announced Ryzen 6000 Mobile processors, which it is aggressively marketing at mainstream PCs. Our review of the new AMD Ryzen 9 6900HS chip showed it delivers game-changing performance for tiny laptops.
Intel's new Alder Lake-P chips: mainstream performance
Remember, Intel's Alder Lake-P series chips carve out a new product designation that hasn't existed before. Intel classifies the “P” processor as “performance thin and light,” implying that this will be its mainstream laptop offering. We're already seeing some business laptops adopt this processor, emphasizing performance without ditching the traditional laptop chassis for something thicker. The P-series chips consume 28 watts.
According to Dan Rogers, Intel's senior director of mobile product marketing, the reason to add a “P”-series processor wasn't for you, but for PC makers — Intel's existing processors allowed PC makers to push power consumption and performance upward to 28 watts, but they weren't taking advantage. Carving out the new “P” brand told customers and consumers alike that they could expect higher performance, he said.
Intel's Alder Lake-P chips will include up to six performance cores and eight efficiency cores, with a total of twenty threads. (This explainer can walk you through the difference between Alder Lake's new P-Cores and E-cores.) Processor speeds will begin at 1.5GHz for the performance or P-cores of the Core i3 chips, with up to 4.4GHz turbo options. At the high end, performance cores speeds will increase from a base clock of 1.8GHz, up to a maximum turbo clock speed of 4.8GHz.

Intel
Intel's Alder Lake-P series chips are designed for “enthusiast” levels of performance, but without some of the characteristics that would define a truly high-end PC powered by Intel's Alder Lake-H chips, Rogers said. For example, Intel's P-series chips lack the x8 PCI Express connection to the discrete GPU, because they aren't specifically designed for them. Instead, Intel's Alder Lake-P includes a pair of x4 PCI Express connections to connect to up to two SSDs. A pair of Thunderbolt 4 ports are supported as well, for connections to external Thunderbolt docks or external displays.
“The vast majority of P-series systems will be running integrated graphics,” Rogers said. Laptops with discrete GPUs attached to P-series parts will ship, but will be “less common,” Rogers said.
Instead of discrete GPU support, an Alder Lake P-series notebook will include a similar integrated Xe graphics core that's similar to Intel's 11th-gen integrated GPUs: up to 96EUs, with support for four 4K displays. As the chart above notes, the differences between the Core i3, i5, and i7 Alder Lake-P processors extend to graphics. As the number of EU cores decreases, you can expect the graphics performance to decrease as well.

Intel
The new Alder Lake P-serie s does allow for the same variety of memory support also found inside both Intel's desktop version of Alder Lake and its mobile H-series chips: DDR5-4800, DDR4-3200, LPDDR5-5200, and LPDDR4x-4267. That will allow for some flexibility if you need to upgrade your laptop.

Intel is also offering an Intel imaging chip, the IMX488, that you may see in some laptops; Intel also refers to this as the Intel IPU 6.0. This probably won't be highlighted on the list of specifications, though Intel is promising you'll see better webcam performance as a result. (Intel is still recommending a 720p webcam as part of its premium Evo brand, because the size of the 1080p camera modules can be too large to fit inside some laptop bezels.) Intel is also including a new intelligent audio noise suppression capability, so that your roommate vacuuming in the background won't break into your Zoom call.
From a performance standpoint, Intel is using the argument that it can't make generation-to-generation comparisons, as there were no 11th-gen P-series chips to compare them to. Instead, Intel provided two sets of benchmarks, one covering common productivity applications and the other a more generic gaming roundup. Intel believes that you'll be able to play many games using just the chip's integrated graphics, though potentially at lower settings.

Intel

Intel
Intel's U-Series: optimized for low power
Intel's Alder Lake U-series chips are offered in one of two configurations: either 15 watts or 9 watts. At one time, Intel might have called these “Y”-series chips for ultralight laptops and Windows tablets. In any event, Microsoft will almost certainly offer them as options inside its Surface tablets, though whether they'll reside within the main Surface Pro lineup or the smaller, cheaper Surface Go line remains to be seen. The 9W chips are also designed for upcoming foldable PCs, though that category has remained a bit of a white whale to date. Naturally, long battery life is more the focus here, rather than performance.
Designing the same processor for two different types of machines will affect performance, though the core counts will be the same across the U-series line: two performance cores, and between four and eight efficiency cores. If you opt for a thicker, more full-featured laptop with an Alder Lake-U series chip inside, you'll be buying at least a Core i3 chip with a base P-core frequency of 1.2GHz, up to a turbo frequency of 4.8GHz. A U-series Core i7-1265U's two performance cores will run at 1.8GHz at its base frequency and 4.8GHz while in turbo mode. The graphics capabilities will be about the same as the P-series chips in terms of EU count, though the clock speeds have been dialed down to conserve power.
Both the 15W and 9W configurations also include Pentium and Celeron options, shrinking down the core counts further to save cost at the expense of performance.

Intel
The lower-power 9W U-series chips dial down the core clocks dramatically, though the number of cores remains the same. Note how the Core i3 base frequency, at 1.0GHz, is lower than the 15W option; the Core i3 turbo clock for the performance core is still 4.4GHz. At the high end, the base P-core clock speed increases from 1.1GHz to a turbo speed of 4.7GHz.

Intel
We don't have performance data for Intel's new U-series chips…but consumers probably won't be buying them for performance. The key metric, though, will be battery life — and we don't know much about the actual numbers there, either.

Intel
That shouldn't matter, however. Now that Intel has officially launched both the Alder Lake U- and P-series, we should be seeing more and more notebook PCs with them inside, especially with Intel's plans to expand its Evo premium notebook brand even further. (We're hearing that reviews may begin in March.) We'll have a good idea of how they shape up before long. Stay tuned to our roundup of the best laptops to see how Intel's new chips shake out.
This story was updated at 10:25 AM with additional detail.
Forgot your Fitbit tracker at home? Here’s how to make your steps still count
New Fitbit owners often expect that manual tracking of a walk or run will count toward their daily steps. Unfortunately, the Fitbit dashboard doesn't work that way. It'll let you track the exercise, but won't count the activity toward your daily step count. Upon realizing this fact, most people assume that they're out of luck whenever they forget to wear their Fitbit. That's not the case—you can get around this problem with Fitbit's MobileTrack feature.
How to turn on Fitbit MobileTrack
Fitbit MobileTrack treats your smartphone as a basic tracker. It pulls in the step data your phone can collect and then calculates the distance you've covered and calories burned.
As you'd expect, this solution works only when you turn it on before the end of your walk or run. You can't get credit for your activity otherwise. MobileTrack is an alternative tracking method rather than a workaround for manual entries. But if you can remember to activate it, this feature performs well as a stand-in for your actual Fitbit.
To get started, go into the Fitbit app, then tap on your avatar image in the upper left hand of the screen. Select “Set up a device” and choose MobileTrack at the bottom of the screen. Apple iPhone users must also enable permission for the Fitbit app to access your Motion & Fitness data.
PCWorld
After you set up MobileTrack, your phone will record your steps as you walk—and those steps will count toward your daily and seven-day totals as well as any challenges you're participating in. Fitbit says that where you wear the phone shouldn't impact the accuracy of the step counting.
The thing to worry about instead is getting your MobileTrack data to stick. Fitbit does not sync that number back to your tracker—instead, whatever's on your tracker will take precedence over your MobileTrack activity. For example: You walked 15,000 steps with MobileTrack, but your Charge 5 only shows 2,500 steps. If you sync your Charge 5 and your phone after that walk, it'll overwrite the 15,000 steps with 2,500 steps.
Thankfully, you can avoid this quirk easily. Once you begin using MobileTrack, you just have to continue relying on it for the remainder of the day. Keep an eye on your phone's battery life as you do—MobileTrack can drain it faster.
If all this sounds like too much trouble—though truly, it's very simple to activate—you may want to consider a different style of wristband or a more current Fitbit (if you bought an older model). Bands made from fabric, leather, and silicon bands with air holes can help with skin irritation and the newest trackers have superb battery life as our guide on the best Fitbits explains. These strategies will keep your tracker on your wrist for longer stretches, reducing the risk of leaving it behind when you go out.
OQ Technology’s “wake-up” patent draws yawn from IoT smallsat rival

Luxembourg startup OQ Technology said Feb. 16 it has secured its first patent for a planned satellite constellation to connect internet of things (IoT) devices.
The post OQ Technology’s “wake-up” patent draws yawn from IoT smallsat rival appeared first on SpaceNews.
Best wireless mice: Cut the cord with these top performers
If you still think of wireless mice as laggy, battery-sucking substitutes for a real mouse, we've got good news for you. Mouse manufacturers have largely solved the latency, connectivity, and power-efficiency problems that once blighted these devices. The best of today's wireless mice rival their wired counterparts in performance, battery life, features, and design.
There are two rather obvious benefits of a wireless mouse. It eliminates the tether to your computer, giving you greater range—essential if you are constrained by your work area or playing PC games on your TV—and removes a source of friction that often interferes with speed and accuracy. It also makes an essential device more travel friendly. No one objects to one less cord in their gear bag. You'll probably pay a bit more for a wireless mouse than a wired one, but if you value this kind of convenience it's worth it.
Want to pair your wireless mouse with a wireless keyboard? We've got you covered—see PCWorld's roundup of the best wireless keyboards.
Our picks for best wireless mice include innovative designs, ergonomic features, and multiple connectivity options. They also cover both productivity and gaming uses, so you should be able to find at least one that suits your needs. You'll find our tips on what to look for in a wireless mouse below our recommendations.
Microsoft Arc Mouse – Most portable wireless mouse

If we had a “most unusual mouse design” category, the Arc Mouse would win that as well. It lays flat until you bend it into an arc that conforms to the shape of your mouse-ing hand. It uses a single click pad for left and right buttons and scrolling, and the default settings can be changed in Windows device settings.
At just 5.17 x 2.17 x 0.56 inches, the Arc Mouse is easily the most portable mouse we tested. We also like that there is no USB receiver to worry about misplacing—the Arc Mouse connects via Bluetooth 4.0. Folks with extra-large hands might find it a little small, but for most it will be a welcome addition to their gear bag.
Pros
- Travel-friendly size
- Comfortable design
- Good productivity performance
Cons
- Limited customization options
- Needs two AAA batteries
- Might be small for bigger hands
Logitech MX Ergo – Best wireless mouse with a trackball

Trackball mice are an acquired taste, but the MX Ergo's innovative design may have wider appeal. Its width and shape can accommodate most hand sizes and its responsive thumb-side trackball is easy to use and control.
A removable metal plate on the bottom serves a dual purpose. Its weight keeps the mouse perfectly still on your desk as you rotate the scroll wheel. And it can also be adjusted to tilt the mouse 20 degrees, an angle that puts your arm in a more natural, rested position.
The mouse has eight buttons—including a dedicated precision button that slows the cursor speed so you can make more accurate movements with the trackball—all of which can be customized using Logitech Options software. The mouse connects via an accompanying USB dongle or Bluetooth, and Logitech claims its battery can go four months on a single full charge. The only downer is it's not ambidextrous, so southpaws will have to look elsewhere.
Pros
- Comfortable ergonomic tilt
- Solid build
- Highly customizable
Cons
- Right-handed only
- Expensive
Logitech MX Vertical – Most ergonomic wireless mouse

If you have a history of mouse-related hand and arm discomfort, the MX vertical is a great option. Its upright position and contoured body puts your arm at about a 57-degree vertical angle, reducing the pressure on your wrist and creating a comfortable thumb rest. Despite the unconventional design, the mouse still offers familiar controls with split mouse buttons, a scroll wheel aligned to your first two fingers, and a pair of thumb buttons on the adjascent side.
The mouse supports Logitech's Unified Receiver and Bluetooth connections. You can also wire it to your computer using the USB-C charging cable. You can use it with Logitech Options to customize button settings and with Logitech Flow to seamlessly control multiple computers with a single mouse.
The MX Veritcal is a high-performing productivity tool once you get acclimated to the vertical design, and one that may prevent pain and strain as well as ease them.
Pros
- Comfortable ergonomic design
- Can cross-control multiple devices
- Customizable button mapping
Cons
- Has a bit of a learning curve
- Expensive
Microsoft Bluetooth Mouse – Best no-nonsense wireless mouse

For a no-nonsense, go-anywhere mouse, the Microsoft Bluetooth Mouse is hard to beat. As its name makes clear, it connects over Bluetooth so there's no USB dongle to keep track of. Split buttons and a clickable scroll wheel let you precisely navigate web pages and large documents, and it tracks easily over most surfaces.
The Microsoft Bluetooth Mouse runs on a single AA battery but since it uses Bluetooth Low Energy, you can expect up to 12 months of battery life. It's available in five colors.
Pros
- Compact, ambidextrous design
- Clickable scroll wheel
- Inexpensive
Cons
- No programmable buttons
- No ergonomic features
SteelSeries Rival 650 – Best wireless mouse for gaming

Wireless gaming mice offer a critical advantage—no cord resistance to slow down your movements or mess with the precision of your aim. Our top pick is the the SteelSeries Rival 650. It features an eye-catching design, smart button placement, and of wealth customization options. It also uses a unique dual-sensor system, pairing SteelSeries' exclusive TrueMove3 with a dedicated depth sensor that keeps your aim steady when you lift up and adjust the mouse.
The SteelSeries Rival 650 uses quick-charging tech similar to what you find in phones, giving you about 10 hours of charge from a mere 15 minutes plugged in. Best of all, you get all this for about half the price of its competitors.
To learn more read our full review of the SteelSeries Rival 650.
Pros
- Fast charging
- Comfortable and attractive design
- Removable weight system provides plenty of options
Cons
- Heavier than some might like
- Expensive
- Third thumb button is small and awkwardly placed
Logitech G603 – Best wireless mouse for gaming runner-up

You can use your main mouse for gaming on the road. But Logitech's G603 is a better choice. This dedicated wireless gaming mouse features six programmable buttons, including the scroll wheel and a comfortable scoop shape that conforms to right-handers' thumbs. Two AA batteries power up to 500 hours of gaming thanks to Logitech's proprietary HERO sensor, which provides accurate performance with no smoothing, no acceleration, and no interference up to 12,000 DPI.
To learn more, read our full review of the Logitech G603.
Pros
- Adopts Logitech's comfortable G703 scooped shape
- 500 hours of high-performance gaming off two AA batteries
- Flashy one-piece battery cover and button design
Cons
- Heavy, thanks to the dual batteries
- Hard to say how durable the buttons will be over time
What to look for in a wireless mouse
Connectivity
In lieu of a cord, wireless mice connect in one of two ways: via Bluetooth or radio frequencies. Most modern computers ship with Bluetooth support, so if you purchase a Bluetooth-compatible mouse, you'll just need to pair the two devices to get up and running.
Wireless mice that connect using radio frequencies come with a USB-RF receiver that plugs into a USB port on your computer. This is a plug-and-play process and the mouse should talk to the receiver—often called a “dongle”—as soon as you plug it in. If you don't or can't keep the dongle plugged into your computer at all times—you only have so many USB ports, after all—you'll have to vigilantly keep track of it. If you lose it, your mouse won't be good for anything but a paper weight. For this reason, some mice come with a small compartment in which you can store the receiver when it's not in use.
The main concern with wireless connectivity is latency. If your input doesn't register onscreen nearly instantly, you productivity will quickly take a hit. A mouse's responsiveness is even more critical when gaming, where quick reflexes can be the difference between virtual life and death.
Unfortunately, there's little agreement around which connectivity method is faster. Gaming companies like Razer and SteelSeries claim RF connections have the advantage, and that is likely true for gaming. But the latency difference between Bluetooth and RF, which is measured in tenths of a millisecond, is probably negligible for productivity. In our tests, we saw little difference between the two types of connectivity during basic work tasks.
Ergonomics
Mouse use has been implicated in repetitive stress injuries for years, and manufacturers have responded with all kinds of quirky designs they claim will prevent or relieve wrist and arm pain. They have tweaked the mouse's sculpt, button position, and shape seemingly every which way to facilitate a more natural angle for your arm when it's moving and at rest. But just because the box says a mouse is ergonomic doesn't mean it's guaranteed to reduce your discomfort. The only way to tell for sure is to use it for a period of time, and unfortunately retailers don't typically allow test drives.
Still, for designers, PC gamers, and others who who spend continuous hours using a mouse, prioritizing an ergonomic model is probably worth it. Just remember, the type of mouse you use is only one factor in minimizing RSIs, and your habits may be an even more important factor.
Programmable buttons
While the functions of left and right buttons and the scroll wheel are clear, many mice include additional buttons on the side and/or top of the m ouse that you can configure for custom tasks. Mapping these buttons to things like the back button of your browser, “cut” and “paste” commands, or other repetitive tasks can save you a lot of time in the long run. Typically, if a mouse comes with a half-dozen buttons, it will also include the manufacturer's software for programming them.
How to turn an old laptop into a Chromebook
Sometimes, a Chromebook beats a Windows laptop. Complexity often makes life harder for users easily confused by computers—and the people who provide them IT support. A Chromebook's simplified interface does away with driver management, endless system updates, and even malware avoidance.
More importantly, Chromebooks run a lightweight operating system that feels fast and responsive on older and budget hardware, making them far more affordable. In fact, you can create your own Chromebook for free if you have an older laptop lying around. You just have to install the equivalent of Chrome OS on it.
The process takes less than an hour, and the end result often feels snappier than today's dirt-cheap Chromebooks. Here's how to do the conversion.
How to convert a laptop into a Chromebook
For this project, we'll be using Neverware's CloudReady operating system, which is based on Chromium OS—the same open-source code that Google built Chrome OS on. You can read more about the basic differences between the two if you're curious, but all you need to know is that Neverware has made the experience of using CloudReady nearly identical to Chrome OS.
The one key feature missing is support for Android apps. (Despite purchasing Neverware in December 2020, Google has not merged development for CloudReady and Chrome OS.) So if that's integral to your needs, you'll have to buy an official Chromebook. Otherwise you're good to go.
Update (Feb 15, 2022): Google has launched an early version of Chrome OS Flex, which builds upon and will ultimately supercede CloudReady. Since Chrome OS Flex is a limited version of CloudReady, with some missing features and compatible devices still experiencing “minor issues,” this guide will continue to rely on CloudReady for now. Google says that existing CloudReady installations will automatically be upgraded to Chrome OS Flex when the latter is stable.
Step 1: Check that your laptop will meet the requirements
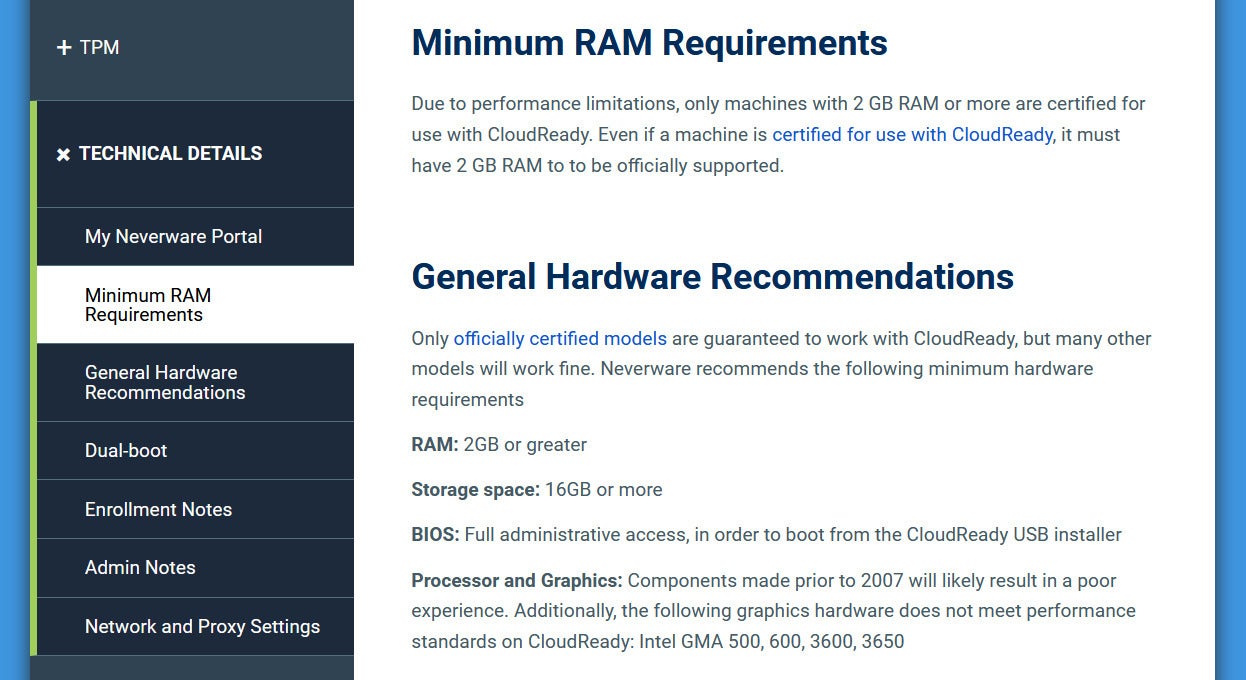
CloudReady's system requirements are very minimal: Just 2GB RAM, 16GB storage, full BIOS access, and manufactured after 2007.
Like Chrome OS, CloudReady's system requirements are very minimal. The laptop must have 2GB RAM, 16GB storage, full BIOS access, and ideally been manufactured after 2007. You will still need to check your CPU model, though, as Neverware says that processors with Intel Graphics Media Accelerator (GMA) 500, 600, 3600, or 3650 graphics hardware don't meet CloudReady's performance standards. (In other words, Atom processors from the Silverthorne, Lincroft, and Cedarview families, which were found in low-end laptops between 2008 and early 2012.)
Your best-case scenario is to find your laptop on Neverware's list of certified devices, which clearly outlines support for features like a webcam or touchscreen. (Click on the model's name to see those details.) We lucked out that our test model, a 2013 Lenovo ThinkPad X240, had full feature support across the board.
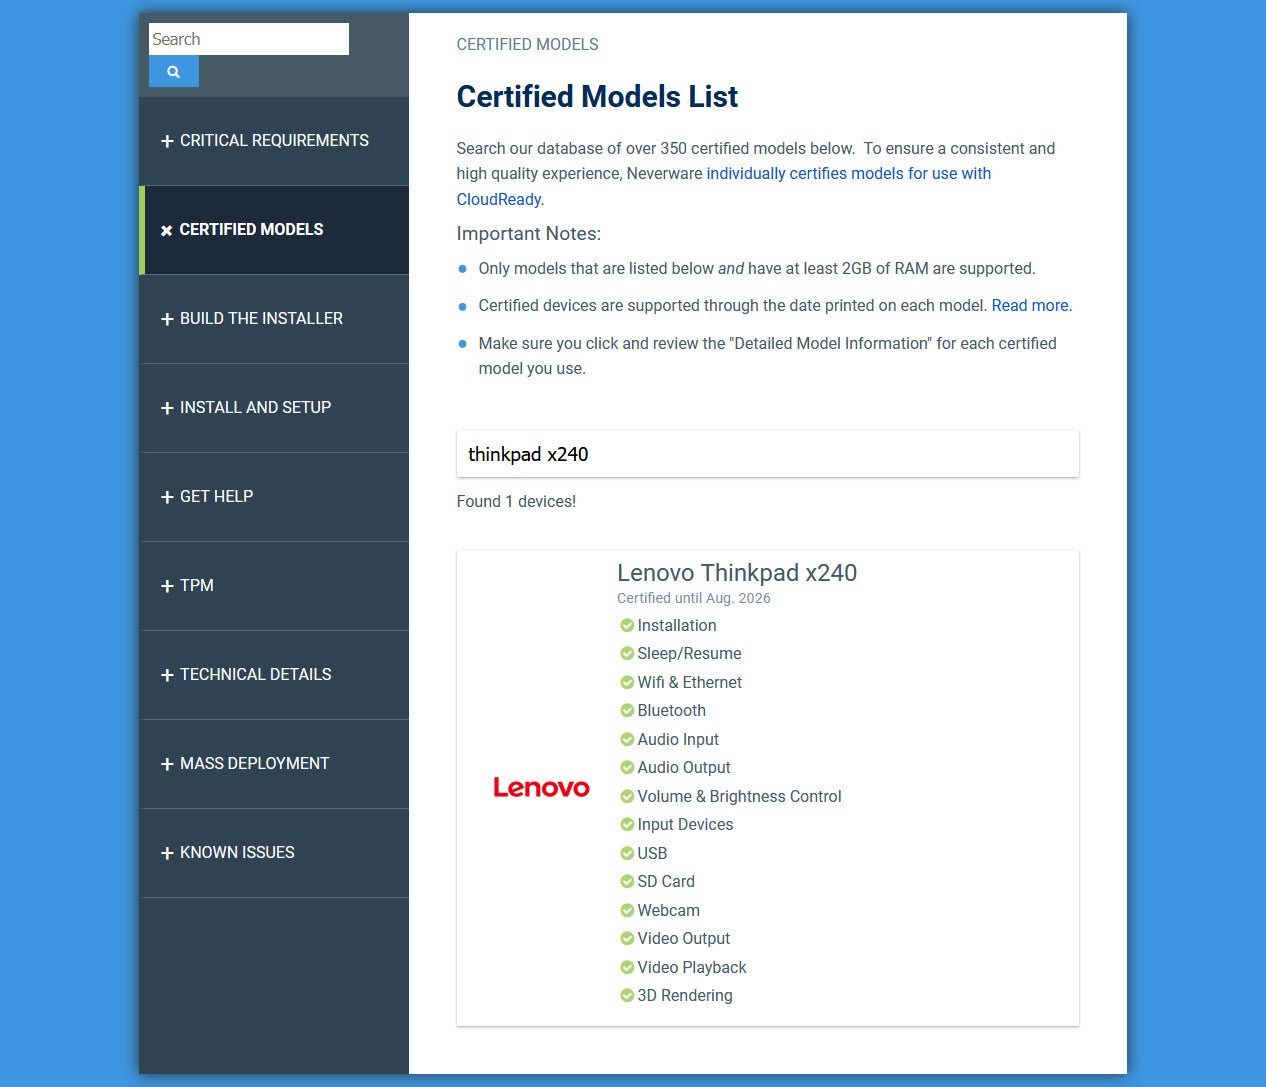
We lucked out with our test machine, a Lenovo ThinkPad X240: All of its major features are supported.
Note: On the compatibility list, you'll see desktop systems like iMacs and NUCs listed as well—so if you have a spare monitor, mouse, and keyboard, you can instead spin up a Chromebox. Systems running integrated graphics work best.
If your laptop meets the hardware requirements but isn't on the certified devices list, don't worry. You can try out CloudReady from the flash drive you'll create next, which will allow you to test out how well it works without having to nuke your system.
FRIENDLY REMINDER: Before you begin installing CloudReady, back up any files within your existing OS! The process is the same as a clean install of Windows, Linux, or MacOS and will completely wipe your drive.
Step 2: Prepare the flash drive for installation
To install CloudReady, you'll need an 8GB USB drive (at minimum) and a PC, Mac, or Chromebook to create the installation media. The process takes about 20 minutes.
We'll be using CloudReady Home edition, which is free and will work even if you plan to use this Chromebook for school. You can ignore any notes or warnings about restrictions related to management licenses—they're for the CloudReady Enterprise and Education versions, which would be purchased by an institution.
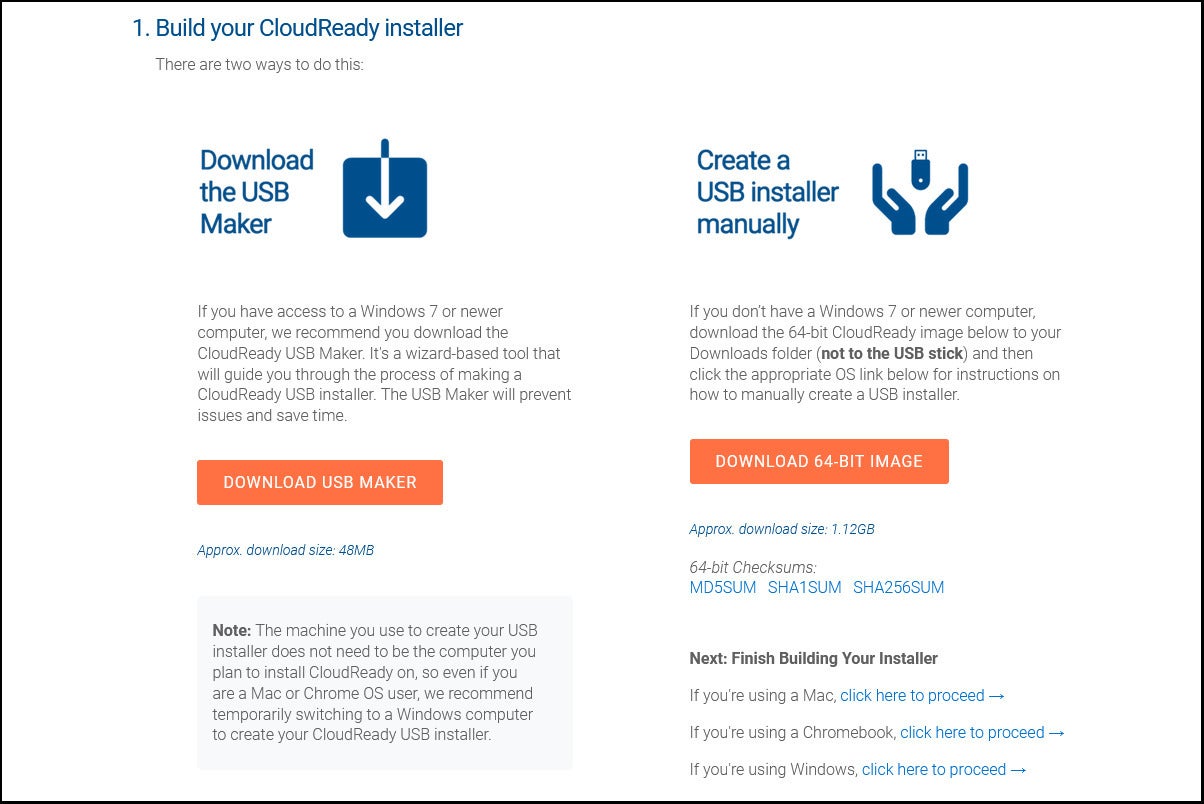
The easiest way to prepare a CloudReady installation flash drive is with a Wi ndows PC.
Using a Windows PC to create the flash drive installer is easiest, as you can download the USB Maker and let it take care of the whole process. For Macs, Linux PCs, and Chromebooks, you'll need to download the CloudReady Home Edition image first, then follow Neverware's instructions for manually building your installer.
Step 3: Boot to flash drive
In order to boot to your newly created flash drive, you must bypass your laptop's automatic boot order, which usually defaults to the primary storage drive. You'll do this by hitting a key on your keyboard when your PC first powers up, similar to entering the BIOS. Search online for how to access the boot priority menu for your particular laptop, since it's not universal. For example, our Lenovo ThinkPad X240 required mashing F12 right at startup, while for our HP Spectre x360, it was F9. CloudReady even provides a list of boot keys for major laptop makers.
An alternative method is to enter your laptop's BIOS (again, you will need to search for which key to press when powering on your laptop) and rearrange the automatic boot order, then undo that change after your CloudReady install.
In either case, you should be able to choose the USB drive as your boot device. A white screen with the CloudReady logo will appear shortly thereafter.
Tip: Did you end up in your laptop's default operating system after booting, despite repeated button mashing? You likely waited too long to start pressing the key, or you aren't pressing the right combination of keys. (Example: Function keys may require also holding the Fn key—or not.)
Step 4: Install CloudReady
When the welcome screen appears, you can take one of two routes: Immediately wipe your laptop's drive and install CloudReady, or configure CloudReady on the flash drive. Choose the latter if you'd like to test drive CloudReady for short while—doing so allows you to try out Neverware's OS without any destructive changes to your system.
Note: Neverware does not recommend running CloudReady indefinitely from a USB drive due to performance and storage limitations, as well as a lack of OS updates.
Option 1: Installation
After booting to the flash drive, wait for the welcome screen to appear, then click on the bottom right-hand part of the screen where the time shows. In the menu that appears, choose Install OS.

You'll find the option for installing CloudReady to your laptop within this menu.
Confirm you've backed up your data, and then proceed with the hard drive wipe and CloudReady installation. Neverware says the process will last between 5 and 20 minutes, depending on the speed of your flash drive and the size of your laptop's hard drive.
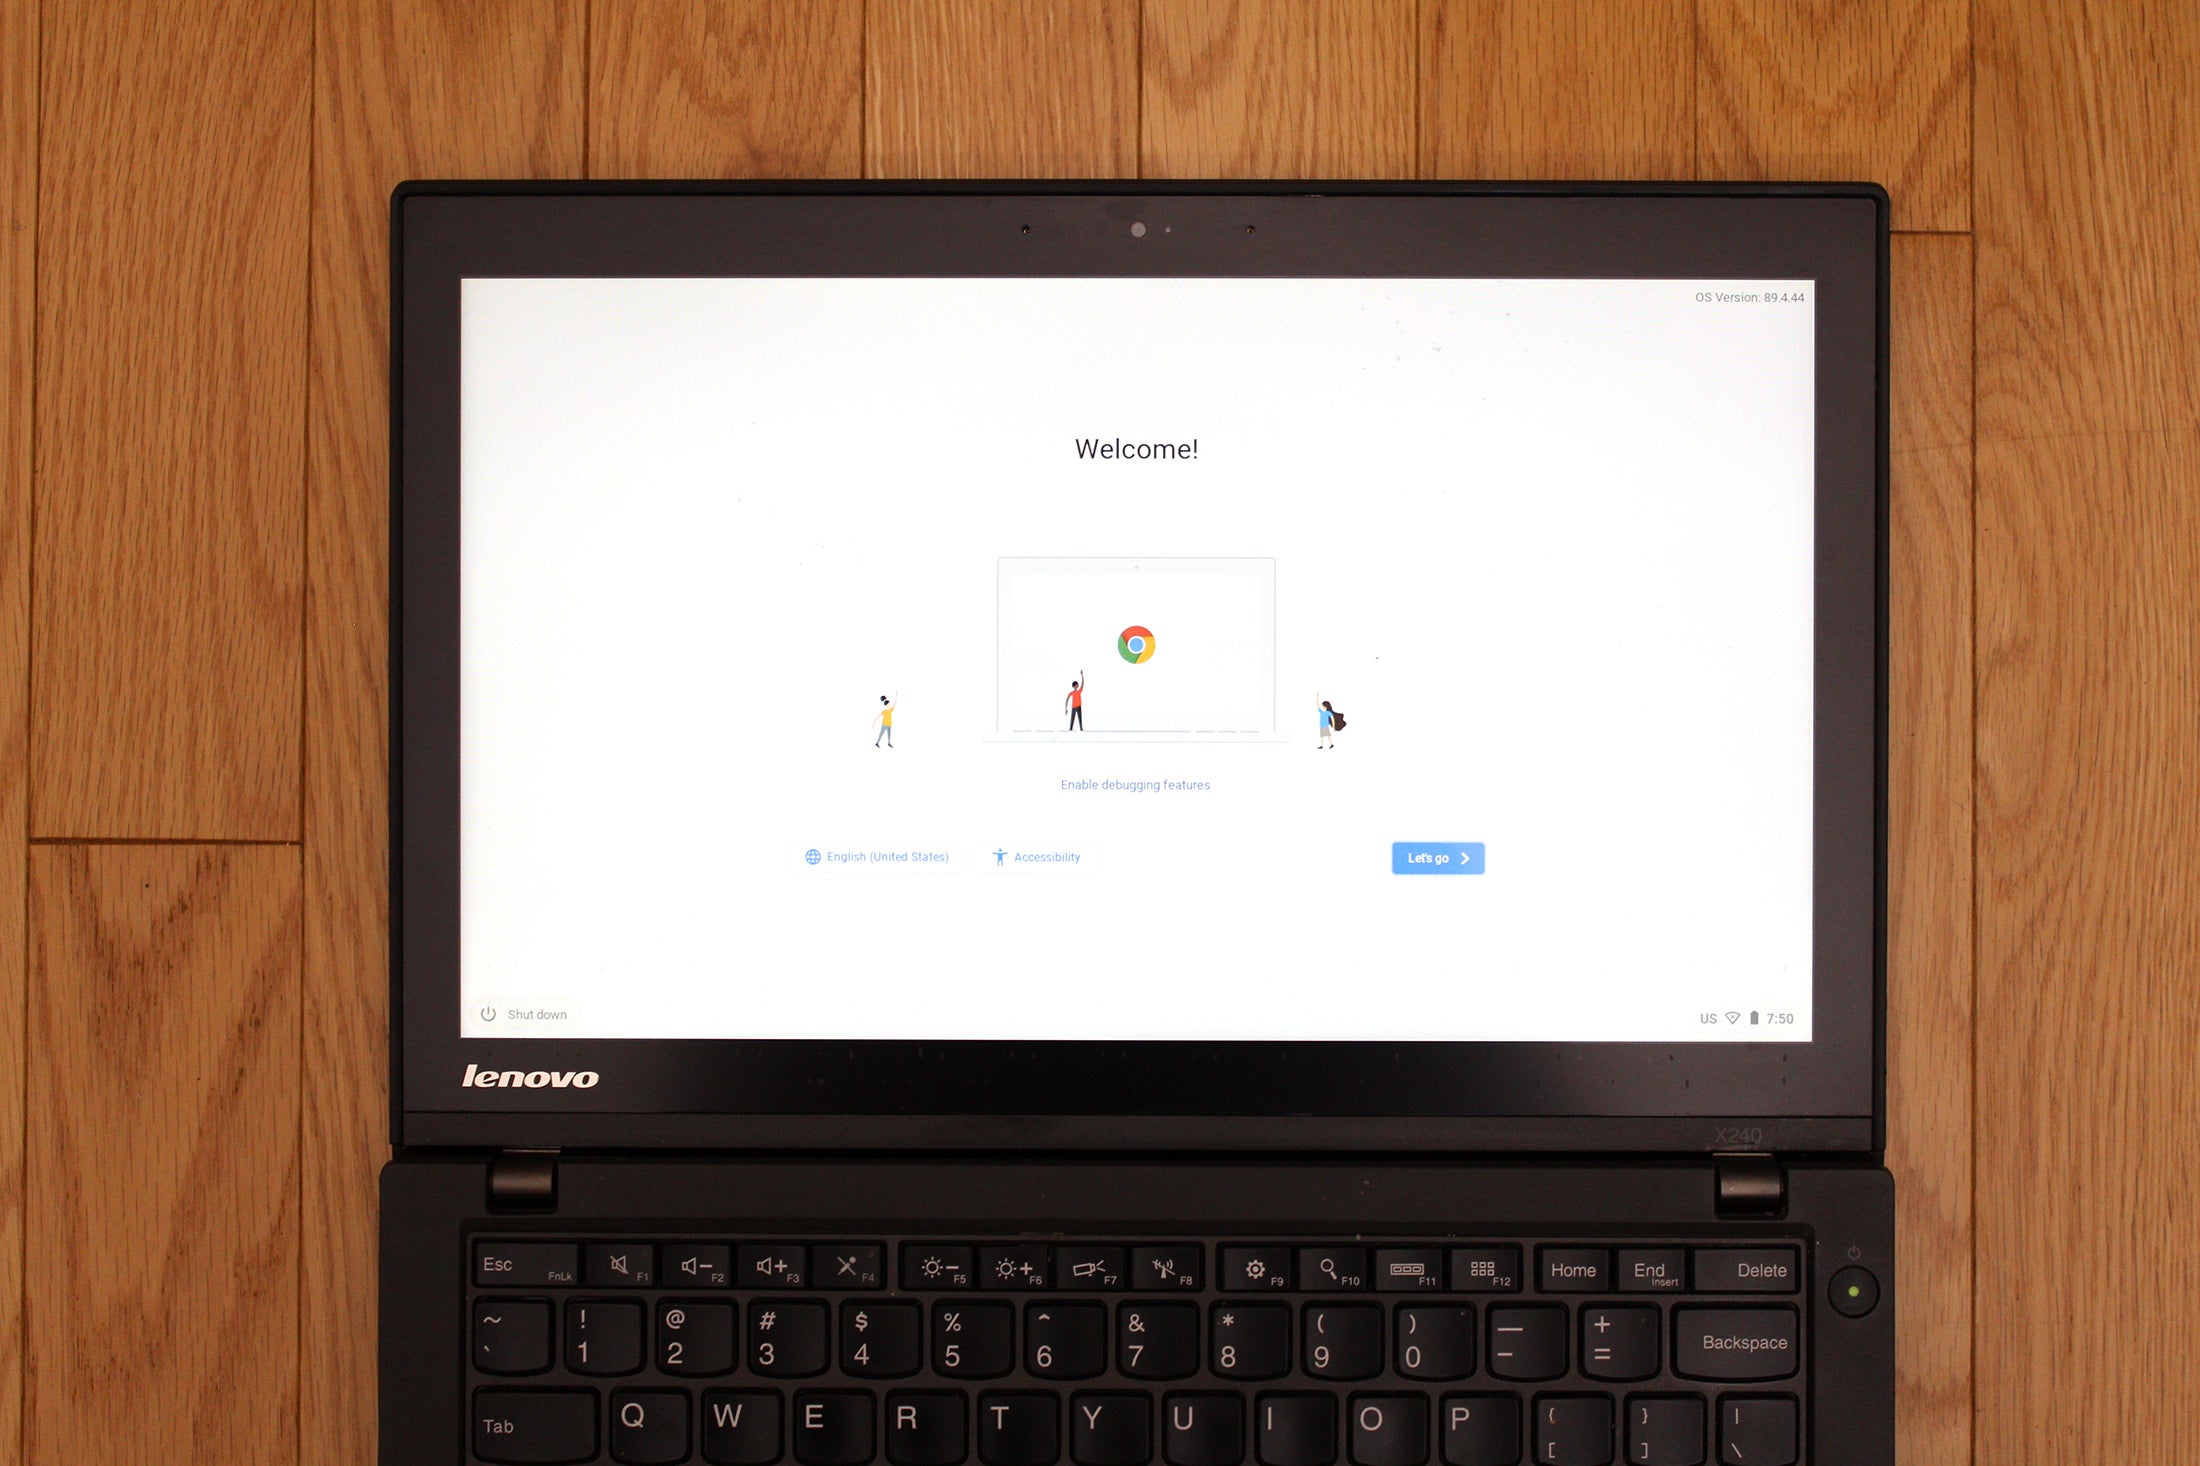
Upon completion, your laptop will shut down. Remove the USB drive, then power the system back on (and undo any changes to your BIOS's automatic boot order, if applicable). You'll see a welcome screen once again, now running from your laptop. Click on Let's Go to begin setup.
Option 2: Try out CloudReady from the flash drive
When the welcome screen appears, click on Let's Go to start setup. After passing through configuration screens for Wi-Fi, data sharing, and Google account login, you'll reach the desktop. Close out of the pop-up window that shows info on the paid editions and current release notes to begin using CloudReady.
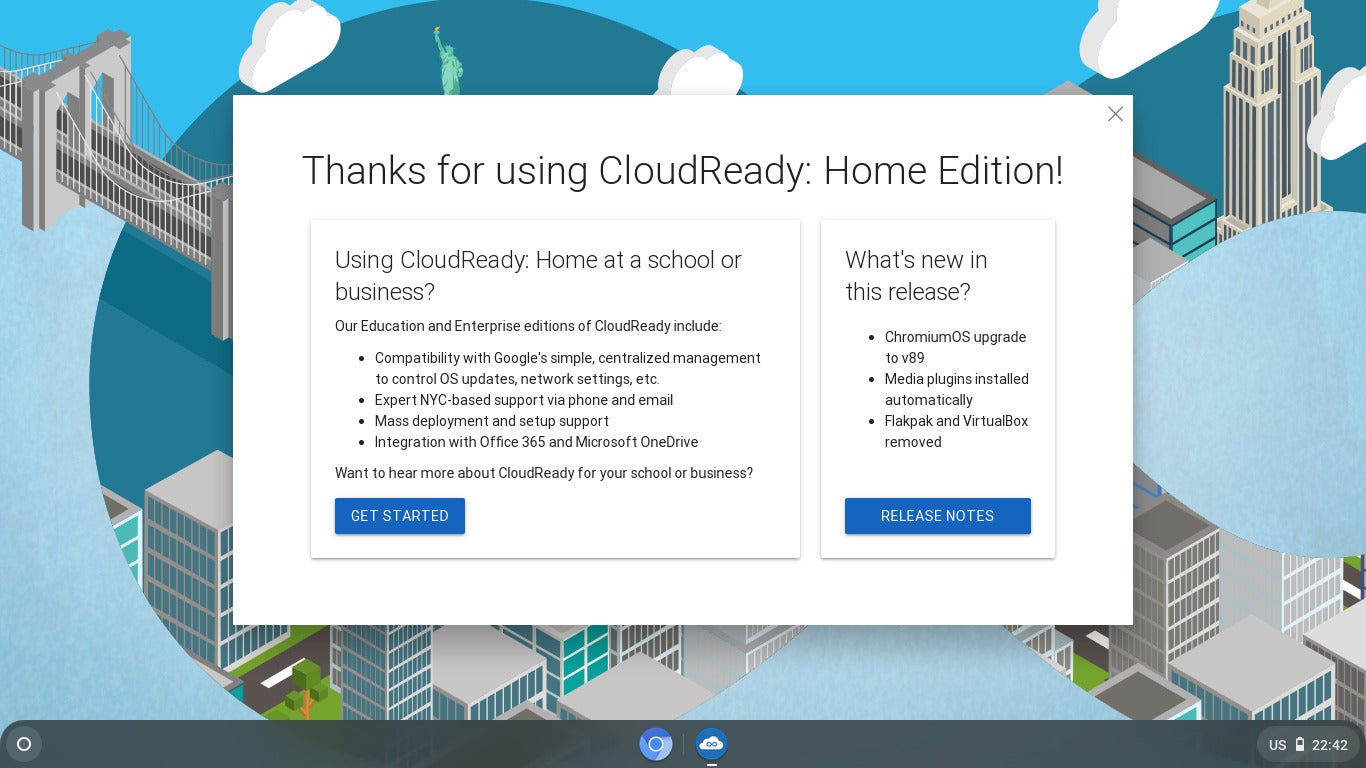
Unless you wish to read the release notes, you can close out of this desktop start screen right away.
You can later install CloudReady locally by clicking on the time in the bottom right-hand part of the screen. Choose Install OS in the menu that appears. After completion, your laptop will shut down. Remove the USB drive, then power the system back on (and undo any changes to your BIOS's automatic boot order, if applicable). You'll see the welcome screen once again, now running from your laptop; begin setup by clicking on Let's Go.
Step 5: Log into your Google Account
If you installed CloudReady to the laptop's storage drive, you now only need connect to the internet (either via Wi-Fi or ethernet), set your data sharing preference, and log into your Google account. You'll then reach the desktop, where you'll see a pop-up window that shows info on the paid editions and current release notes.
Close it to start using your DIY Chromebook—you're all set to go. As of version 89 of CloudReady, proprietary media plugins no longer need to be installed manually. You can start streaming video from services that rely on DRM (Netflix, Hulu, etc) right away!
How well does it run?
As a Windows PC, our Lenovo ThinkPad X240 was starting to get long in the tooth. As a Chromebook, its hardware automatically made for a smooth, pleasant experience.
For this article, we used a 2013 Lenovo ThinkPad X240, borrowed from our IT department's stash of decommissioned laptops. This 12.5-inch touchscreen laptop is long in the tooth by today's standards, mostly due to a spinning-platter hard disk drive—when working within Windows 8.1, the system felt sluggish even during basic use.
But our X240's Intel Core i5-4300U processor, 8GB RAM, and 500GB drive absolutely crushes today's budget Chromebooks. It hangs pretty well with mid-range models, too, despite its 1366×768 resolution display. When we tried CloudReady off the flash drive, the touchscreen worked immediately and the system ran buttery smooth; even when installed on the hard disk drive, CloudReady had a much faster response time than Windows 8.1. Normally in an older laptop, I'd swap in an SSD to prolong its life, but I found I could use CloudReady on the X240's existing hardware without yearning for that upgrade.
Standby battery life also improved, allowing us to go from a day of use between charges in Win 8.1 to a couple of days in CloudReady.
If you don't have an old laptop
Try hunting for gently used notebooks among reliable friends or family. Local universities sometimes also have surplus departments, which offload older computer equipment by selling it to the public. On occasion, you can find good refurbished computers through Amazon Warehouse or Woot, too.
Final tips
- If your older laptop has low-end hardware (or very old hardware) paired with a hard-disk drive, you'll get better performance by swapping in an SSD. Find out the height of your existing hard drive before buying to ensure it'll fit.
- Though CloudReady functions all but the same as Chrome OS, one small difference is that the keyboard layouts don't match exactly. Most keyboard commands carry over, but a few are a little different. Our Lenovo ThinkPad X240 didn't even match Neverware's suggestion of CTRL + F5 for taking a screenshot; for some inexplicable reason, CTRL + F11 worked instead. You may also need to experiment to find the right key combos.
Editor's Note: This story originally published on 8/24/2020 and has been updated with current instructions for installing CloudReady.
DF Direct Weekly: first Steam Deck reviews shine – but is battery life a concern?

Another week, another DF Direct Weekly! This one's pretty spicy though as we share our thoughts on the first hardware reviews for Valve's Steam Deck. Yes, it's a multi-tier embargo, where selected outlets are allowed to post a whole range of content on the machine and a carefully curated range of games. The outlook is highly positive overall, but two aspects of the existing coverage definitely need further analysis - battery life and screen quality.
We're currently looking at Steam Deck ourselves but cannot comment on our own findings until a later embargo is up, while further content continues to arrive from Valve's favoured outlets. However, in choosing Steve Burke from Gamers Nexus to tear down the device and analysis thermal performance, gaming benchmarks and build quality, Valve made a calculated bet that pays off.
Latest Intelligence

