Simosiwak Shrine is a shrine on The Legend of Zelda: Tears of the Kingdom’s Bravery Island in the Great Hyrule Forest Sky region.
Our guide will help you find the Simosiwak Shrine location, solve its puzzles, and walk you through the “Proving Grounds: Lights Out” challenge to collect the chest and Light of Blessing.
When you’re done, our shrine locations page or interactive Hyrule map can direct you toward something else to do.
Simosiwak Shrine location
The Simosiwak Shrine is on Bravery Island, one of the sky islands in the Great Hyrule Forest Sky region. The exact coordinates are (0163, 1973, 0759).
In order to get to Bravery Island, which is also the place where you can find part of the super-useful Glide Armor set, head to the Thyphlo Ruins Skyview Tower, launch into the air, and paraglide southward. Land on the circle-shaped island, the furthest south of the group of four. (There’s also a simpler route if you’ve unlocked the nearby Mayim Shrine; you can just paraglide from the North Hyrule Sky Archipelago.)
Simosiwak Shrine walkthrough
This shrine is a “Proving Grounds” challenge, so you’ll be stripped of your gear at the outset. As if losing your clothes and armor isn’t enough, Simosiwak Shrine also plunges you into almost-complete darkness. I guess that’s why this test is called “Lights Out,” huh?

1. Walk down the small staircase and pick up two light shields and a wooden stick on your left. After this dimly light opening room, you’ll be heading into the dark; press ZL to hold up your shield and shine its light ahead of you.
2. There’s a Construct on the left, shining its red eye-beam into the darkness. It has a light shield of its own, which it will shine into your eyes; it won’t be particularly aggressive, at least not until you attack. And you’ll have to: Defeating the Constructs is the way to solve this shrine.
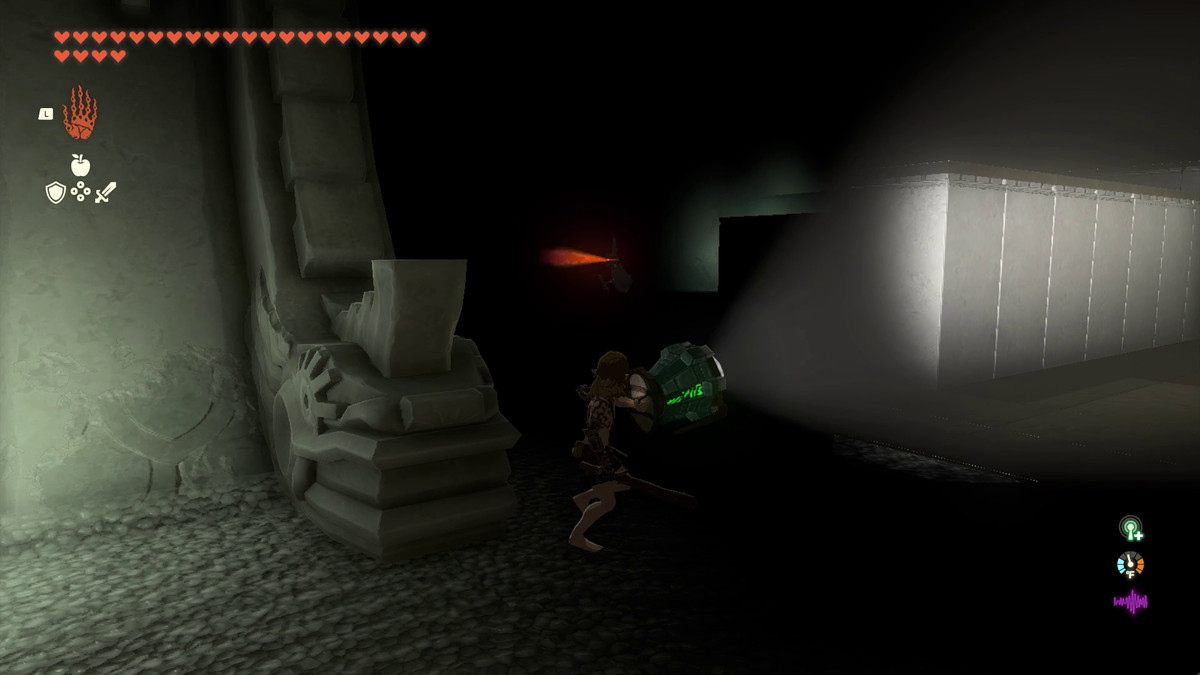
3. Leaning against the wall by this Construct, there’s a long stick and an old wooden shield. Grab those and use them to take down this first enemy. Pick up its stuff, and use this opportunity to Fuse the Construct’s horn to one of the wooden sticks you’ve picked up.
4. Head further into the darkness, looking for more Constructs as you go. This isn’t a very large room, and there are only two more Constructs left to fight, but you’re under-armed, so be cautious.
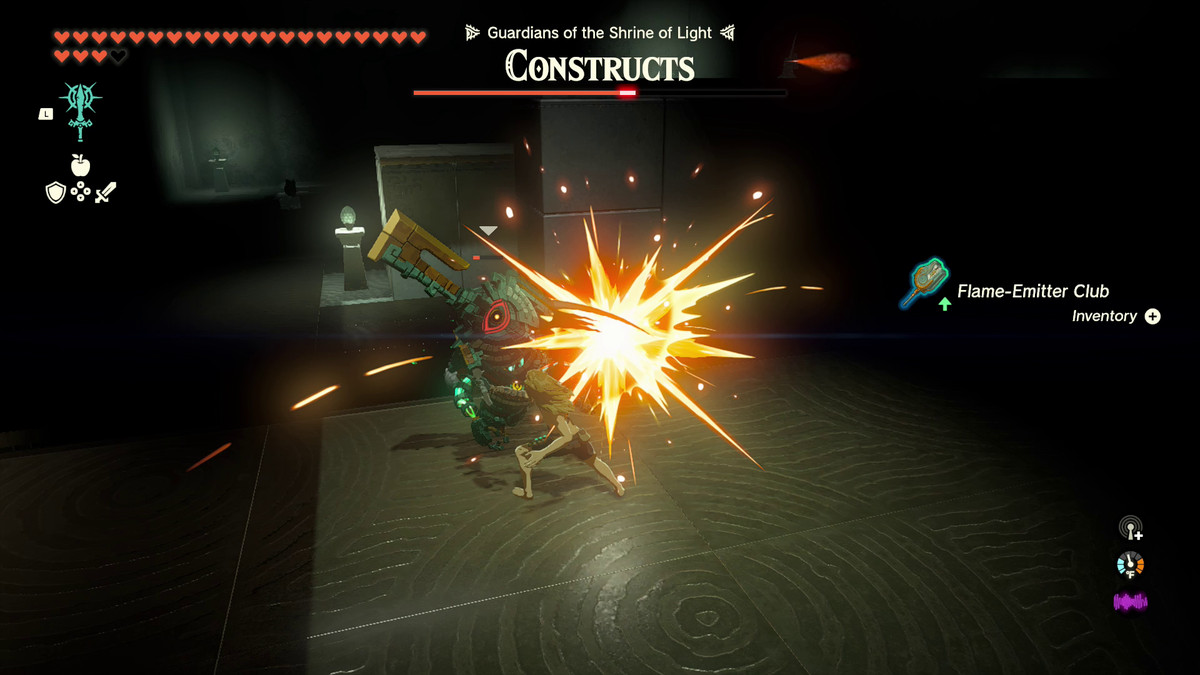
5. The next Construct is a little further into the shrine, and it’s stronger than the first one; creep up on it to land a Sneakstrike if you can. It has a Flame-Emitter Club, whose flames we avoided by parrying and using Flurry Rush. By the way, there are two Flame Emitter devices nearby, in corners adjacent to where this Construct is patrolling. We fused both of those devices to wooden sticks.
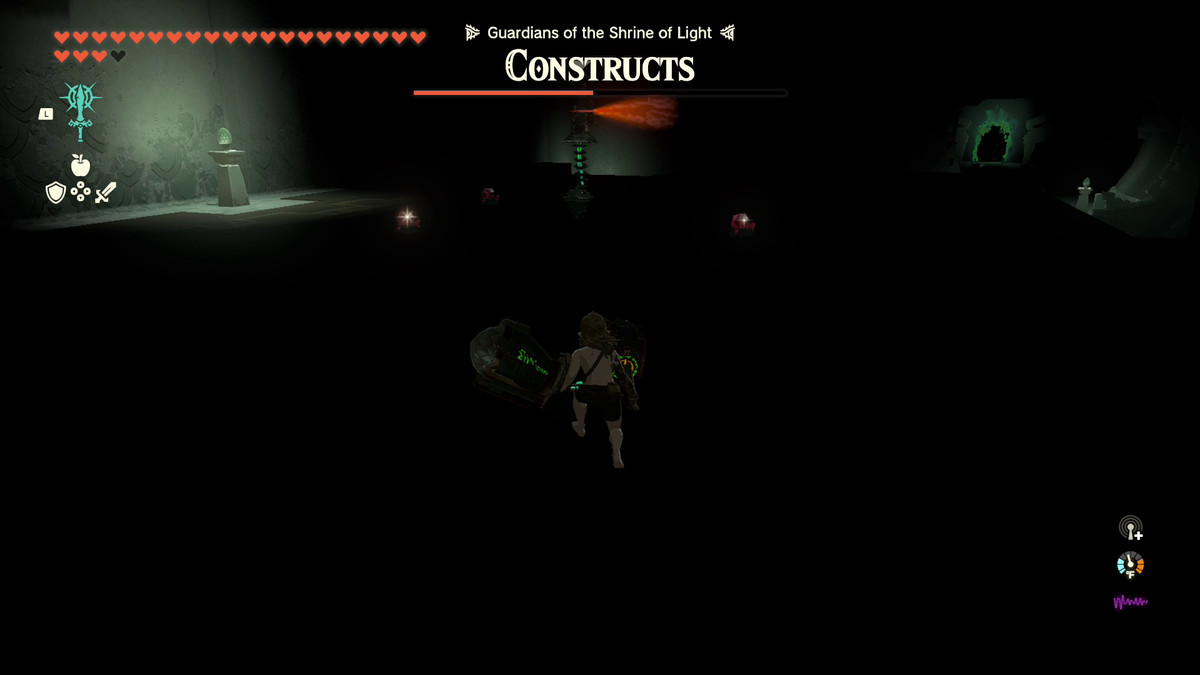
6. Look around in the dark for a set of stairs, and head up towards the final Construct in the room. Again, if you can be stealthy and Sneakstrike, that’ll chew off a bunch of damage. This Construct will be shooting fireballs at you with a Fire Rod; it’s also surrounded by three rubies. Once you defeat this final Construct, the gates at the back of the room will open.
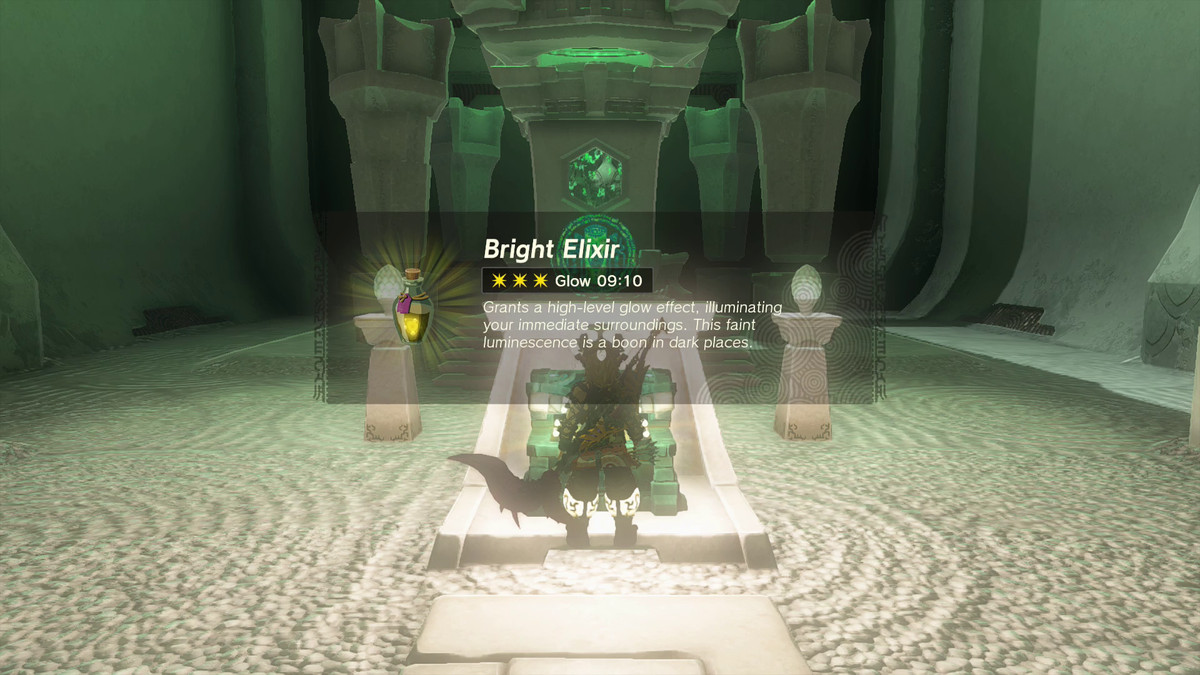
7. Go through the gate and open the chest, which contains a bright elixir that grants a glow effect (very apropos for this shrine). After you’ve grabbed it, head forward to activate the sigil and receive a Light of Blessing.
- SEO Powered Content & PR Distribution. Get Amplified Today.
- EVM Finance. Unified Interface for Decentralized Finance. Access Here.
- Quantum Media Group. IR/PR Amplified. Access Here.
- PlatoAiStream. Web3 Data Intelligence. Knowledge Amplified. Access Here.
- Source: https://www.polygon.com/zelda-tears-of-the-kingdom-guide/23752970/simosiwak-shrine-location-proving-grounds-lights-out-walkthrough-totk

